


(For the 24 weeks leading up to December 1st, we’ll be making a Christmas ornament. Each one will be traditional to or inspired by a different country.)
This week we are off to Germany for our ornament inspiration. I was originally going to knit up a pickle, but after doing some research, I found that the tradition of hiding a pickle in a tree most likely is American and not German. Some more research led me to an apple ornament instead.
Apple ornaments were hung on evergreen trees during the presentation of the Paradise plays of the Christmas season in medieval times in Germany and throughout Europe. Trees laden with apple ornaments were used during the re-enactment of the story of Adam and Eve on Christmas Eve, to reinforce the meaning of Christ’s birth. Also, an early legend held that if an apple was cut during the holidays and there was a perfect star inside and the seeds were plump, good health and fortune would be assured during the coming year. Since the earliest Christmas trees were often decorated with apples and other fruit, when German glassmakers began making ornaments fruit was a very common design.
I have not worked my way up to glassmaking (yet), so our ornament is made from a little more rustic elements, felt and twigs. All it takes to put it together is a little basic sewing and some glue.
Felt Apple Ornament
Supplies:
- red and green felt
- red thread
- stuffing
- 1/2″ twig
Tools:
- scissors
- hand sewing needle or sewing machine
- glue
1. Save this pattern to your computer and print it out.
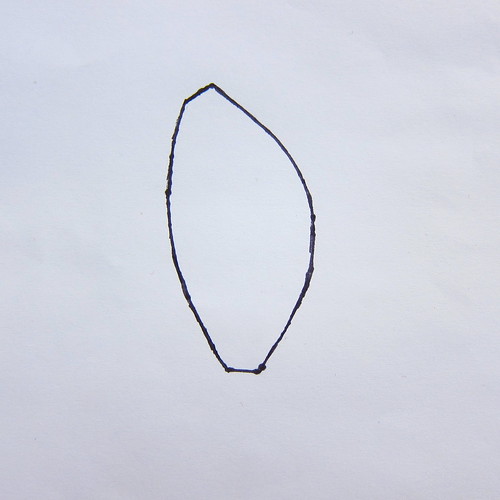
I printed it out at 2 3/4″ (about 7cm) and ended up with a 1 1/2″ (3.8 cm) apple.
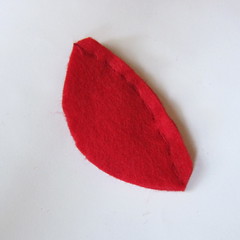
Use the pattern to cut out 4 pieces from the red felt.
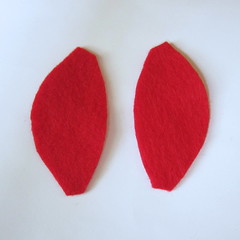
2. Match two of the pieces up and sew them together with an 1/8″ seam allowance.
Repeat with the second two pieces. Now, sew those two pieces together on one side with right sides facing in.
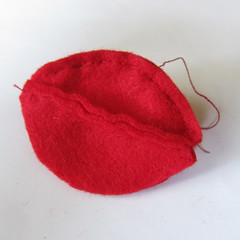
(I don’t currently have my sewing machine, so I sewed this by hand and it pulls the seams a bit. A machine sewn seam would probably be slightly neater.)
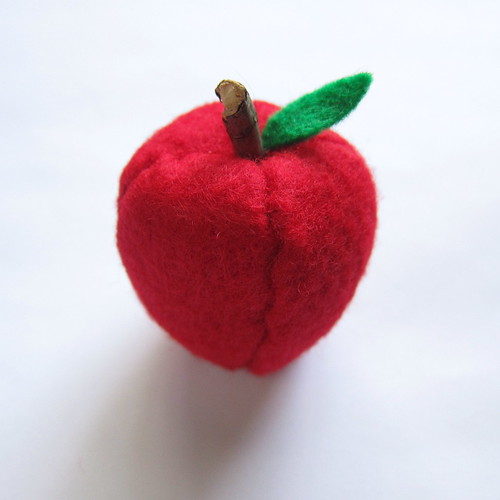
3. Sew the last two sides together about halfway. Turn right side out through that hole and stuff. Sew the rest of the seam together. Pull the needle and thread through the middle of the apple and pull tight to create the indent at the top and bottom. Tie off.
You may need to shape the apple a bit but squeezing the fulling around.
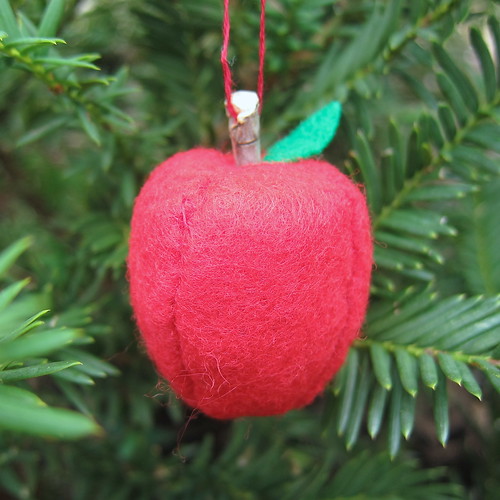
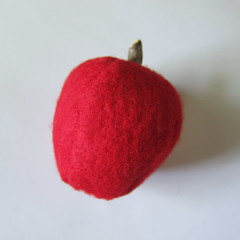
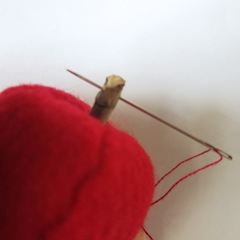
4. Glue the twig into the top indent for a stem. Cut a small leaf shape from the green felt and glue it next to the stem.
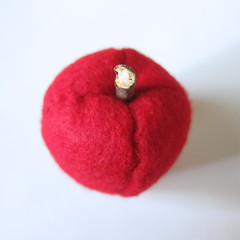
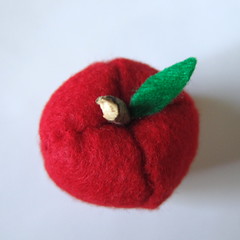
5. To hang, I poked a small hole through the stem with a needle and threaded some embroidery floss through it. Then I tied the floss into a loop.
Frohe Weihnachten!
© 2005 – 2013 Kathy Lewinski & Susan Cornish


One Comment to Advent Calendar Project ’13 – Week 9