
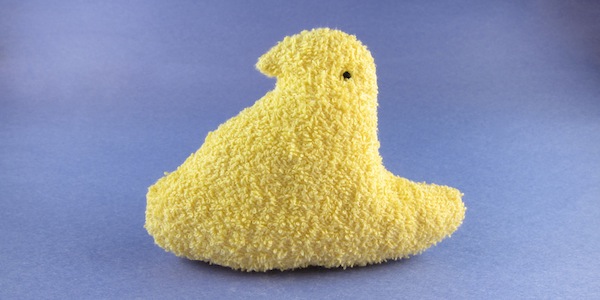

It’s that time of year when the Iron Crafters do a Peep project. I was torn whether to do a diorama or something inspired by Peeps. I happened across some leftover yellow washcloths in my craft room and thought it would be fun to do a Peep washcloth. Then I thought, why not a puffy, stuffed Peep washcloth? But what to stuff it with so it would still be good in the tub. Then it came to me, stuff the washcloth with washcloths.
I have to tell you guys, I gave a little squeal of delight when I got this guy sewn together and stuffed. I was worried it would be hard to get the shape right, especially the nose. But I took my time with sewing the curves and did some extra hand stitching around the nose, it really made the difference. Sewing right over the paper pattern also helped get the shape just right and made the terry cloth move easily through my machine.
Just a note about the washcloths I used. I got these washcloths in a package of 8 at Target for $2 or $3 dollars, so they are not the plush high quality washcloths. They have a nice terry texture, but are relatively thin. It’s the type of washcloth you might find at a dollar store. I would suggest looking for a similar type of washcloth as something thicker and plusher really make it hard to get the nose detail.
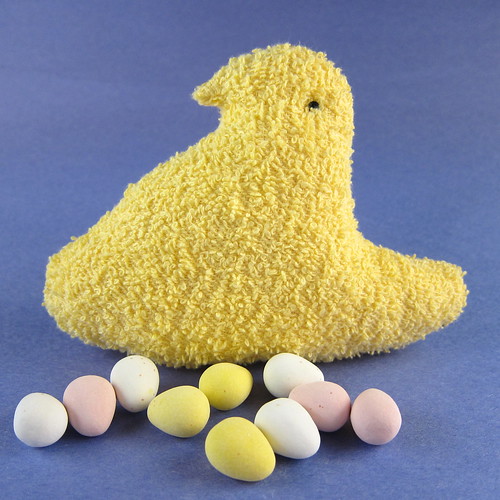
These sew up really quickly, so you have plenty of time to whip a few up to help fill some Easter baskets. What kid (or child-like adult) wouldn’t love to take a bath with their favorite Easter treat?
Peep Bath Buddy
Supplies:
- two 12″ x 12″ (30.5 cm x 30.5 cm) washclothes in yellow, pink, blue or other peep color
- matching thread
- black embroidery floss
Tools:
- straight pins
- scissors, fabric and paper
- sewing machine
- hand sewing needle
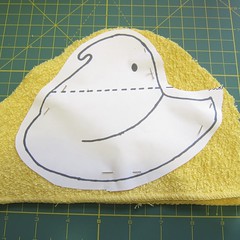
1. Download and print out the Peep Bath Buddy Pattern. Print it out so the peep is about 6 1/2″ (16.5 cm) wide. Cut out leaving about 1/4″ – 1/2″ around the pattern.
2. Lay the washcloths on top of each other. (If they have a wrong and right side, place them right sides together.) Pin the peep pattern on top.

Trim a lot of the excess washcloth just to make it easier to sew. (Don’t throw it away.)
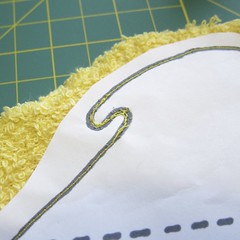
3. Either with a sewing machine or by hand, sew the peep shape right over the paper pattern leaving about a 2″ (5 cm) hole open at the bottom.

4. The nose of the peep is the trickiest part and I wanted to make sure it was sewn extra well. First I did it with the machine. I find doing these tight curves with a machine tricky.
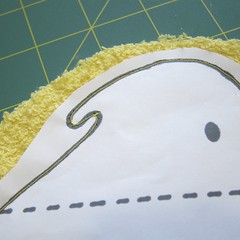
Then I went back sewed around those curves by hand using a backstitch.
5. Trim the washcloth again leaving a 1/4″ seam allowance all the way around. (I left more of a 1/2″ at the opening.) I cut a small slit inbetween the nose an the body, so the seam allowance there is less. Remove the paper pattern, the stitching line is perforated from the sewing making this easy. Turn right side out through the hole. Work out all the curves, point of the tail and the nose, a chop stitch or knitting needle can be helpful here.
6. Cut up all the washcloth scraps into pieces about 1/2″. I chose not to use the edging of the washcloths, but that is up to you.
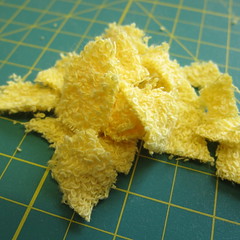
Use the scraps to stuff the peep making sure to work them into all the curves, tail, etc… I used all the scraps and my peep was perfectly stuffed.
7. Fold the seam allowance in at the hole at the bottom and hand sew shut. (The terry texture helps hide stitching!)
8. Use black embroidery floss (use all six strands) to make triple french knots for the eyes. (A triple french knot is just a french knot where you wrap the floss around the needle three times.) Make a single knit a piece of the floss and pull it from one side through to the other, pulling the knot inside the peep. Then make the triple french knot. Next, pull the floss back to the other side and make another triple french knot. This way there is an eye on both sides. Finally, pull the floss through to the other side again, cut it off and worked it inside the peep. Now, you have french knot eyes on both sides with the tails of the floss hidden in the peep.
© 2005 – 2013 Kathy Lewinski & Susan Cornish


Pingback: 30 Easter Peep Crafts | About Family Crafts
Pingback: OVER 50 MARSHMALLOW PEEPS CRAFTS AND RECIPES - Mad in Crafts
Pingback: 17 DIY Peeps Crafts for Easter | Mom Spark - Mom Blogger