

I have made the hoodie towels before, but I wanted to share this one with you as well.
We have a little friend who likes princesses, well enough, but she really likes construction sites, sharks and blue too. Her birthday is coming up, so I give you…
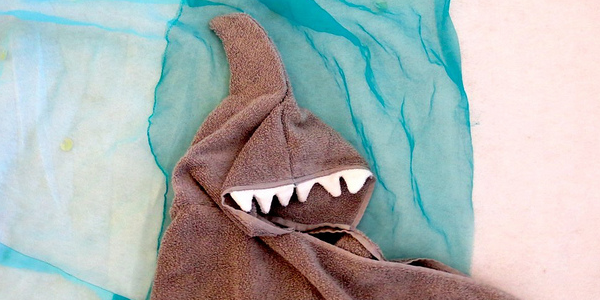
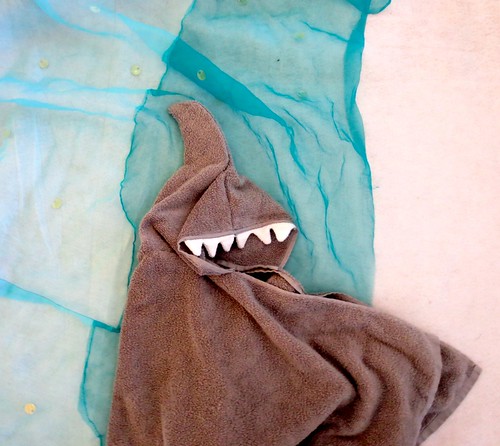
The Shark Hoodie Towel
Supplies:
- 1 bath towel steel gray
- 1 hand towel steel gray
- small amount of pellon VERY thin one-side fusible interfacing
- small amount of white terry cloth.
- thread (white and shark gray)
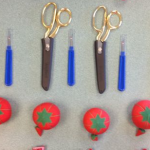
Tools:
- craft scissors
- fabric scissors
The full tutorial for the towel is here. So for this installment, I will show you how to adapt the hoodie into a shark shape.
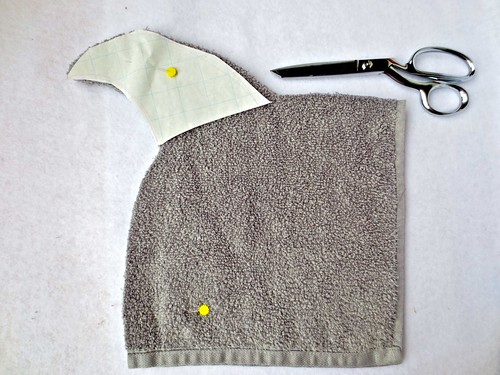
The hood top is made in the same way except, this time, you are going to cut a shark fin in the top of it. I had plenty of room to do this just in the hand towel and I did it all in one piece with the hope that the fin will have some chance of standing on it’s own.
This picture shows how much room I had to work with on the towel.
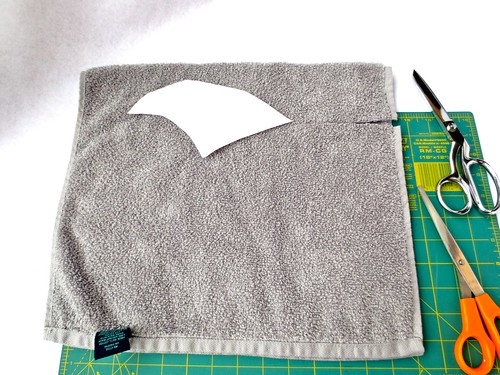
Here, I laid out a paper fin pattern on the top of the hood.
(Note, the hood on this towel is rounded rather than being squared off. )
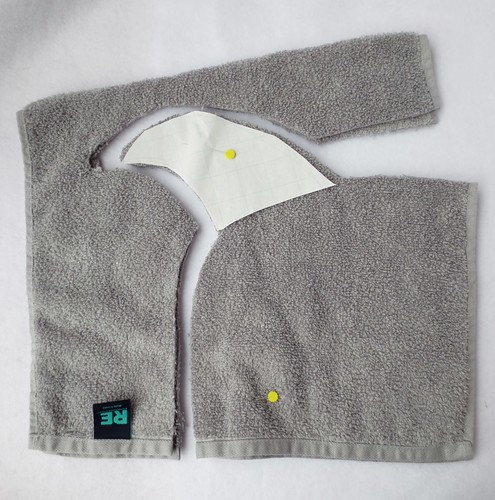
Next, cut the stabilizer for the fin slightly smaller than the terry cloth to allow for the seams. Iron that onto one side. (careful to iron it on to the INSIDE)
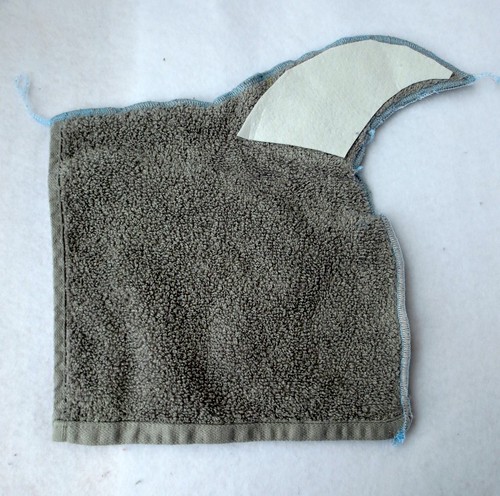
(I sewed this on the serger. I’m sure there are people that are better at using their serger than I am at using mine. But you would be hard pressed to find someone having more FUN! That thing is a good time. Sometimes it feels a little bit out of control – with the cutting blade chomping, CHOMPING, but it is SO fast, and SO satisfying.)
For the teeth, I had strip of white terry. I cut one triangle out of a scrap of card board, and laid it down, and traced it, several times. (careful to make the teeth bigger than you think you should. They will shrink down when you turn them inside out)
Finish both of the bottom edges. Fold the terry in half. Sew the teeth along the lines.
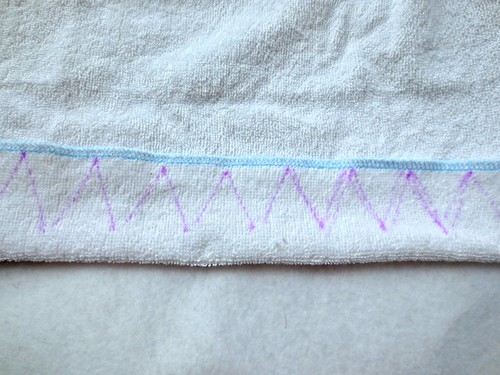
(if you don’t have a serger – just zig zag the edges.) (in the photo above the blue is the edge, then I folded it closer to the points of the teeth. I sewed the teeth, and clipped the extra fabric. Then turned it inside out and the bottom was the still the blue edge ) Clip the tips of the teeth so that you can get a nice point on the ends. Then turn them inside out, and sew them to the front underside edge of the hood.
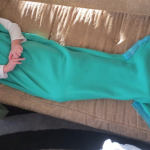
Here is our friend, super excited in her shark towel.
![photo[6]](http://farm9.staticflickr.com/8062/8160409052_39eabb8b90.jpg)
She was loving it.
(I tried to get a picture of a different model in the towel, but for heaven sakes she was temperamental. She was frightened of the teeth! There were tears involved. So I was greatful and relieved to have the picture of the recipient enjoying her gift.)
Happy Birthday Claudia.
© 2005 – 2012 Kathy Lewinski & Susan Cornish

Pingback: Tutorial: Shark hoodie towel · Sewing | CraftGossip.com
Pingback: Stacy Sews - Diary of a Fabric Junkie » Blog Archive » Linky Thursday
Pingback: 73 ideas to craft your Christmas |
Pingback: crafts | Pearltrees
Pingback: 39 DIY Gifts You’d Actually Want To Receive | Natural Beauty & Health at Any Age
Pingback: DIY | Pearltrees
Pingback: 25 DIY Beach Towels + Totes | Henry Happened
Pingback: 25 DIY Beach Towels + Totes
Pingback: 65 Amazing Homemade Christmas Gifts | Dodo Burd
Pingback: DIY Christmas Gift Ideas You'll LOVE!
Pingback: 39 DIY Gifts You’d Actually Want to Receive | peaceloveandhippiness
Pingback: 39 DIY Christmas Gifts You’d Actually Want To Receive - zdouf!
Pingback: 39 DIY Christmas Gifts for Adults | Hiit Blog
Pingback: 18 Homemade Christmas Gifts That Won’t Break The Bank « The Helpmates
Pingback: 18 DIY Gifts that They’ll Actually Want | Crafty Components
Pingback: Friday Favorites–Shark Week | Crafty Staci
Pingback: 101 Homemade Holiday Gifts | HelloNatural.co
Pingback: Top 30 Last Minute DIY Gifts | Life Hacks
Pingback: DIY Gifts You’ll Love To Give Out | WORLD Warotter
Pingback: 51 Creative and Fun DIY Gifts You'll Decide to Keep -Design Bump
Pingback: 30 Gifts You Can Make For Your Friends This Holiday Season « Apprecify
Pingback: 30 Gifts You Can Make For Your Friends This Holiday Season
Pingback: 30 DIY Gifts That Will Make Your Friends And Your Wallet Happy
Pingback: 30 Gifts You Can Make For Your Friends This Holiday Season « hipstr news
Pingback: Homemade Presents and 14 Other Ways to Save Money this Christmas
Pingback: Los 41 Regalos Más Significativos Y Lindos Que Puedes Hacer Tú Mismo. | Viralistas.com
Pingback: Los 41 Regalos Más Significativos Y Lindos Que Puedes Hacer Tú Mismo. | Noticias TLN
Pingback: 39 DIY Christmas Gifts You’d Actually Want To Receive | Advertising and Marketing
Pingback: 39 DIY Christmas Gifts You’d Actually Want To Receive | Web site related advices
Pingback: 39 DIY Christmas Gifts You’d Actually Want To Receive | About healthcare
Pingback: 18 Cute DIY Gifts for Kids Birthday Parties
Pingback: 24 Homemade Gift Ideas for Christmas
Pingback: » D.I.Y Gifts for ChristmasEvolutionEvolution
Pingback: 20 The Most Easy DIY Christmas Gifts To Try This Season
Pingback: 5x de leukste 'last-minute' kerstcadeaus die je zelf kunt makenOudermatch Blog
Pingback: Hooded Towel For Refugees in the United States – Aina
Pingback: DIY Beach Towels for Summer
Pingback: DIY Christmas Gifts For Everyone In Your List | Pioneer Settler
Pingback: 15 Regalos que puedes hacer en casa y te costarán $0 – Venezuela Mundial
Pingback: 6 Last-minute Homemade Gifts They Will Love - LinenMe News
Pingback: お洒落で可愛い海外タオルリメイク術 9選
Pingback: NATAL 2013 - SUGESTÕES DE PRESENTES FAÇA VOCÊ MESMO - TIPS BY GELLY
Pingback: 100 Mind-Blowing DIY Christmas Gifts People Actually Want - DIY & Crafts
Pingback: お洒落で可愛い海外タオルリメイク術 9選 | HANDMADE LOVE! 無料で使えるハンドメイドレシピ
Pingback: Last Minute DIY Christmas Gift Ideas – sustainmalaysia
Pingback: DIY Beach Towels For Your Kids | Don Moore Automotive