
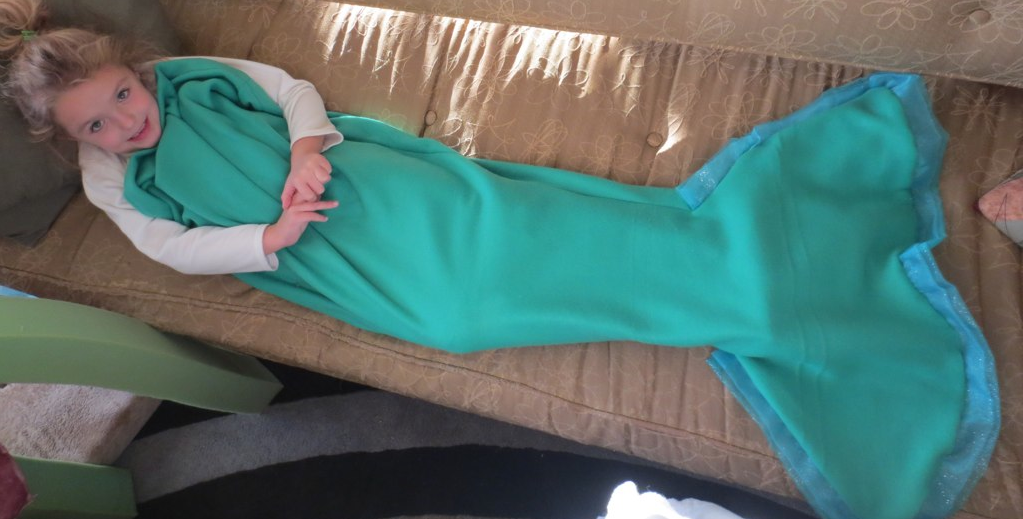

I saw this inspiring Pin and I was off to the store not long after. There are times that Jambi likes to be wrapped up on the couch in a blanket and this looked great to her, so she was “all in”.
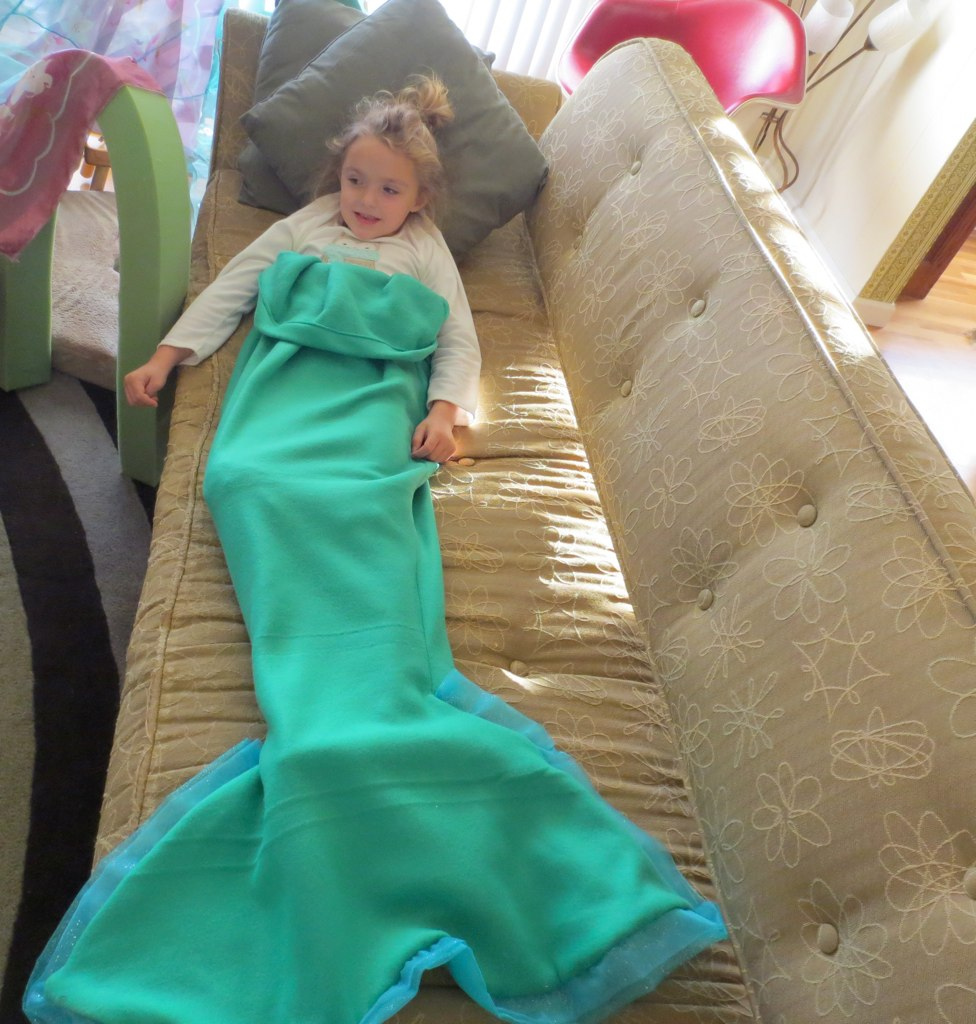
She LOVES this thing. She will get out of bed in the morning and go seek it out before she gets dressed. So, it has been a great leg warmer!
Mermaid Fleece Snuggler

Supplies
- large scale paper for template
- pencil
- access to the model, or some general measurements for length and width
- craft scissors (for the paper)
- straight pins
- 52′ of fleece
- 1/4 yard of contrasting fabric, I used chiffon (optional, but it adds a lot)
- thread to coordinate
- fabric scissors (for the fleece)
1. Make a template that you will use to cut the fleece – If you have a roll of paper that is the easy option. If you do not have access to a roll, you could use super cheap wrapping paper and turn it over to the white side. Another option is to take some sheets of newspaper and tape them together to make a sheet big enough. Or open up paper grocery bags and tape them together. The most important part of the design is the bottom fish-tail portion, so focus on getting enough paper for that at least. The “legs” portion of the tail is a long gentle curve and you can kind of wing it.
I had access to my model, so I had her lie down on the paper. I was more concerned about where her feet were and the tail area than the waist portion, but you want to make sure it is wide enough for your mermaid to get into.
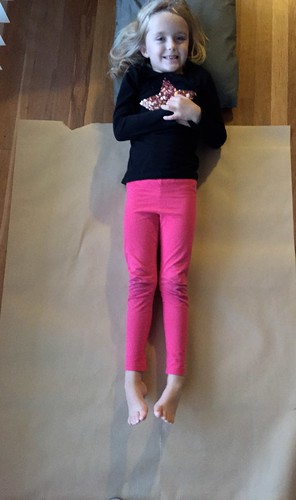
Then I drew around her.

Here you can see the pencil lines near her leg and part of the tail sketched out.
To make sure that I got a symmetrical tail, I folded the paper in half (the long way) and I cut out two equal halves.
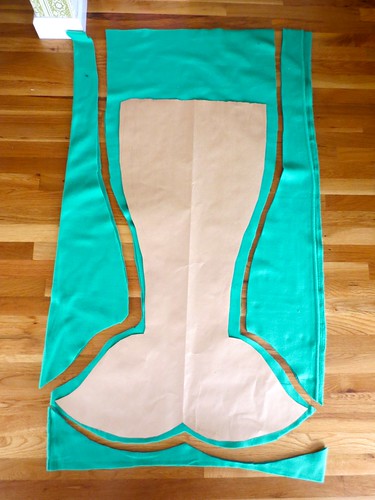
2. Fold the fabric in half the long way and lay the paper pattern on top. Cut around the pattern. You can see here that I carried on and went above the actual paper that I had. (There is about an inch all around the paper here. I was worried that she would not get her feet through the thin part and that the tail would all be “extra” so I tried to make it a little wider all the way.)
3. (This is otional) I wanted to add a little something extra to the tail, so I got two colors of shimmering chiffon fabric. I tore strips that were 4 inches and 5 inches wide, and folded them over to make layers.
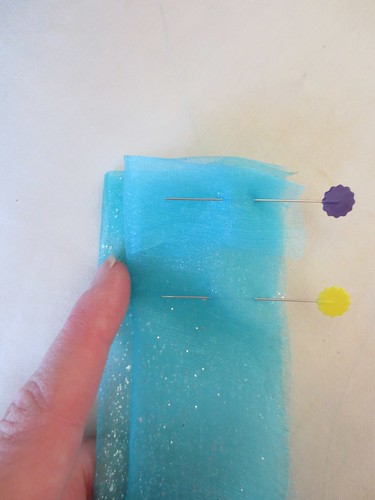
I pinned the two shimmering layers together and then pinned them into the edge of the tail.
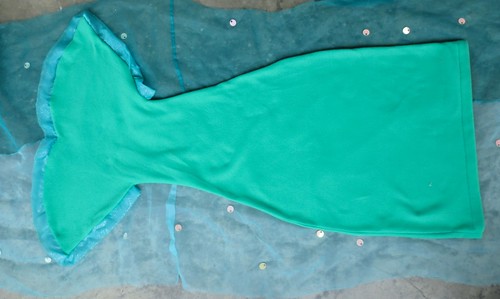
4. Pin the fabric right-sides-facing together. Remember to put the chiffon layers facing “inside” with the cut edges all lined up to sew. Then, when you turn the whole tail inside out, the ruffles will be on the outside along the edge.
5. Hem around the top opening and you are done.
If you are not reading this post in a feed reader or at http://justcraftyenough.com then the site you are reading is illegally publishing copyrighted material. Contact us at jcraftyenough AT gmail DOT COM. All patterns, text and photographs in this post are the original creations & property of the author unless otherwise noted.© 2005 – 2015 Kathy Lewinski & Susan Cornish

10 Comments to Project – Mermaid Fleece Snuggler