DIY Adjustable Light for Starting Seeds

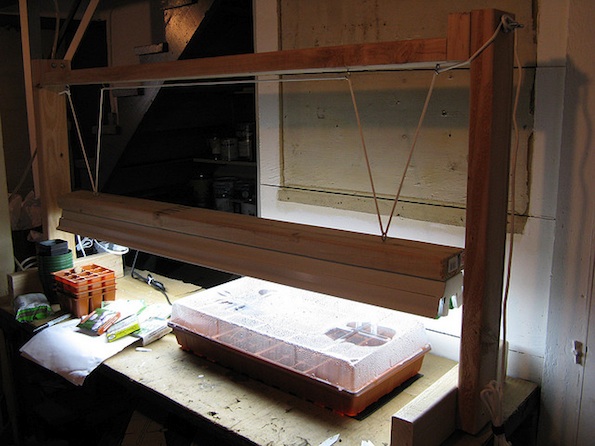
We decided to start a lot of our vegetables from seed ourselves this year instead of buying plants from nursery. We figured it would be cheaper in the long run since seeds are cheap & can be saved to use from year to year. The main outlay would be the cost of a grow lamp. We wanted something adjustable that could be moved up as the plants grow bigger. Matt started pricing grow lamps & figured he could make something pretty easily with a shop light & some scrap lumber in our basement for much less. His final design was so ingenious I thought I’d share it.
Seed Starter Set-up
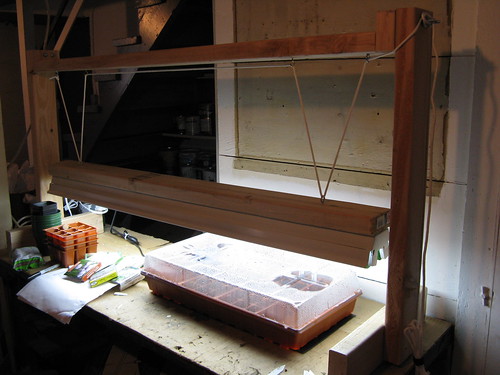
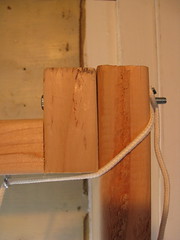
This is our seed starting set up on an old workbench in the basement. The light is big enough to accommodate 2 flats of seeds. The hooks & eyes along with the rope create a pulley system to move the light up & down. The rope is secured to the ends to two screws with wing nuts, working a lot like a cleat on a boat.
Seed Starter Set-up Seed Starter Set-up
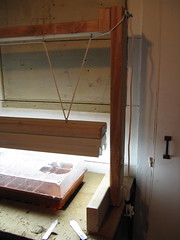
Here’s what you need to build it…

15 1/2 feet of 2×4 cut into the following pieces
two 15″ lengths
two 3″ lengths
two 48″ lengths
two 27″ lengths
ajustablelight
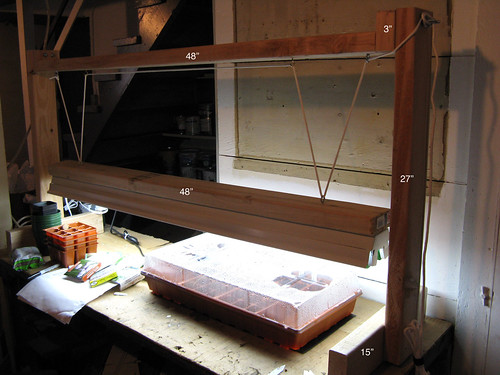
four 4″ bolts with 4 washers & 4 wing nuts

ten 2″ screws

four 1″ screws to attach light to wood (this may vary for your lamp)

two screw in hooks

four screw in eyes

one 48″ shop light with daylight bulbs (you don’t need to spend extra for plant bulbs)

8 feet of rope, thin enough to go through your eyes
Seed Starter Set-up

Here’s how it’s put together. 
1. On one of the 48″ pieces of wood screw an eye in 1.5-inches from the edge, screw a hook in 8.5-inches from the same edge. Repeat on the other edge.
2. Attach a 15″ piece with three 3″ screws to the bottom of each 27″ length as shown above creating the legs. 
Seed Starter Set-up
3. With two 3″ screws, attach the 3″ pieces of wood to the ends of one of the 48″ as shown above, creating the top. 
4. Use the 4″ blots to attach the top to the legs as shown. The wing nut end of the 4″ screws should face out.
5. On the other 48″ piece of wood attach an eye 5.5 inches in from each side.
6. Attach the light fixture to the piece of wood you just put the eyes on. Our lamp only came with hardware to hang it from a chain, we had to take it apart & screw it to the wood through holes that were already in it
7. Stand up & tie the end of the rope to one of the hooks, run the rope through the eye on top of the light fixture, through the first hook & then the second. The rope then goes through the second eye on the light fixture & the final eye on the top. Adjust the rope to get the light even & to the height you want. Secure on to the ends of the bolts.
If you are not reading this post in a feed reader or at http://justcraftyenough.com then the site you are reading is illegally publishing copyrighted material. Contact us at justcraftyenough AT yahoo DOT COM. All patterns, text and photographs in this post are the original creations & property of the author unless otherwise noted.
© 2005 – 2011 Kathy Lewinski & Susan Cornish
16 years ago by in Craft Projects , Crafts , Projects | You can follow any responses to this entry through the RSS feed. You can leave a response, or trackback from your own site.
One Comment to DIY Adjustable Light for Starting Seeds

Leave A Response

* Required