

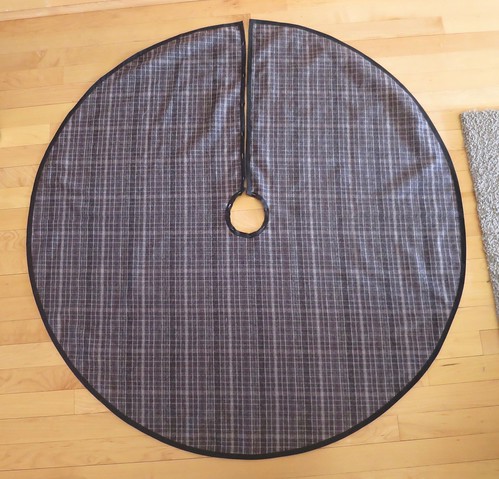
For this challenge we were asked to use one or more of this year’s fall fashion trends in our project. I wasn’t sure what I was going to do and then realized we needed a another Christmas tree skirt. (We got a second tree for our travel ornaments last year.) This was a perfect place to use one of the trends. Originally, I was going to do a black velvet skirt (velvet is a trend) with a plaid bias tape trim (plaid is another trend), but I couldn’t find the plaid I was envisioning for the trim in the right fabric. So, I decided to do a plaid skirt with solid trim instead.
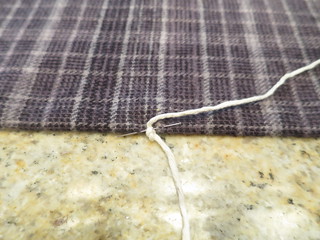
Sorry, I didn’t bother to haul the tree out of storage for my photo. As you can see, I have a little bit of the trim to finish, hand sewing binding on takes forever!
Making a Christmas tree skirt is really easy. Pick out your fabric, remembering the diameter of your skirt can only be as big as your fabric is wide. Have the fabric cut, so that it is as long as it is wide. My fabric was 44″, so I needed just under a yard and a quarter.
Buy or make bias tape to edge trim the skirt. It it pretty easy to figure out how much you are going to need. Multiple the diameter you are planning on making your circle by pi, 3.14 to get the circumference. Then add the the diameter to that total. This is the amount you need to trim the opening. Then divide by 36 to get the amount in yards. You will need about another yard on top of that number to trim the center hole and account for any overlap or joins.
Here is the math for mine.
44″ x 3.14 = 138.16″
138.16″ + 44″ = 182.16″
182.16″ ➗ 36 = 5.06 yards
So two 3-yard packages worked out almost perfect for me. I used a 1/2″ double fold tape.
Fold your fabric in half. Use a piece of string and a pen to draw out a half circle. You do this by putting a knot on one end of the string and pinning in the center of your folded edge.
Attach the pen to the other end of the string one half the width you want your final circle. Make sure to hold the folded end down and in place. Pull the string taut and, keeping the pen straight up and down, draw a half circle on the fabric.
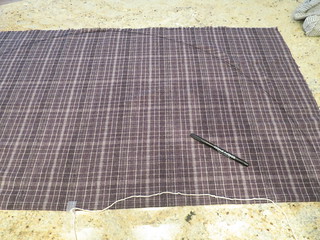
Draw a straight line from the edge of the circle to where you string is pinned at the fold for your opening. Draw a smaller circle the same way using the same center point at the fold the size you need for your tree trunk.
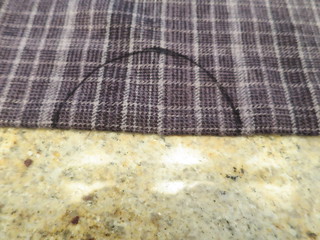
Keeping the fabric folded in half, cut out the large circle, the small circle and down the straight line.
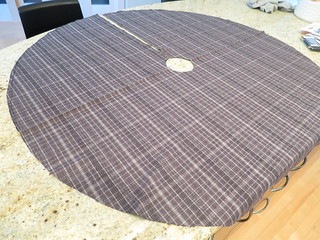
Now, all you have to do is trim all the cut edges with your bias tape. I say all, but really this is the most time consuming part of the project.
And there you go, a custom tree skirt.
© 2005 – 2016 Kathy Lewinski & Susan Cornish


6 Comments to Iron Craft ’16 Challenge #19 – Plaid Christmas Tree Skirt