

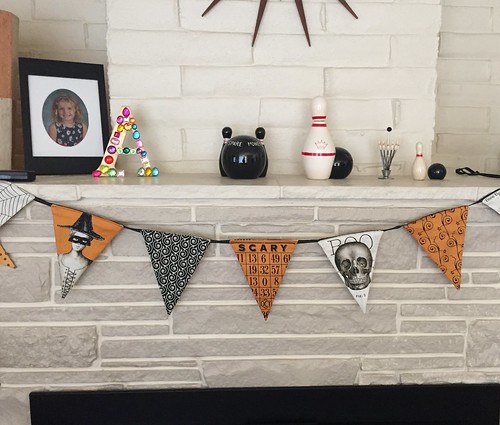
I am ready for some Halloween Crafting.
I found this GREAT Halloween fabric to use over the summer and I was bound and determined not to just let this transition from “inspiration” to “stash”. I am going to break this down into a VERY detailed step-by- step tutorial so that you can have the same glorious success if you choose to embark on this project.
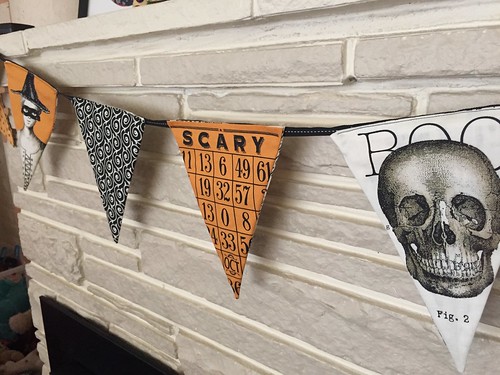
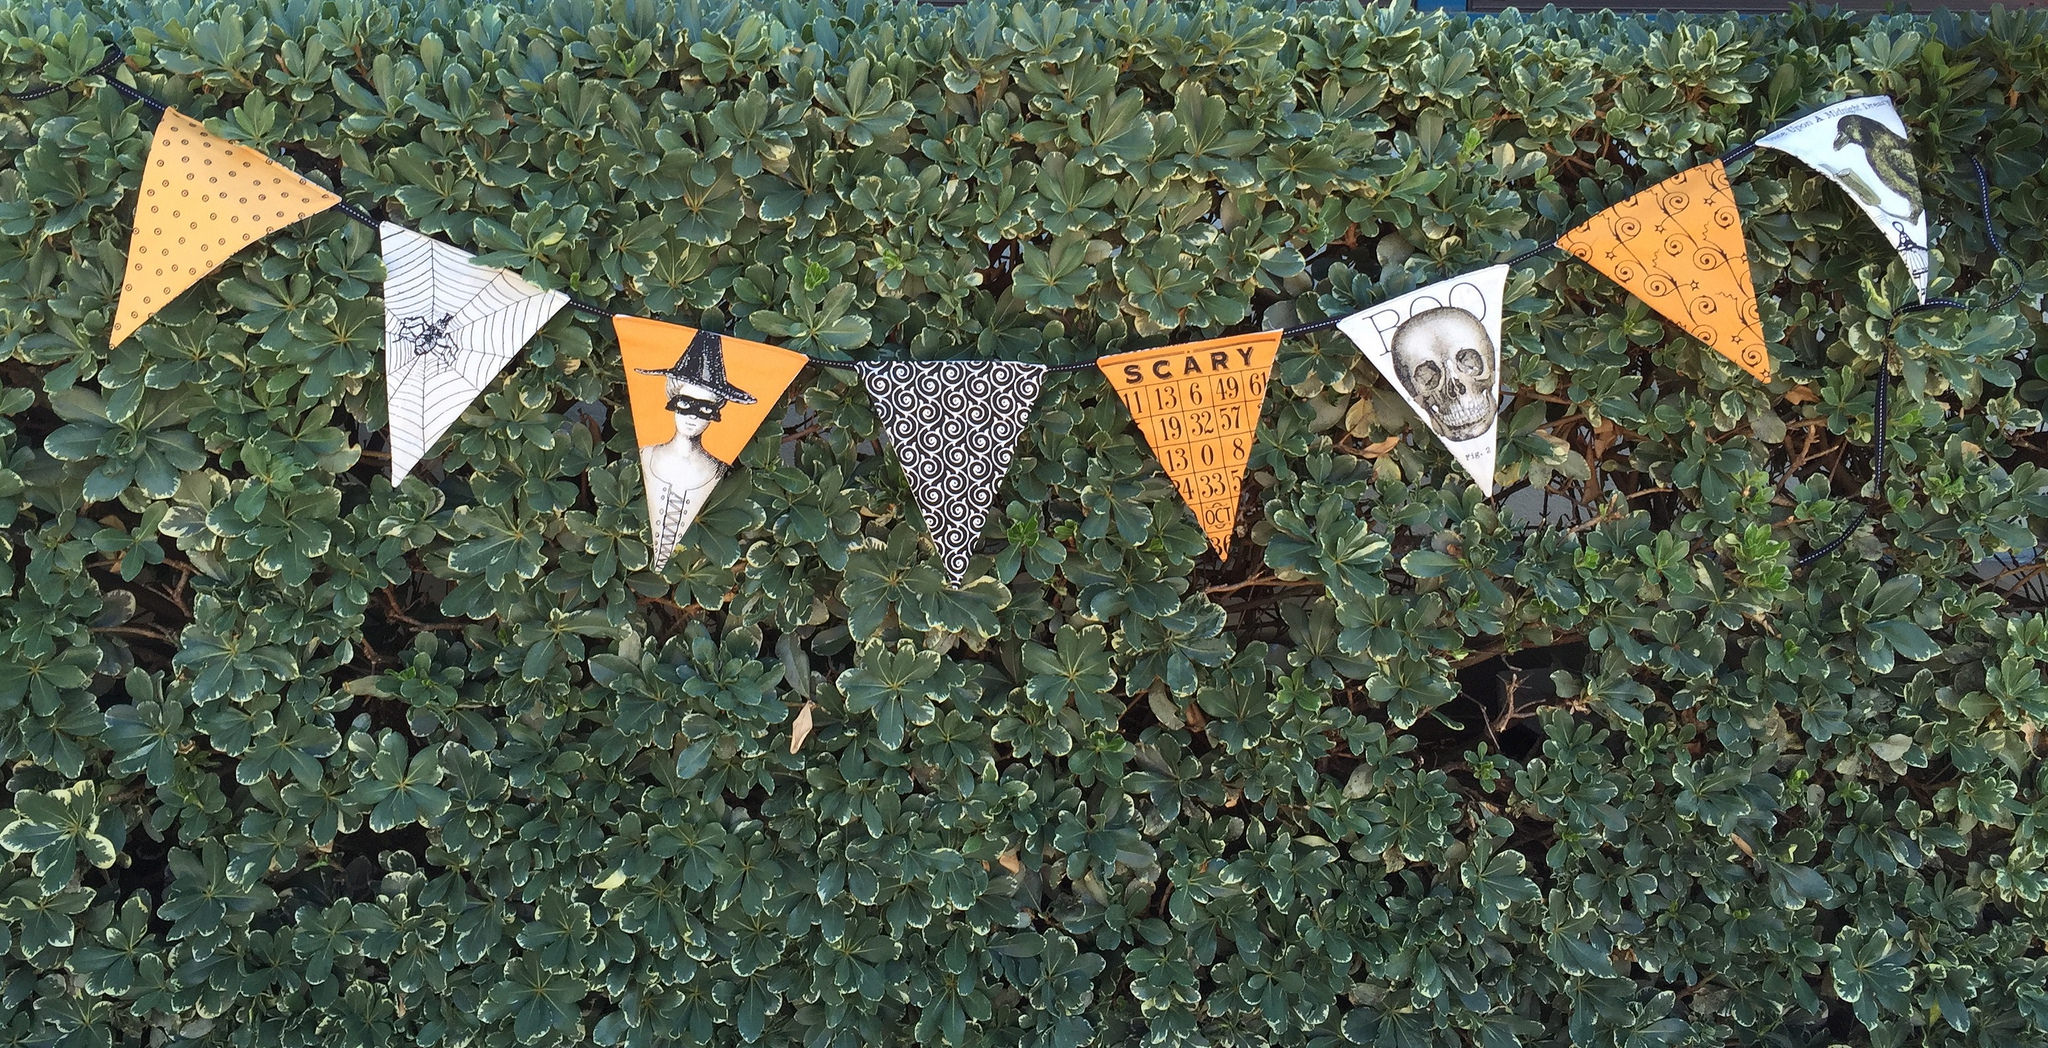
Halloween Bunting
Supplies:
- one panel of the Sew Scary Halloween triangles
- rotary cutter, quilting ruler and cutting mat are all helpful
- 1 yd of backing fabric (optional, but doubles the size of your bunting)
- rick-rack trim or ribbon to hang bunting
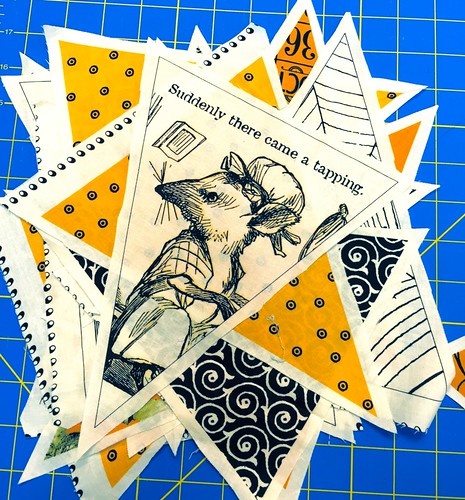
The pre-printed panel here has 18 triangles. They figure some will be “features” and some will be backing, but I like them all and I wanted a longer strip than just nine. So, I added backing fabric. I found a news print with a cream background to match the panel and I felt like that was perfect. It’s not “blank” but it doesn’t compete with the front either.
Instructions:
- Iron the fabric
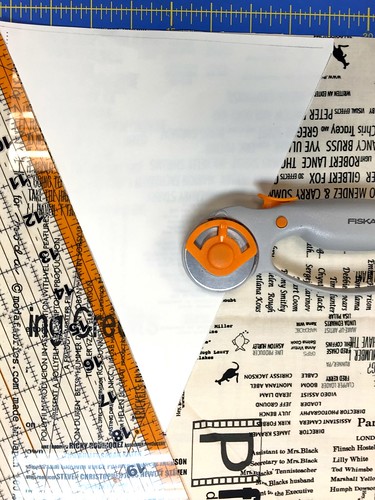
- Cut the fabric print out (take care to cut carefully in between because there is not a huge seam allowance in between the triangles)
- Take one of the triangles that you have made and make a template. That will help you draw and cut your matching triangles.
- Use the template you made to help you cut triangles for the backing.
Now with two stacks of triangles, 18 front sides from the printed fabric and 18 back sides from your additional fabric, you will form the hanging pendants.

Pin right sides together. Sew carefully down the two long sides of the triangle leaving the top open. Sew with the top “feature” side up towards the needle so that you can see exactly where the seam allowance is.
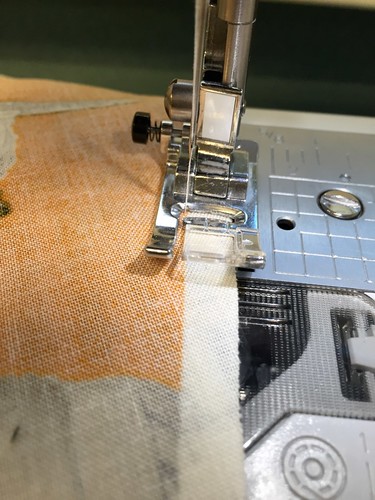
Be sure to sew all the way off the edge so that you have a sharp point.
Carefully clip the tip of each triangle.
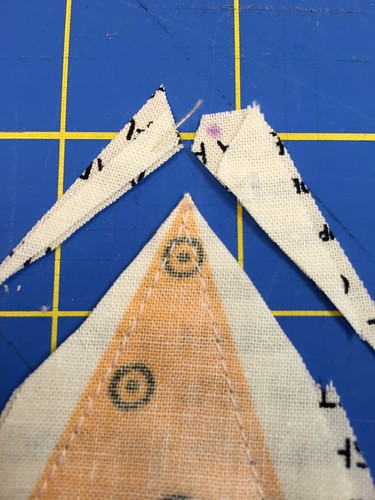
Clip the tops close to the corners.
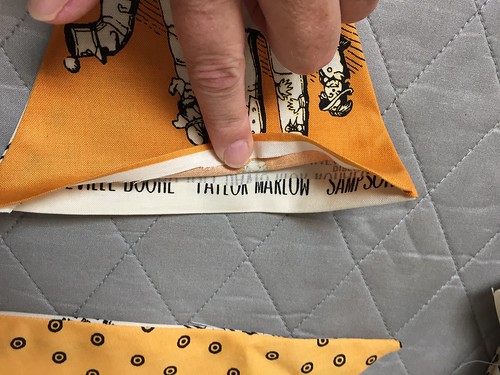
Heat up your iron, turn the triangles inside out and press the triangles flat. On the top side you will want to fold the raw edges in and press.
Take your ribbon or trim and sew the triangles to the ribbon. Be careful to space them out evenly and leave enough on each side to tie or fix the bunting on the ends.
© 2005 – 2015 Kathy Lewinski & Susan Cornish


One Comment to Project: Halloween Bunting