

Every Friday for the twenty-four weeks leading up to December 1st, we will be making a handmade Christmas ornament. Follow along and make them all or pick and chose your favorites.
This week’s ornament was one I’ve been wanting to make for the past two years, but this is the first time I’ve gotten it to work. I’m glad I stuck to it.

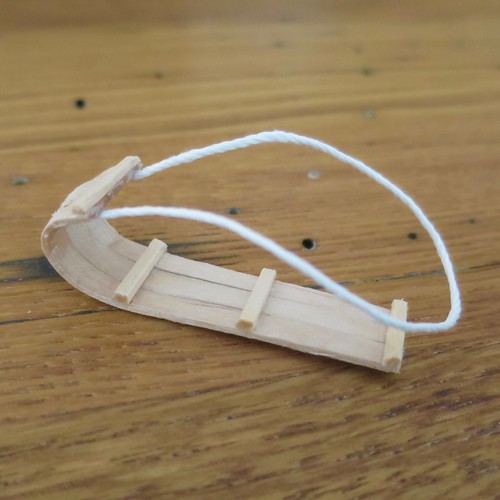
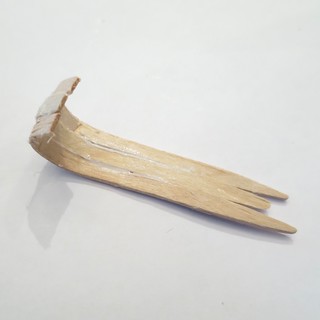
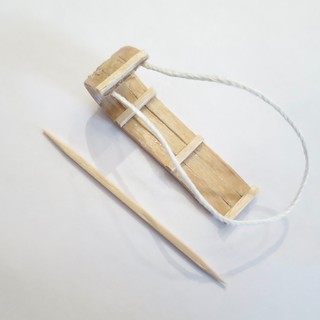
This tiny wooden toboggan is just the length of a toothpick and really sweet as can be. You can leave it natural with just a little varnish for shine like I did or paint it up a color like red.
The reason it took me awhile to get this project to work was the bending of the wooden sticks. There are lots of projects on Pinterest and such where people have bent popsicle sticks to use as bracelets, so I thought bending the wood couldn’t be that hard. Ha! It was really tricky and I have about a 50% success rate with the sticks I used. I read a few posts about how to get the wood easily bendable and for me soaking overnight was the best. I also found it helped to work into the shape a little at a time and very gently, don’t try to get it into a dramatic curve in one quick bend. I would bend mine a little, put it back into the water and then bend a little more. I’m thinking warming them again might have helped too, but I didn’t try that.
Tiny Wooden Toboggan Ornament
Supplies:
- flat wooden sticks – I used picks from the craft store, but you could also grab a few coffee stirs at the coffee shop. You’ll want about double the number you’ll actually need.
- scissors you can cut wood with, I used kitchen shears
- something round for shaping like a marker or large knitting needle. It should be the same diameter in a long enough spot to wrap three wooden sticks.
- strong tape like packing tape
- tacky glue
- fine sandpaper
- 4 or 5 square toothpicks
- paint or varnish
- embroidery floss, pearl cotton or thin twine
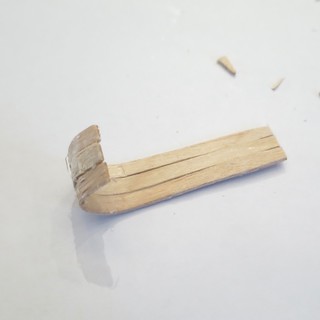
1. Bend the wooden sticks (this is the trick part) – If your sticks have a rounded end, trim one end so it is flat. You want to get the sticks really saturated with water and pliable. I boiled them for 30 minutes and then let them sit in the hot water for another 30, they still weren’t soft enough. I let them sit in the water overnight and this seems like the best I was going to get. Gently, bend and shape the sticks so they curve at the flat end around something like a marker. About half the sticks I tried broke. Tape the sticks one at a time to the maker, side by side, so you’ll end up with three the same shape.
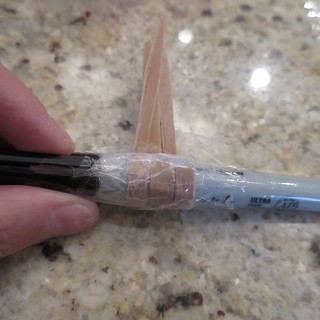
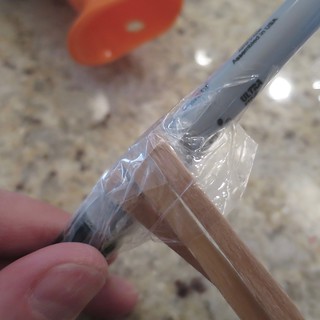
Let dry overnight.
2. Glue the shaped sticks together – Remove the tape holding the sticks to the maker. The curl on the end will open a little.

Glue three of the sticks together matching the curves. I found I had to hold them together for a little bit to get them to stick.

Let dry.
3. Shape and sand – Trim both ends of the sticks to make them even. Lightly sand as necessary. I found it made the the curve look better to sand it a bit.
(If you want to paint the toboggan a different color than the cross bars, do it now.)
4. Add cross bars – Glue square toothpicks across the wooden sticks at both ends and a few spots in between. You can add as many or few as you like. Clean and excess glue. Let dry.
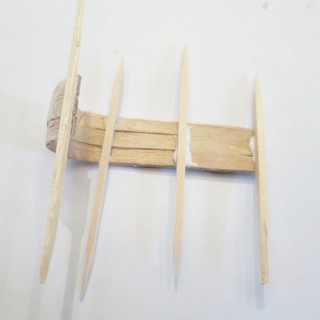
Trim the toothpicks to be flush with the sides of the toboggan.
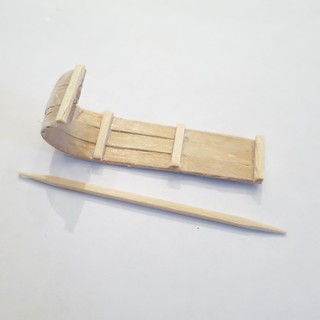
5. Paint or varnish the toboggan on all sides. Let dry.
6. Cut a piece of twine that will be about twice the length of the toboggan when folded in half. Glue the ends underneath the curve of the toboggan. Let dry. (Technically, the rope should be shorter, but since I was hanging the toboggan from it I wanted it longer.)
You can hang the ornament from this twine as I did or glue another piece to the bottom/back for hanging.
© 2005 – 2015 Kathy Lewinski & Susan Cornish


2 Comments to Advent Calendar Project ’15 – Week 19