
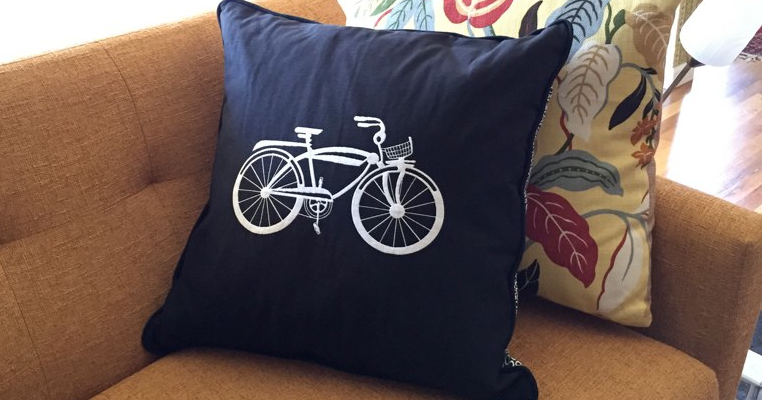

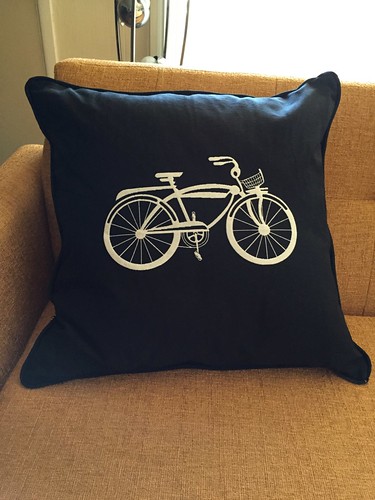
JoAnn’s had a new line of panels in the home decor fabric section called Square By Design. There are lots of clever ones, but the one I like the best is a bicycle.
Earlier in the Spring went to a house-warming-birthday party, and I wanted to send a thank you/house warming gift all in one. The hostess of the house has a beautiful bike that looks like this one. So I committed to the panel, picked out some backing fabric, and got the right size pillow insert.
This pillow has piping all around it.
Bike Panel Pillow
Supplies:
- 1 panel (or feature fabric) (panel offers 25/25 of usable space. There is some writing woven in on the bottom edge.)
- backing (at least 25 x 25)
- pipe (103 inches or 1.86 yds)
- zipper (22 – 23 inches is fine)
- pillow insert (shown here with 24 x 24 pillow)
- coordinating thread
First I want to start with a working note about this panel. It is beautiful thick cotton, woven, double sided and reversible. It has some weight to it, and is pretty substantial. There is a boarder all around the outside that I thought that was a “selvedge” and that I could just sew into that.
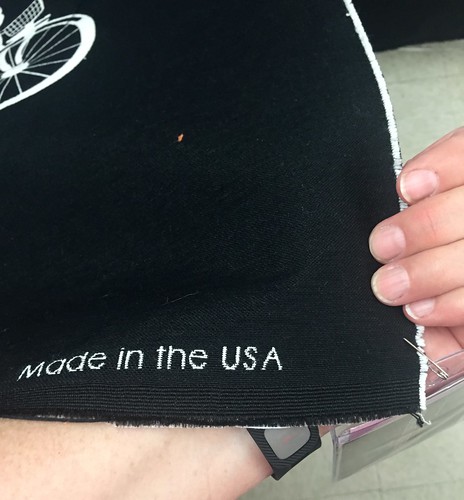
In reality, when I was working with it, I found that the border was not woven tighter than the rest of the cloth and I has some issues with unraveling. Cut your piece to the size you want regardless of the border that you see. Then zigzag around the perimeter of the whole thing to catch the edges and give the piece stability.
Directions:
- Cut two piece of fabric the size you need for your pillow. Zig zag around the edges for stability.
- Attach the pipe to one side of fabric. Here, I used pre-made piping. The seam allowance is 1/2″ on most of the pre-made pipe, so that will be your seam allowance too. Take the pipe, and lay it down on your pillow front. You will start at the bottom 3rd of one side. Some amazing sewers do this with no pins. That is not me. I don’t use a TON of pins because sometimes the fabric stretches a little bit and sometimes the pipe stretches a little bit so, if you used a million pins, you will now be locked in with a fight over what to do about the excess on your hands. Also, it is very hard to pin within a 1/2″ seam allowance. I like pins to be perpendicular and to get a pin to go in and back out, perpendicular, in 1/2 an inch is TOUGH. I start out and pin it around with one pin on the end and one pin in the middle of each side. The first pins are very well laid out, and the rest are a little bit more casual. I start to sew, and remove the pins carefully. Sew to within 1/2 inch of the corner (that is your seam allowance) and then place the needle down into the fabric. Carefully pull the pipe to form the corner. Take some sharp scissors and clip the seam allowance on the pipe to help it bend around the corner with the precision and sharp angle that you are looking for. Then lift the presser foot and pivot turn your fabric 90 degrees to make the corner, and start down the second side. Continue in this fashion on each corner. When you have gone all the way around you have two options for treatment of “ends of the cord”. One is to just overlap them. The other is to carefully splice the cord and trim and sew the fabric cover to make an invisible join. The choice is yours based on personal preference, time and skill level.
- Insert the zipper to the bottom edge of what will be your pillow. Here is where the tricks begin. I thought I would just set the zipper using the same method I would for an invisible zipper.
- Line up the bottom side of the front and the back piece. Stitch two inches with a regular small stitch. Try to follow the same line where you sewed the pipe on so that there are no seam lines visible from the outside. Change the stitch length to long stitches. Sew to within two inches from the end of the seam. Change the stitch length back to short stitches and sew the last two inches. What you have done is to make the start and the end of the seam strong, and the middle of the seam is just held in place while you add the zipper behind it.
- Open the seam and press it with an iron. Here, you are going to set the zipper in the bottom seam. This becomes a little bit tricky with the pipe and the fabric on one side and only 1/2″ seam allowance. I would suggest hand basting to get the zipper in exactly the right place. Then, with a zipper foot on your machine, slowly, carefully insert the zipper. I did an extra step, and top stitched a little bit so that the fabric hid the zipper a little bit more, but technically, you should not have to do this.
- Now that the zipper is in, take a seam ripper and gently rip open the stitches in the “middle” of the seam, exposing the zipper pull. Open and close the zipper to see that everything is working. (If there are things you don’t like, now is the time to make corrections.)
- Open the zipper a little bit (so there is a hole to turn the pillow inside out easily). Line up the front and the back and place a few pins in to hold everything in place. Sew the other three sides closed.
- Open the zipper all the way. Put the pillow insert into the case.
- Zip it closed and admire it.
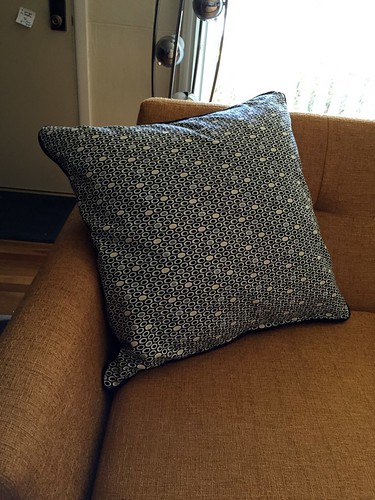
Here is a back fabric I chose.
It has a gray and a soft muted yellow/mustard to it. I thought that broke up the black surface a little bit.
Hind site is 20/20, so let me offer what I would have done differently. I bought pre-made cotton pipe by the yard. If I had more time I would have made my own. I would have used the grey shown or even tried to match the light mustard. I would have liked the pipe to “pop” a bit more.
I would have made the whole pillow smaller. I like the look of a pillow that is stuffed almost to bursting. I think it looks better when it is just about to explode. So, if I did another one, I would cut the fabric the size of the pillow itself, and have it be “too small” by the width of the seam allowances. This sounds a little bit too dangerous to recommend, so I will just leave it there as a note to myself. It is just a personal preference issue.
Finally, I would have tried some of the amazing tricks and skills that I learned in these Peg Baker Tutorials that were featured in this post. Her method of adding the zipper into the piped piece looks amazing.
Have fun!
© 2005 – 2015 Kathy Lewinski & Susan Cornish


2 Comments to Bike Panel Pillow