


(For the 24 weeks leading up to December 1st, we’ll be making a Christmas ornament, giving you enough to fill an advent calendar.)
This week’s ornament is a great little stash buster for small bits of fabric and extra buttons.
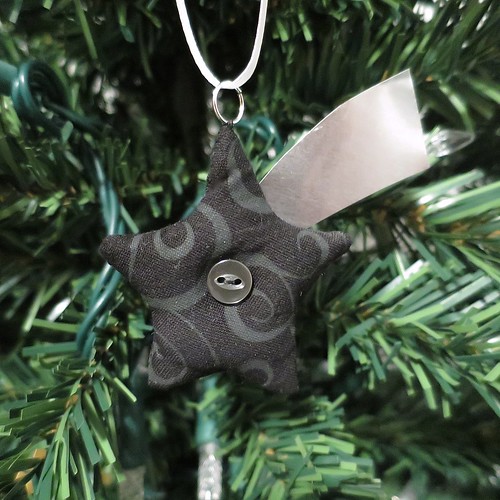
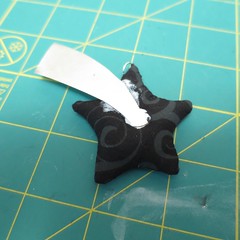
A little shooting star with a shiny tin tail.
This would be cute done up in a lot of different fabrics. I went with a black and grey, because I thought it would have a little “drama”. One note, I made my star quite small, finished it was only 2″ across, which made it very tricky to stuff and sew shut. If I did it again, I would go a little bigger.
Shooting Star Ornament
Supplies:
- fabric, enough to cut two stars the size of your choice
- straight pins
- fabric and craft scissors
- matching thread
- sewing machine (optional)
- hand sewing needle
- stuffing
- button
- jump ring
- disposable pie or baking pan
- 1/8″ ribbon for hanging
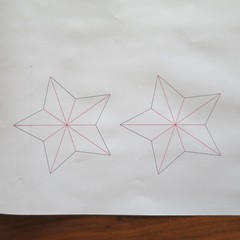
1. Draw or print out a star template to use as your pattern and cut out. Remember to make it big enough to give yourself a seam allowance. Fold the fabric in half with right sides facing each other. Pin the pattern through both layers and cut out.
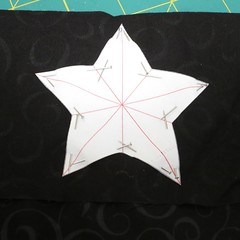
2. Remove the pattern, keeping the two cut fabric stars together. Sew around the outside of the star leaving a seam allowance between 1/8″ – 1/4″. (I did 1/4″ and wished I had done 1/8″ for better points.) Leave an opening for turning and stuffing. (I only left one side of a leg open and with this tiny a star it was tricky to turn, stuff and sew shut. I really either needed a bigger opening or a bigger star.) Clip the seam allowance at the points and inner corners. Turn right side out through the opening. A knitting needle or pencil helps push the points out. Stuff and sew the opening shut.
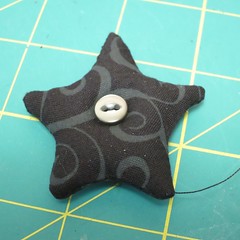
Sew a button to the front middle of the star, pulling tight so it pulls in. Sew the jump ring to the top of the star for hanging.
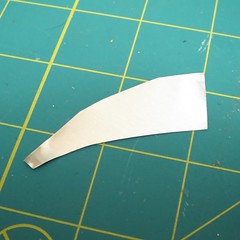
3. Cut an arc or tail from the disposable tin pan. Glue to the back of the star. (I was surprised at how well the tacky glue held it on.
Let dry.
Put a ribbon through the jump ring and tie into a loop to hang.
© 2005 – 2014 Kathy Lewinski & Susan Cornish


