


I was commissioned to make a the Evil Queen costume for the school’s upcoming production of Snow White. You can see the cape post here. Now, let’s talk about the dress.

I am so proud of how this dress came out, because I did it without a pattern or a mannequin. And, I designed something for a real client who is not a model. After living through an actual reality show where I was part of a group of clients who were not models, I HAVE walked a mile in those shoes. I was thrilled to be asked to make this costume. My overriding MAIN objective was to make the client happy.
Evil Queen Dress
Supplies
- 2.25 yards of stretch velvet
- 1.5 yards of lilac chiffon
- 4 yards of silver trim (for sleeves)
- 2 x 3 yard sections of gold cord (found in the drapery trim isle)
- thread
Tools:
- dress or skirt and top to use as a pattern
- sewing scissors
- pins
- sewing machine
Body:
I was pretty unorthodox in how I went about this. 2.25 yards of stretch cranberry velvet came home with me. I laid it out on the floor, folded in half with the right sides together and pinned it so that it would not move all around when I wasn’t looking. I had a t-shirt with a similar stretch and a maxi skirt for the length. Those were my pattern pieces. Ready, set, go!
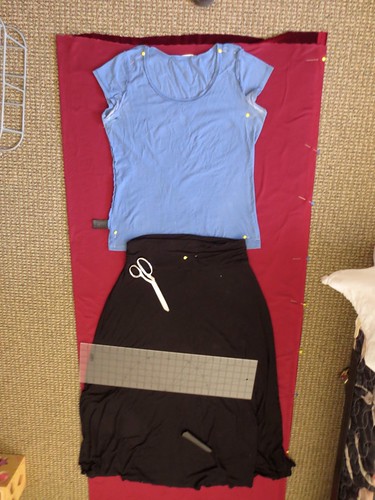
When I cut around the shirt, I had it inside out, so I could really get the sleeves out of the way and see the seams. I left HUGE seam allowances (1 – 1.5 inches,) so that I could use those if I needed to.
I cut the dress out, sewed the sides and the shoulders up, and took it in for a fitting. My client took the dress into a supply closet (=private dressing room) and came out beaming. You could not wipe the smile off her face. She looked like a million bucks! How satisfying!! I pinned in bust darts when it was on her and added those at home.
We decided we liked the neck plane. And what’s more, you cannot see the neck at all behind the cape closure. So the treatment of the neck and the neckline were almost irrelevant. (note: this was designed for a school production, but if you were doing this for cosplay or an adult party, you could certainly treat the neckline differently and “sexy it up” a bit more. Here would be the time to do that.)
Sleeves:
Lay the chiffon out and cut HUGE bell sleeves. Fold the fabric the way it was on the bolt and pin it together. The place where your arm is (if you held your arm out to the side) will be straight. The hole where your hand comes out will be straight and perpendicular. (Leave 4.5 extra inches in length for the hem on that side.) The side of the triangle that is on the armpit can either be curved from the armpit (in a rainbow style arc) to the wrist, or it can be straight. Here, I cut it straight. Seam up the length of the sleeve. (I did go the extra mile and do french seams.) Turn under .5 inches at the wrist hem and press. Then turn under 4 more inches, press and pin. Sew this seam down. Starting at the side seam and using a seam ripper, open up 1-2 stitches right at the hem line. Insert the end of the silver trim into the seam allowance, so that the end is hidden. Using a zig-zag stitch, run over your silver trim, taking care to keep it right on the folded hem line.
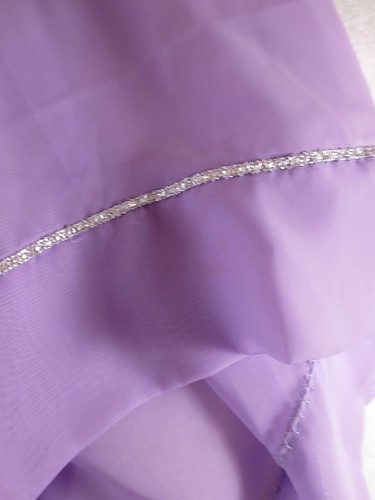
Once you get all the way around, leave another .5 inch and clip the end of the trim. Then send that end into the hole you created in the sleeve seam with the start of the trim. For extra strength, and to make sure it will stay put, go back and sew those few stitches shut.
Next, you are going to ease the sleeve into the armhole. This is the trickiest part with no pattern. This would take a mighty fine tailor. I did not want to lose any of the volume or drama from the sleeves by fitting the armpits exactly, so I decided to handle the challenge with pleat tucks. I put one big center folded pleat at the shoulder and fit the rest of the sleeve without gathers or puckers. Because the chiffon is so thin, there was no risk of a dainty “puff shoulder” sleeve.
The last step is to hem the dress. Be sure to try it on with the shoes you will wear it with. Then hem to your preferences. For fun and drama, tie the two gold cords around the waist. We will show it with one cord a little higher than the other on the hips.
Now put the dress on, raise your arms is a powerful sweeping motion and cackle.
© 2005 – 2014 Kathy Lewinski & Susan Cornish

