
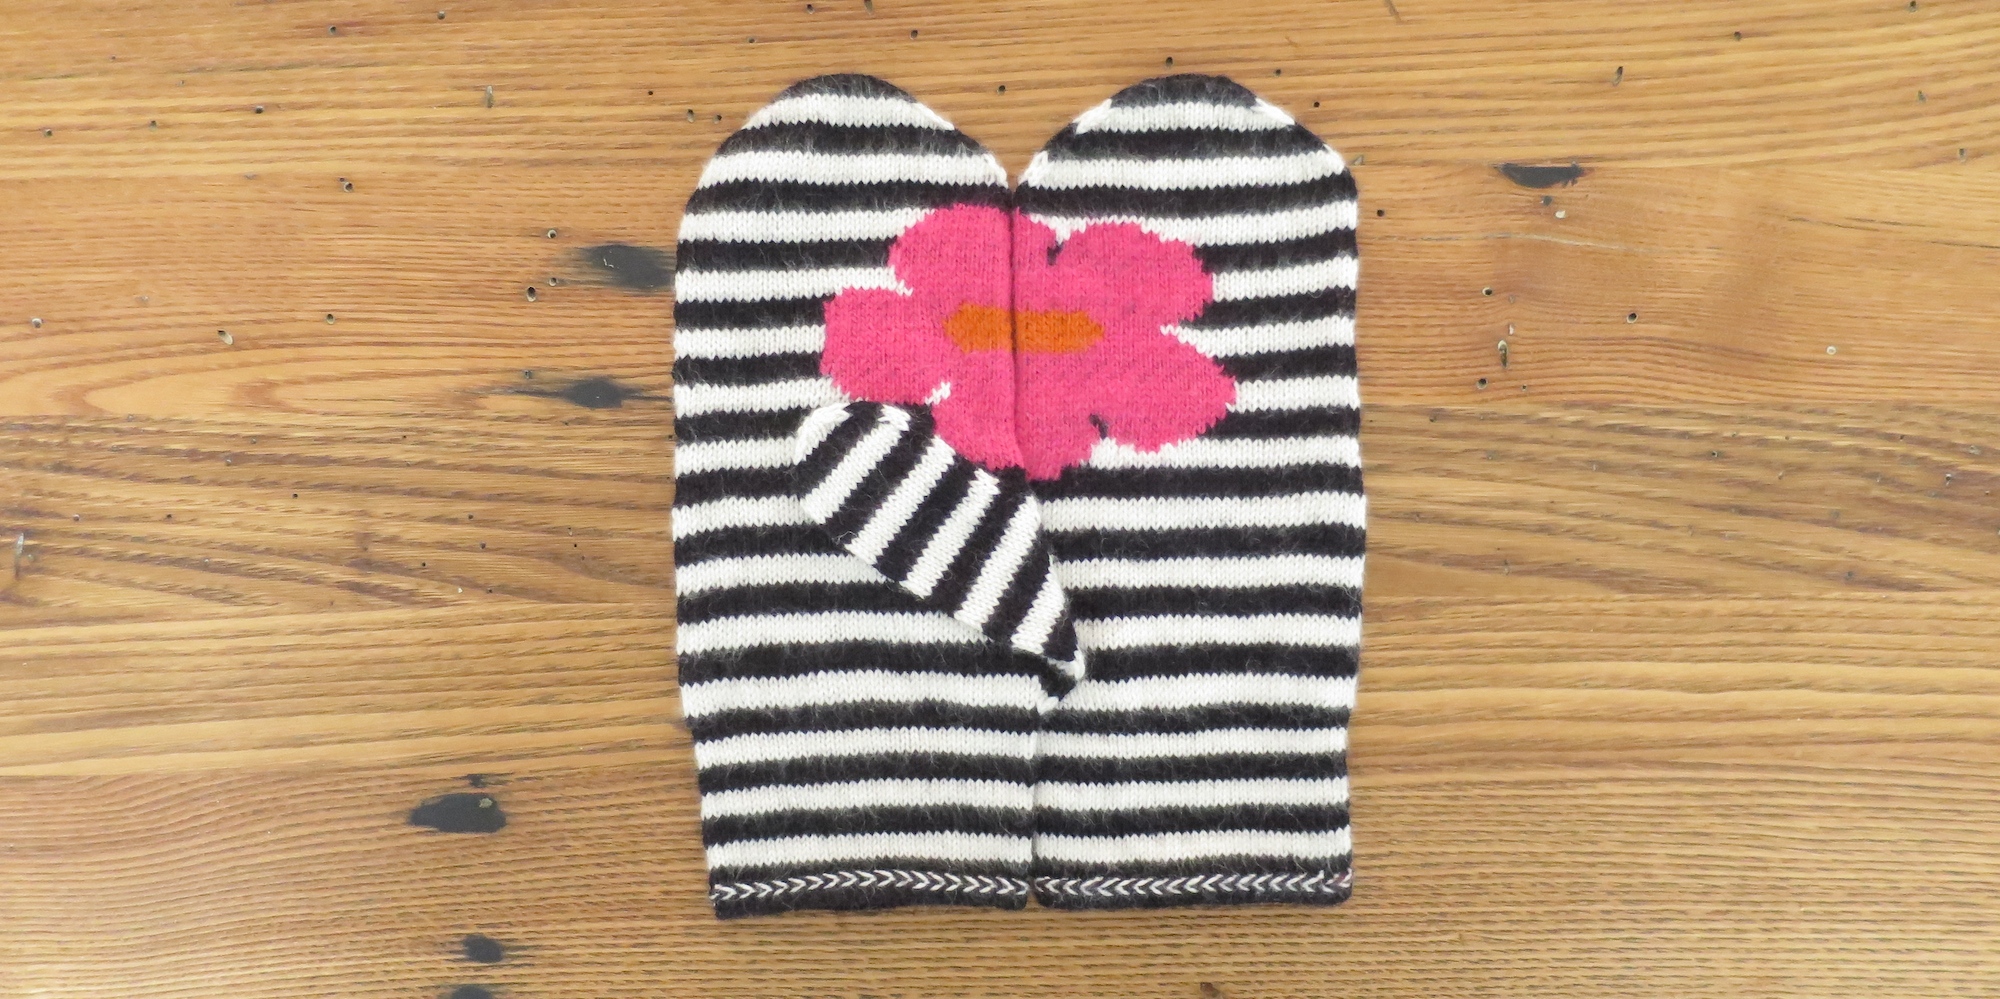

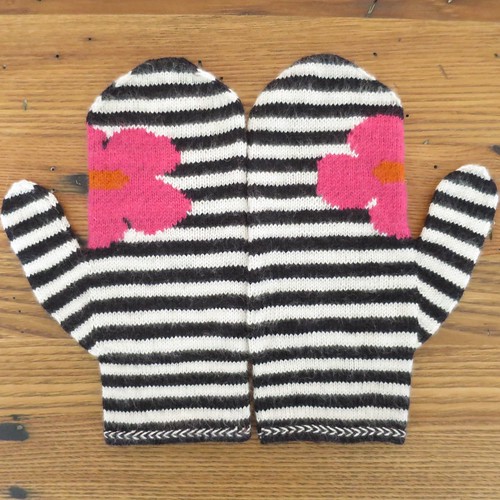
Another month and another pair of mittens designed and knit! Last month, I did the April Showers Mittens which of course led to this month’s May Flower Mittens.
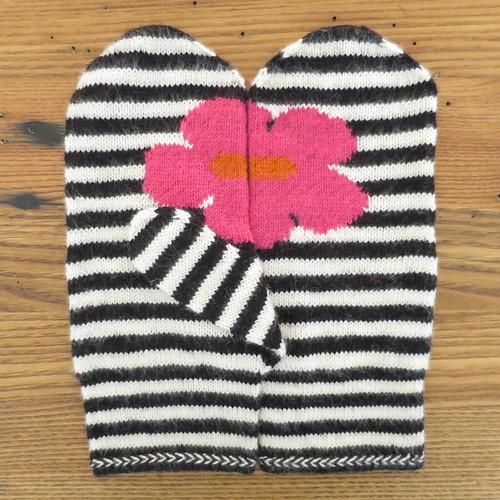
I’ve had the idea for these in my head for awhile, I wanted them to be graphic like pop art and I wanted the flower to wrap around the hand so when you held your hands together you got a full flower. I struggled with the flower shape, but then this last Iron Craft challenge fixed that. We were to be inspired by art and I saw Andy Warhol’s Flowers, there was my flower shape inspiration. I love the hot pink and orange against the black and white. It’s sure to bring a little spring color to even the gloomiest winter day.
Some notes about this pattern:
This was my first time doing a Latvian braid! It is pretty simple if you are used to doing stranded colorwork, you are just doing the twisting of the yarn on the front of your work. I gave basic instructions, but there are some good tutorials online. I used this one from Ohdessa Knits.
I will admit this pattern is a little but fussy with the colorwork. I had originally planned to do intarsia in the round, but it wasn’t giving me the smooth look where you turn your knitting, especially with the stripes. What I ended up doing was a bit of a cheat, I knit the mittens in the round up until the flower started and then I knit that section flat. I seamed it up and continued the rest of the top of the mitten in the round. I just didn’t want to strand the pink and orange all the way around the mitten.
Finally, I used the method I show here to get jogless stripes, which just look so much nicer.
May Flowers Mittens
Download the May Flowers Mittens Pattern (with chart) or download the May Flowers Mittens Chart only.
Size: Woman’s Large (8 inches)
(You can make a medium by casting on 6 less inches and adapting the other numbers from there or knitting at a tighter gauge)
Supplies:
- fingering weight yarn in black (approx. 200 yards), white (approx. 200 yards), pink (approx. 50 yards) and orange (scarp). I used Serenity Sock Weight for the black and white and Knit Picks Palette in Fushia and Orange for the flower
- four size 00 double-pointed needles
- four size 0 double-pointed needles
- stitch markers
- tapestry needle
- scrap yarn or stitch holder
Gauge: 10 stitches and 12 rows per inch
Abbreviations:
- k – knit
- p – purl
- m1 – make one (direction doesn’t matter)
- m1r – make one stitch right
- m1l – make one stitch left
- ssk – slip, slip, knit
- k2tog – knit two stitches together
Follow chart for color changes and intarsia pattern. The same chart is worked for both hands. I chose to change the direction of the Latvian braid on the second mitten by switching the order I did rows 4 and 5, but that is optional.
Cuff:
Cast on 76 in black with 00 needles. Divided between three needles. Join together to knit in the round placing a stitch marker between the first and last stitch to make rows.
Row 1: k
Row 2: p
Row 3: k1 black, k1 white until end of row
Row 4: Pull both yarns forward with black on top. Purl into each stitch with its matching color floating the other color over the working yarn.
Row 5: purl into each stitch with its matching color floating the other color under the working yarn
Row: 6 – 31: k
Row 32: change to size 0 needles, k25, m1, k26, m1, k25, m1 (79 stitches)
Hand:
Row 33: k39, m1l, k1, m1r, k39 (81 stitches) You may find it easier to keep track of where the thumb stitches are if you place a stitch marker before the m1l and after the m1r.
Row 34: k
Row 35: k39, m1l, k3, m1r, k39 (83 stitches)
Row 36: k
Row 37: k39, m1l, k5, m1r, k39 (85 stitches)
Row 38: k
Row 39: k39, m1l, k7, m1r, k39 (87 stitches)
Row 40: k
Row 41: k39, m1l, k9, m1r, k39 (89 stitches)
Row 42: k
Row 43: k39, m1l, k11, m1r, k39 (91 stitches)
Row 44: k
Row 45: k39, m1l, k13, m1r, k39 (93 stitches)
Row 46: k
Row 47: k39, m1l, k15, m1r, k39 (95 stitches)
Row 48: k
Row 49: k39, m1l, k17, m1r, k39 (97 stitches)
Row 50: k
Row 51: k39, m1l, k19, m1r, k39 (99 stitches)
Row 52: k
Row 53: k39, m1l, k21, m1r, k39 (101 stitches)
Row 54: k
Row 55: k39, m1l, k23, m1r, k39 (103 stitches)
Row 56: k
Row 57: k39, m1l, k25, m1r, k39 (105 stitches)
Row 58: k
Row 59: k39, m1l, k27, m1r, k39 (107 stitches)
Row 60 – 62: k
Row 63: k38, put the next 29 stitches on a piece of scrap yarn or a stitch holder, k38 (78 stitches on the needles, 29 on the stitch holder)
Row 64 – 103: k (or until the mittens hits the top of the little finger)
Row 104: ssk, k35, k2tog, ssk, k35, k2tog (74 stitches)
Row 105: k
Row 106: ssk, k33, k2tog, ssk, k33, k2tog (70 stitches)
Row 107: k
Row 108: ssk , k31, k2tog, ssk, k31, k2tog (66 stitches)
Row 109: k
Row 110: ssk, k29, k2tog, ssk, k29, k2tog (62 stitches)
Row 111: ssk, k27, k2tog, ssk, k27, k2tog (58 stitches)
Row 112: ssk, k25, k2tog, ssk, k25, k2tog (54 stitches)
Row 113: ssk, k23, k2tog, ssk, k23, k2tog (50 stitches)
Row 114: ssk, k21, k2tog, ssk, k21, k2tog (46 stitches)
Row 115: ssk, k19, k2tog, ssk, k19, k2tog (42 stitches)
Row 116: ssk, k17, k2tog, ssk, k17, k2tog (38 stitches)
Row 117: ssk, k15, k2tog, ssk, k15, k2tog (34 stitches)
Row 118: ssk, k13, k2tog, ssk, k13, k2tog (30 stitches)
Row 119: ssk, k11, k2tog, ssk, k11, k2tog (26 stitches)
Row 120: ssk, k9, k2tog, ssk, k9, k2tog (22 stitches)
Row 121: ssk, k7, k2tog, ssk, k7, k2tog (18 stitches)
Cut the yarn leaving about a 10-inch tail. Finish the hand with kitchener stitch.
Thumb:
Place the 29 stitches from the stitch holder on three needles. Pick up and knit two stitches from the hand of the mitten. Place a stitch holder after those two stitches to mark rows.
Row 63: k29, k2tog (30 stitches)
Row 45 – 85: knit (or until thumb reached the middle of the thumbnail)
Row 64: ssk, k11, k2tog, ssk, k11, k2tog (26 stitches)
Row 65: k
Row 66: ssk, k9, k2tog, ssk, k9, k2tog (22 stitches)
Row 67: ssk, k7, k2tog, ssk, k7, k2tog (18 stitches)
Row 68: ssk, k5, k2tog, ssk, k5, k2tog (14 stitches)
Row 69: ssk, k3, k2tog, ssk, k3, k2tog (10 stitches)
Row 70: ssk, k1, k2tog, ssk, k1, k2tog (6 stitches)
Cut the yarn leaving about a 10-inch tail. Finish the hand with either kitchener stitch or by weaving the tail through the remaining stitches and pulling tight.
Weave in ends.
Copyright 2014 Kathy Lewinski JustCraftyEnough.com
Do not duplicate for distribution, repost, sell or teach without permission.
These mittens have not been test knit by anyone but myself, so if you run into an error please let me know.
© 2005 – 2014 Kathy Lewinski & Susan Cornish

Pingback: Floral Mittens for May, in June | Knitting | CraftGossip.com
Pingback: ≫ Floral Mittens for May, in June – Knitting