
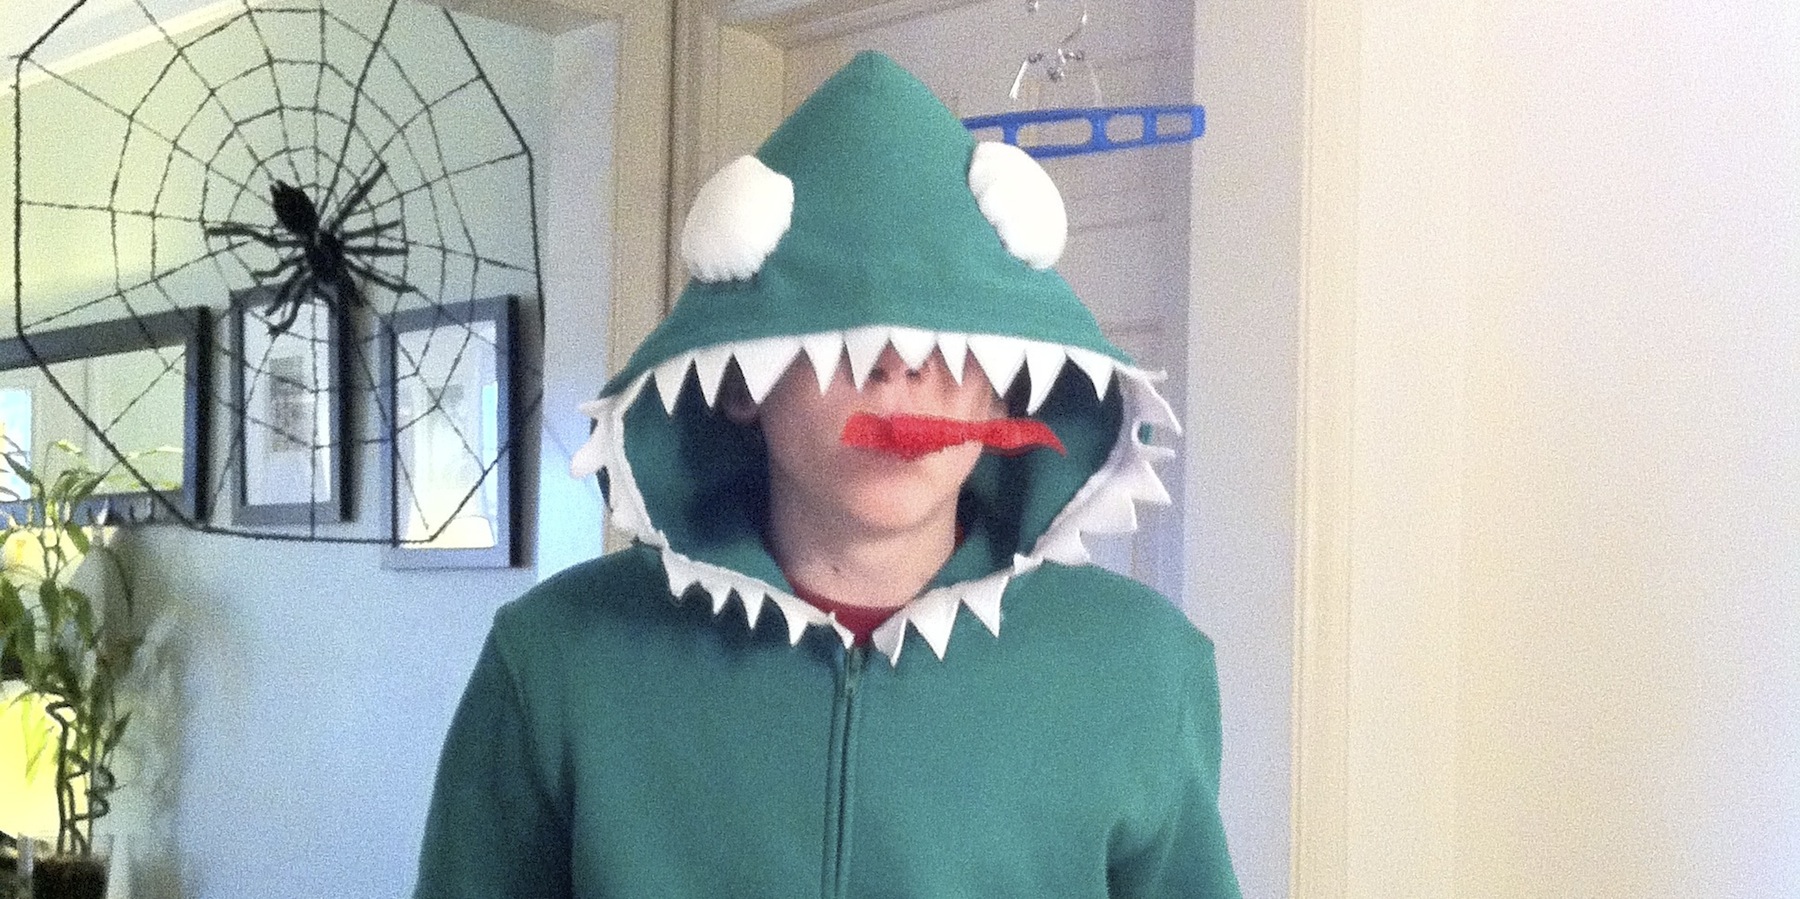

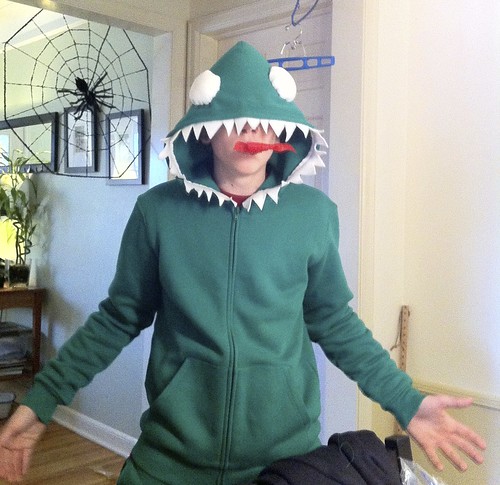
Last year Jenny figured she was done making costumes for Thing 1 since he was 13 and the years of Trick or Treating were over. Well, then came the invitations for boy/girl costume parties and believe it or not, he wanted Jenny to sew him a costume. He wanted to be Godzilla. He wanted the costume to be made from a sweatsuit similar to the costumes you often see like this for little kids. Here are the results (Well, the best pictures we could get of a 13 year old boy who didn’t want his picture taken.)
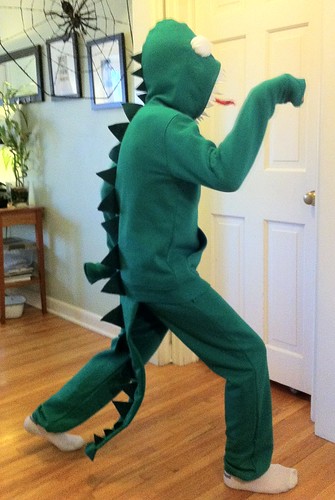
We even added flames to a party blower so he could breath fire. We made the tail so he’d still be able to sit down while wearing it.
I just noticed these pictures are even before the pupils were in the eyes! Yikes. Anyway, the costume was a big hit and since it was comfortable he kept it on all night at both parties. He liked the sweatshirt part of it so much he said he wanted to wear it even when it wasn’t Halloween.
This costume was pretty easy to make, though it took two of an afternoon to cut everything and then sew and glue it all together. Really the hardest part was finding a green sweatsuit!
Godzilla Costume
This costume was made to fit a 13 year old boy, it can easily be done for other sizes by changing the length of the tail.
Supplies:
- green hooded sweatshirt and pants
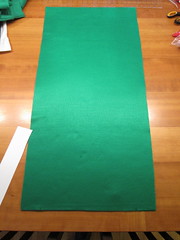
- matching green felt or fleece 18″ x 72″
- matching green thread
- cardstock or cardboard
- darker green felt 1/4 yard
- strong fabric glue
- 2 wire hangers or a length of stiff wire
- white felt 2 1/2″ x 36″
- white felt bigger enough to cut two 6″ circles
- stuffing
- scrap black felt
- red or yellow party blower (You want a blower that is made from more of a plasticy material than paper. I found mine at the dollar store.)
- red tissue paper or streamers
- tacky glue
Tools:
- yard stick
- marker
- sewing machine
- fabric scissors
- wire cutters
- hand sewing needle
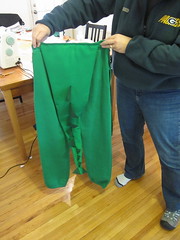
1. Make tail – Fold the large piece of green felt in half lengthwise, it’ll be 18″ x 36″. On the open side mark how wide you want your tail, ours was 12″. On the fold end mark the center of the fabric. Using your yard stick and a draw lines between your width marks and the center mark to create a triangle. This line will be your stitching line. Pin the felt together and sew along those lines with your sewing machine.

Now sew inside the triangle 1/4″ from the first stitching line. This will be your channel for shaping wire. Trim the excess felt from the outside of the first stitching line leaving about 1/4″ seam allowance. Turn right side out.
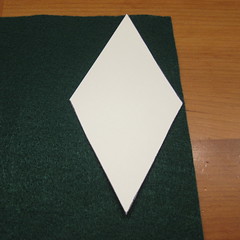
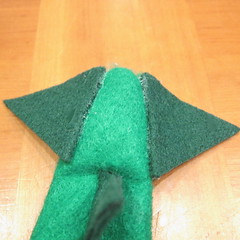
2. Cut out the spikes – We used the templates from See Vanessa Sew for our medium and large spikes. Then we made a smaller template for a spike that was 1 1/2″ across the middle of the diamond. Cut the templates out of cardstock or cardboard. Use the templates to cut 11 small diamonds, 5 medium diamonds and 6 large (you may need a different amount based on the length of your top and tail).
3. Attached spikes along the tail – Pin 3 small, 2 medium and 3 large diamond down the length of the tail. (You want the spikes to start at the top where the bottom of the shirt hits.) The center of the diamonds should run down the center of the tail. Pin them in place and then sew down the center of the diamonds. Make sure to put the diamonds right side down if you have a wrong and right side.
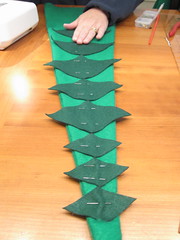
Put fabric glue on one side of the diamond. Fold both sides up and press together to form the spikes. Don’t worry if they don’t match exactly, just go back and trim them up if you want.
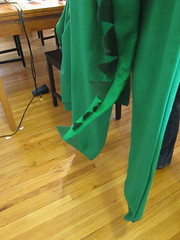
Fold and glue 4 more of the small diamond creating 4 triangles. Glue to then end on the tail, two on each side, one on top of the other.
4. Add shaping wire – Straighten out the two hangers (pliers can help with this). You will be inserting them into the channels on either side of the tail.

We wanted our godzilla to still be able to sit easily, so we trimmed the hanger wire so it only went as far up the tail as the upper thigh. Then once it was inserted into the tail we stitched the top of the channel shut.
5. Sew the tail to the top of the sweatpants. Shape the wire at the end of the tail to make it curl up.
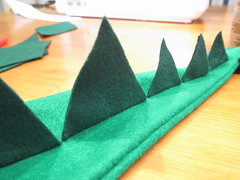
6. Add spikes to the top – Using the same method as the tail layout and attach spikes from the back of the head to the bottom of the shirt (Godzilla doesn’t have spiked on the top of his head). Start with smaller spikes and move to bigger.
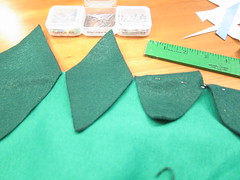
Folding the back of the sweatshirt in half makes it easy to line the spikes up down it.
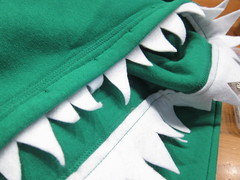
7. Add teeth – Measure around the edge of the hood starting and ending where it joins the shirt, ours was 30″ long. Using the long strip of white felt cut random sized teeth a slightly longer length than you want them when finished. Sew to the inside of the hood. Trim any excess.

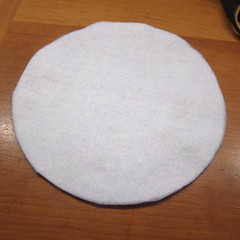
8. Add eyes – Cut two 6″ circles from the white felt. Baste a line of hand stitches about 1/2″ from the edge and pull tight. Stuff.
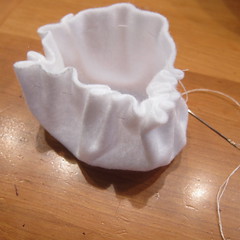
Sew shut. Pin onto the hood, you want them to be closer to the top than the sides. Hand stitch into place. Cut two small circles from the black felt for pupil and glue onto the eyes.
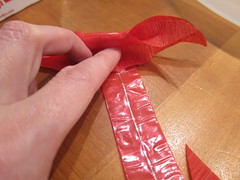
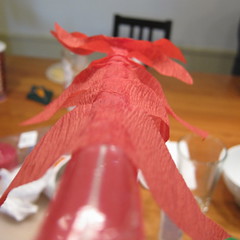
9. Flame blower – Roll out the party blower and use a couple small heavy thing to hold in place. Cut the streamers or tissue paper into rectangles and then shape the ends of the rectangles into flames.
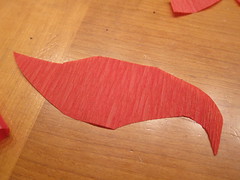
Put tacky glue down the center of the blower and attach the flames.
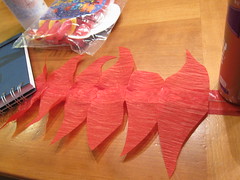
Let dry then roll back up. Now you can breath out fire.
© 2005 – 2013 Kathy Lewinski & Susan Cornish


Pingback: Dollar Store Crafts » Blog Archive » 10 Awesome Godzilla Crafts