
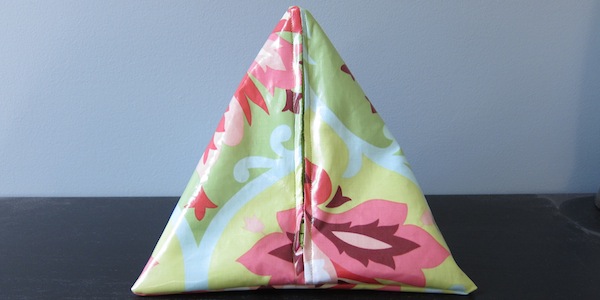

I saw a door-stop that was in the shape of a pyramid over Christmas (in England) and I have had that shape in my mind ever since.

With that inspiration (and sewing challenge) I added a zipper, and made a little travel tote for toiletries.


Once you get the hang of where you are going, it’s easy. Want to try one?
Pyramid Bag
Supplies:
- Vinyled Cotton
- Lining fabric
- zipper (7″)
- Thread
- Sewing machine
- Kitchen towel and an iron

The basic math for this bag is a ratio of 2:1. Make the long side 2x the short side.
So, I started with a zipper that is 7″, when measured is the WHOLE zipper is actually 9″. Adding for 1/2 seam allowances, cut fabric into a 9.5 x 19 rectangle. One rectangle out of the lining fabric, and one out of the vinyled cotton.
Fold the vinyled cotton in half length0wise with the right sides together and sew into a tube. Set your sewing machine to a HUGE stitch, and sew across the whole seam. Then pick a regular stitch length, and reinforce the bottom 1.5 inch and top 1.5 inch of the seam. (The middle, you will open with a seam ripper later, to expose the zipper itself.) With a thick dish towel on top press the seam open.
With the lining cotton, make a tube and insert the zipper so that the right side of the zipper is on the wrong side of the fabric.
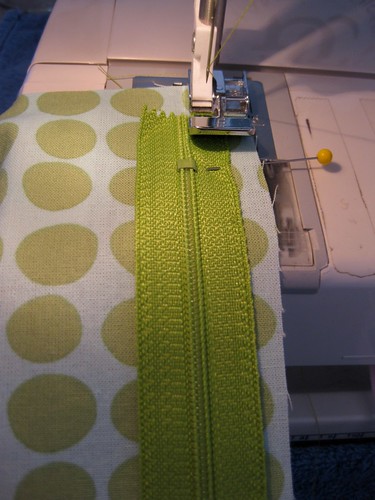
To do this, flip the zipper over, and (using the zipper foot on your machine) sew it to the right side of the fabric.
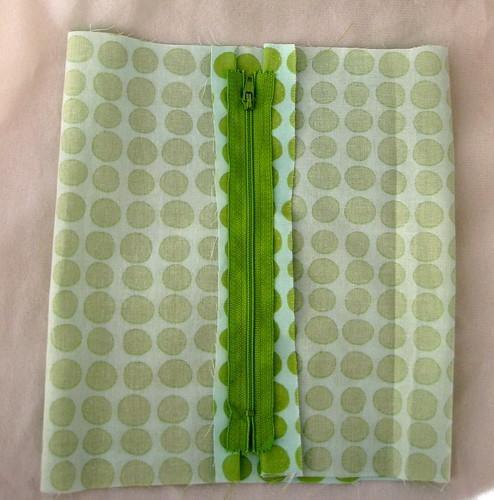
Using a cloth again, press the seam open.
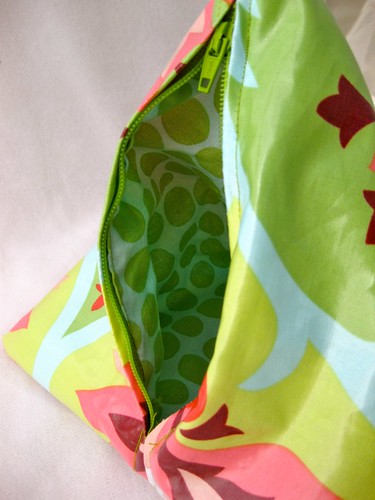
Insert the zipper tube into the vinyl tube.
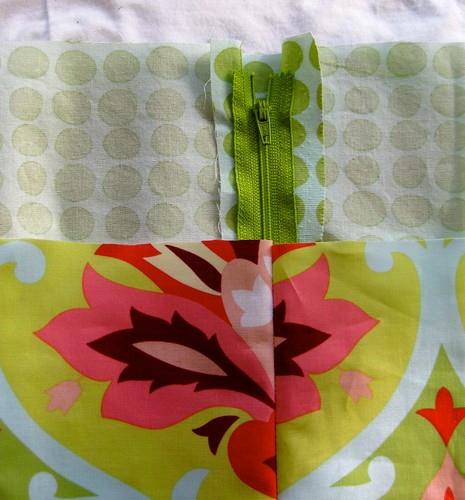
(In this picture, the tubes are inserted correctly, but for illustration purposes, they are not lined up. Line up the top of the inside tube with the top of the outside tube before sewing it down.)
Using your zipper foot still, top stitch so that the sides of the zipper are sewn down on the vinyl cloth.
With two tubes finished, now the “construction” part of the project begins.
(I will admit to you that before this started, I made a pattern out of a grocery bag. If you want to change the size of the finished bag, starting with a different zipper, or you need to make a road map first, just whip open a grocery bag, and make a pattern.)

It really helps to see the angles.)
The seam at one end of the zipper will be pulled and sewn to make a “T” shape with the zipper.
Turn both of the tubes inside out, and sew them each shut separately.
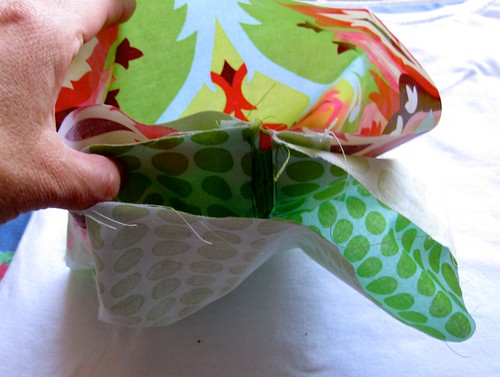
This picture shows the open end, with the first set of seams done at the other end.
Next, take the other side and pull the fabric so that the seam is running in the other direction. (If you drew a line with your finger, it would draw an “L” shape, with the zipper being one leg, and the seams being the other leg.)
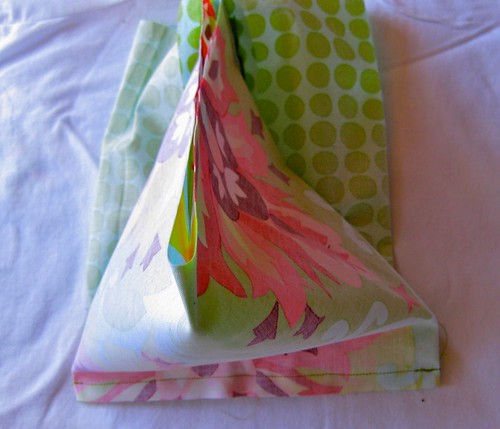
Here it is set up for the next seam. (Both pieces are still inside out, so there are essentially two separate pyramid shapes you are making)
Stitch all the way across the vinyled cotton. On the cotton lining, stitch across only part way. Leave at least 2 inches open. Clip the corners. Turn the whole thing inside out through that hole and stuff the cotton lining into the bag. Open the seam in front of the zipper, being careful not to cut the bag, and stop 1 inch from the end (where you reinforced the stitches earlier.)
And VOILA!
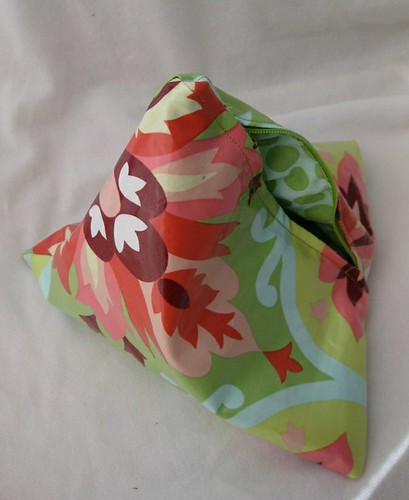
The unusual shape takes it one step up from the normal pouch without too much extra work or time.
Have fun! And if you try it, post us a picture to show us.
© 2005 – 2012 Kathy Lewinski & Susan Cornish


3 Comments to Bag of the Month – Pyramid Bag