

Happy leap day! We are coming in right under the wire for the February bag of the month. Actually I have an excuse, this bag was my latest Iron Craft project and I wasn’t allowed to show it until yesterday.
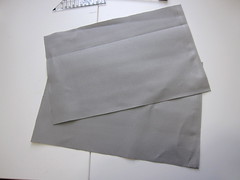
We were asked to make something inspired by something for sale in a catalog or online. My inspiration was the Fossil Penelope Tote.

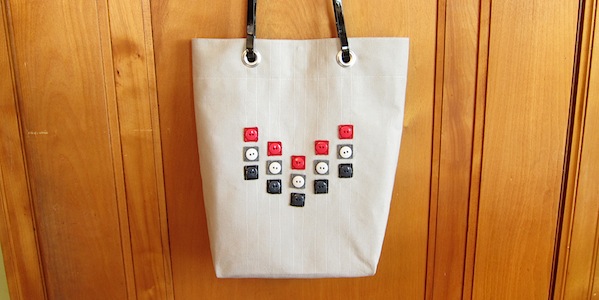
My bag is smaller than the original, more of a purse size than tote. Jenny at A Mom and 2 Things liked it so much that she made one too, in a slightly bigger size.
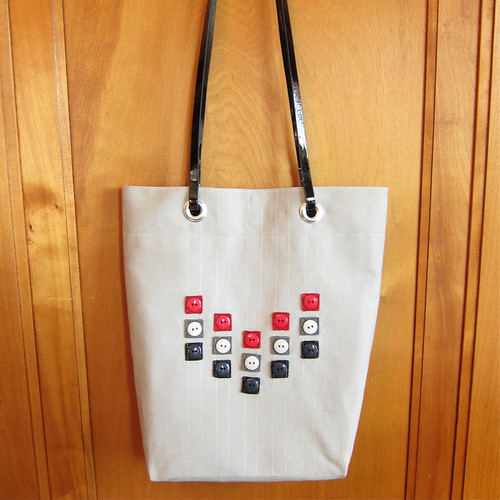
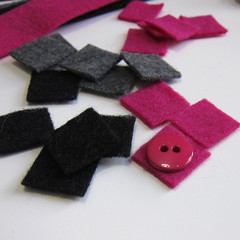
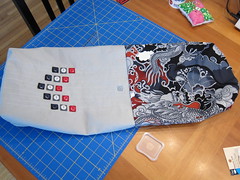
We had to get clever with some of the materials for this bag. The original had leather squares with suede circles. We could not easily find the suede or leather in multiple colors, plus we knew it would be tricky to sew. So our bags are decorated with felt squares topped with buttons.
Then came the issue of the straps. Neither of us liked the brown one on the original, so we looked for something in black or, in my case, red. Boy, choices were slim at craft and fabric stores. There were a lot of choices on Etsy, but we didn’t have time to have them shipped from Hong Kong or Korea. The answer came on a shopping trip to H&M: skinny belts! They were cheap and a great length.
Penelope Bag
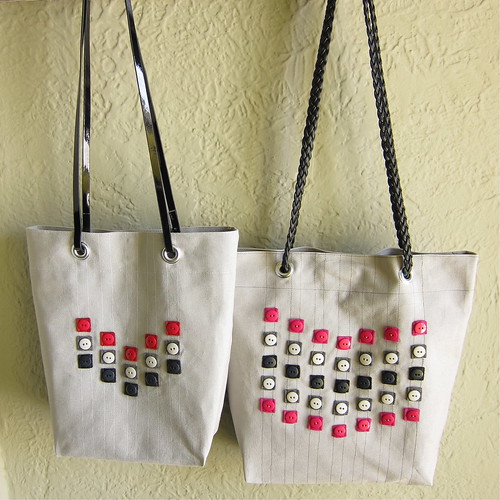
We made this bag in two sizes, 10″ x 13″ and 14″ x 14″ both with a 3″ gusseted bottom.
Unless otherwise specified all seam allowances are 1/2″.
(Click on any picture in this tutorial to see it bigger.)
Supplies:
- 1/2 yard canvas for outside of bag
- 1/2 yard fabric for inside of bag
- scissors
- ruler
- thread to match outer fabric and buttons
- hand sewing needle
- felt in various colors
- fabric glue
- water soluble marking pen or pencil
- 5/8″ buttons to match felt (or contrast, your choice)
- magnetic purse snap
- extra large grommets
- two 1/2″ or thinner leather (or leather-like) belts
- super glue (optional)
The instructions start with the outside of the bag. First we cut the fabric, then we add the embellishments.
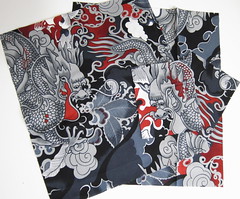
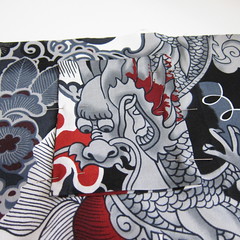
1. Cut the canvas into two 13″ x 17″ rectangles (for 15″ x 18″ larger bag)
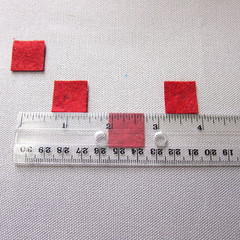
2. Cut your felt into 3/4″ squares. They should be just slightly bigger than your buttons.
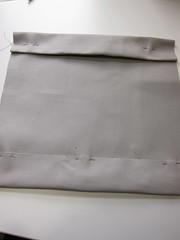
3. Lay out your design with the felt squares on the right side on one piece of the canvas. Keep in mind your bag is longer than it is wide. Turn over the 2 1/2 ” at the top of the fabric and 1 1/2″ at the bottom and pin them down.
With those hems turned under, you will see the finished size of the front of your bag. Use a ruler to find your middle to help start the layout. (You don’t want any squares in the top 2″ of the bag as this is where your clasp and grommets will be.)
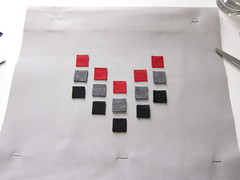
Use a ruler to evenly space out the squares. On the smaller bag they were 1/2″ apart horizontally and 1/4″ apart vertically. On larger bag they are 1/2″ in each direction. Play with them until you are pleased with the layout.
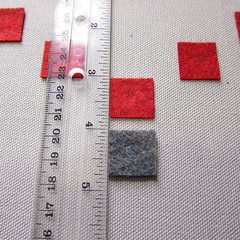
Glue the square in place with a dot of fabric glue. (Don’t use too much as it’ll make it harder to sew your buttons on later.)
4. If you have pinned the top and bottom of the front of the bag under, unpin them now. Sew straight lines from the top of the front of your bag to the bottom, just catching the edge of the felt squares about 1/8″ in. I found it helped to use a ruler and draw the lines I was going to sew with a water-soluble pen or pencil. (Make sure to check that the ink will easily wash off your fabric before using. I didn’t and had a heck of a time getting it off.)
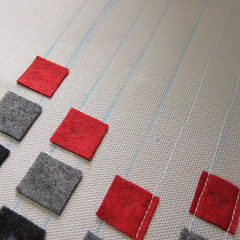
You can use a thread that matched your fabric to blend in or a contrasting thread to make the lines stand out more.
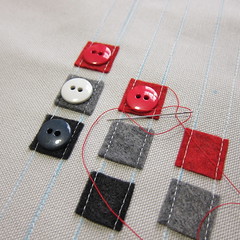
5. Sew a button on top of each felt square.
6. Attach the magnetic clasp to the bag. Note: the outside fabric of your bag will also be the top 2″ of the lining, so your clasp will be attached to it.
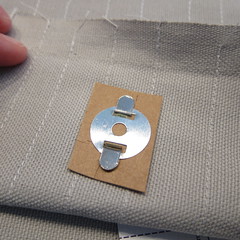
To help the clasp stay secure to the bag, cut out small cardboard rectangles to go between the back of the clasp and the fabric.
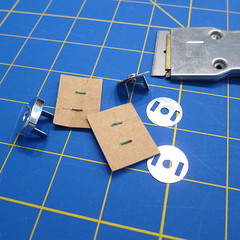
You want to find the middle of the bag 1 1/2″ down from the top. Use the back of the clasp and your fabric pen to mark the placement. Then carefully cut the slits for the claps and put its prongs through the fabric. The prongs will be on the wrong side of your fabric and the magnetic end of the clasp will be on the right side. Place the cardboard on the prongs and then the back. Bend the prongs over to secure. Repeat on the other piece of canvas with the other side of the clasp.

Now we cut the lining.
7. Cut two rectangles 13″ x 14.5″ from your lining fabric (15″ x 15.5″ for the larger bag).
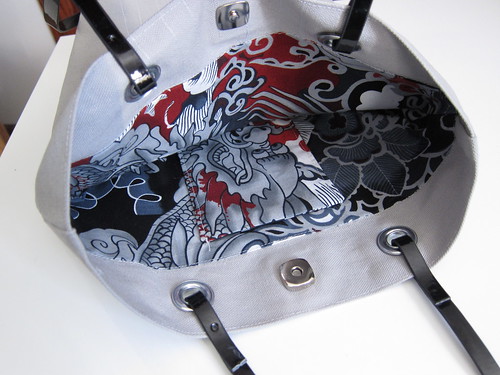
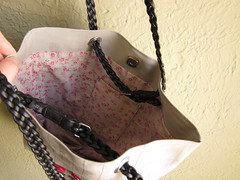
If you want a pocket in your bag cut it out too. We both made 4″ x 5″ pockets to fit our iPhones and sewed it on the right side of one piece of lining.
Next we’ll sew our canvas and lining pieces together and create the gusseted bottoms.
8. Put your canvas pieces together right sides facing. Sew both sides and the bottom together.
Next, make a 3″ gusseted bottom. Line up your bottom seam with your side seam at each corner creating a triangle. ( I find it helps to pin the seam together.)
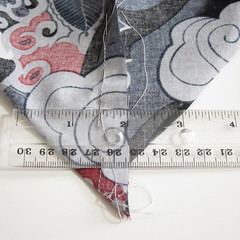
Then use your ruler to mark where the triangle is 3″ across (the distance will be 1 1/2″ up the seam, and 3″ across the long side of the triangle. That long side will be the seam.). Make a line at 1 1/2″ up the seam, and sew across that line. Do that at both bottom corners making sure the seam allowance lays the same direction across the bottom of the bag.
Repeat this process with the lining pieces except leave about 3″-4″ open in the middle of the bottom seam. (You will need this to turn the bag inside out through later.) Press your seams.
9. Turn your lining right side OUT and put it inside the canvas bag (it should still be inside out), your right sides will be together. Pin the two together around the top matching up the side seams.
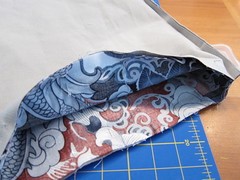
Sew all the way around.
10. Pull the outside of the bag through the opening you left in the bottom of the lining. Iron the seam between the two pieces flat.
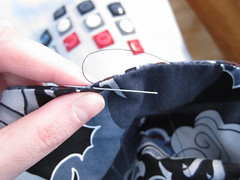
Sew the opening at the bottom of the lining shut. I did it by hand, Jenny used her machine.
11. Push the lining into the bag, folding over the canvas until 2″ of it is also on the inside of the bag. Use your ruler to make sure it is even all the way around and pin it in place. Top stitch 1/8″ in round the top and then again 2″ in.

12. Figure out how far apart you want your straps and mark out their placement 1″ from the top of the bag. The use your grommet and marking pen to mark where the grommets will go.
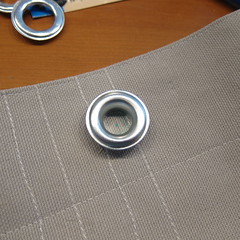
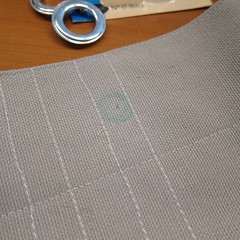
Carefully cut out the circle for the grommet or use an eyelet tool. Attach the grommets according to the directions that come with them.
13. You can attach your straps in one of two ways. I cut the ends off my belts, put them through the grommets and super glued the ends into a loop.
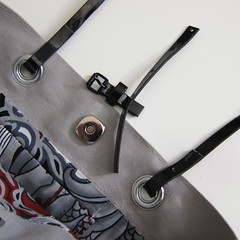
Jenny just put her straps through and buckled the belt.
And there you have it!
We would be excited to see other interpretations of the bag. Be sure to post pictures to our Flickr group if you do one too.
Happy Crafting!
© 2005 – 2012 Kathy Lewinski & Susan Cornish


One Comment to Bag of the Month – Penelope Bag