

Hi, this is Jenny from A Mom and 2 Things welcoming you to the first Bag of the Month here at Just Crafty Enough. When Susi said she was thinking about doing a Bag of the Month, I told her that I would be happy to help from time to time.
The original idea for this bag came a couple of summers ago when our family was planning a major road trip to visit my brother on the Outer Banks of North Carolina. It drives me crazy when we travel and my kids have stuff all over the backseat and floor of the car, especially in the winter when the floor is wet. I decided to modify a simple tote bag to hang in front of them in the back seat of the car. I made each Thing two of them. One is sized to hold a clipboard for drawing, their DS and other stuff. The other, smaller bag, holds the DVD player.
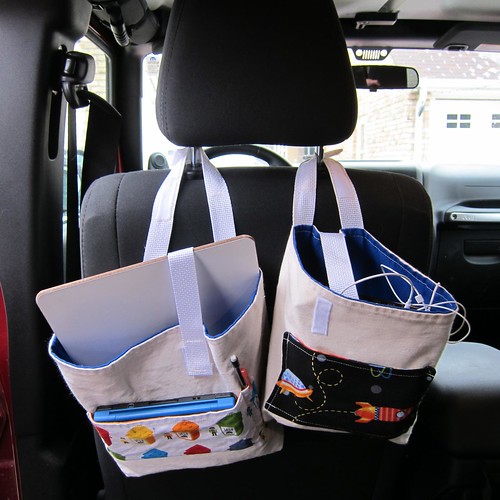
The straps come apart using velcro, so they easily attach to the headrest of the front seat. The strap over the opening keeps the bag from opening too much and spilling things out. The velcro allows it to be adjusted to fit whatever the Things put in the bags. The back seat is much neater and each boy is responsible for bringing his own bags of stuff in each night.
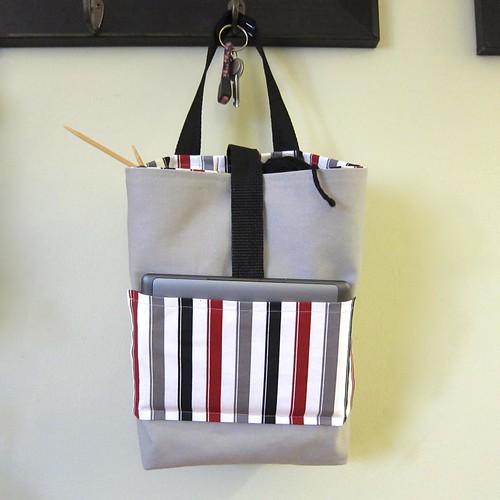
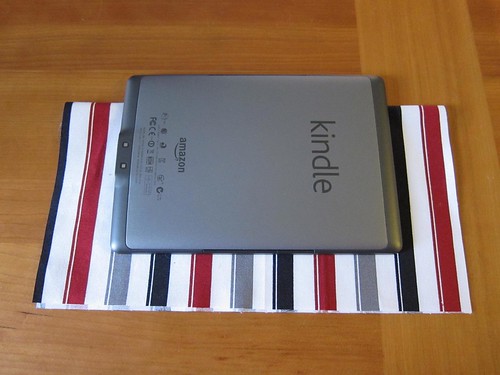
After a trip this fall to Colorado I decided that I needed one that I can hang on the handrail in the dashboard on my Jeep. It will keep my knitting and Kindle off the floor.
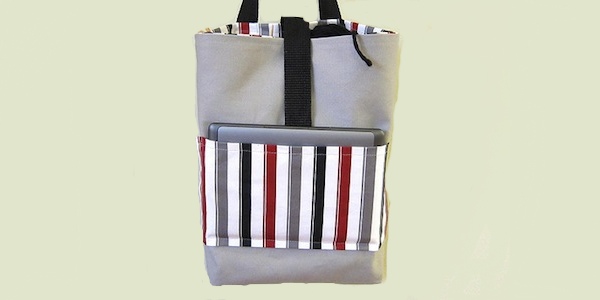
Seat Back Car Tote
This tutorial makes a bag that is 8″ wide, 9″ tall and 3 1/2″ deep, though you can size it to your needs.
Unless otherwise noted, all seam allowances are 1/2″.
Supplies:
- 1/2 yard canvas fabric
- 1/2 yard co-ordinating cotton fabric for lining and pocket
- scissors
- ruler
- thread
- sewing machine (though you can hand sew this if you wish)
- fabric maker or pencil
- 26 inches 1″ webbing
- sew-on velcro
1. Cut two 12″ x 13″ rectangles from both the canvas and lining.
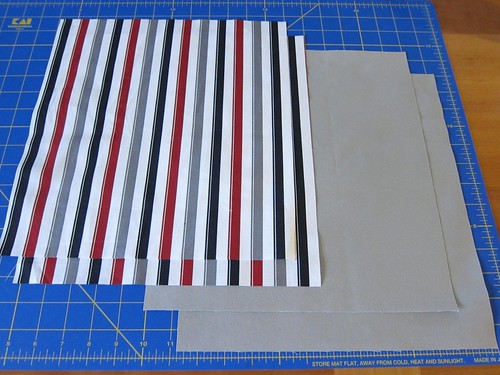
2. Cut a piece of fabric for the front pocket. You will be folding the fabric to be the outside and inside of the pocket. The size of this will depend on what you want to put in it. You want the square to have 1 1/2 inch more fabric on three sides once it is folded. (If the item you want to store in the pocket is thick, like a DS, you may want to also add that dimension to the 1 1/2 inches.)
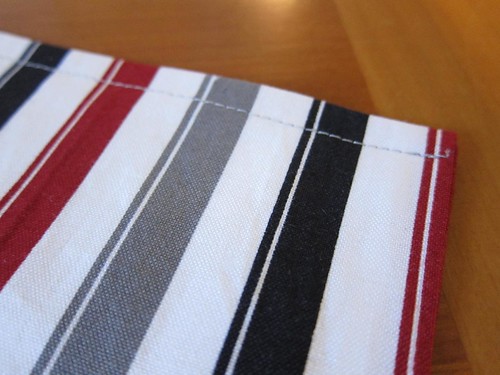
3. Fold your pocket piece in half, right side together. Sew one short side and the long side. Clip the corners. Turn right side out. Press the open side in 1/2 inch. Top stitch 1/4″ on the folded side of the pocket for a neater look.
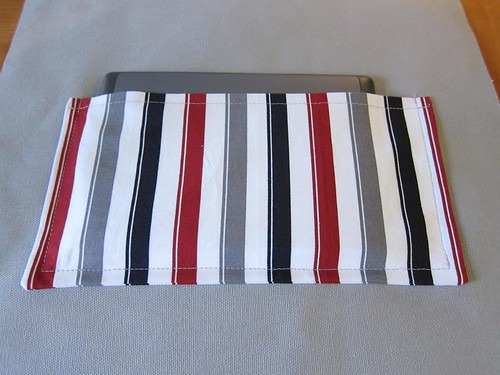
4. Sew the pocket to the right side of one of your canvas pieces. When placing the pocket on the canvas remember the gusseted bottom will take up 2 1/4 inches on the bottom of each canvas piece. I placed my pocket 4 1/4 inches for the bottom and then centered it side to side. Sew the pocket on with a 1/4″ seam on both sides and the bottom . Remember your bag is longer than it is wide.
5. Pin the canvas pieces together right sides facing each other. Sew the two long sides and one short side together (make sure the open side of your pocket is facing the same direction as the side you leave open when sewing the canvas pieces together.)
6. Pin the lining pieces together right sides facing each other. Sew two long sides and one short side together.
7. Make 3 1/2″ wide gussets on the bottom of both the exterior (canvas) and interior (lining) of the bag. With the bag pieces still inside out, match the side seam with the bottom seam making the corner into a point. Use the ruler to find where base of the triangle is 3 1/2 inches wide.
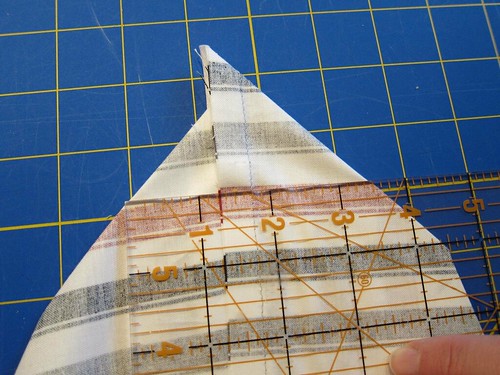
Draw this line with a fabric marker or pencil. Pin together.

Sew along this line. Repeat for both corners of each bag piece. Make sure that the bottom seam allowance is folded in the same direction for both gussets on each bag piece.
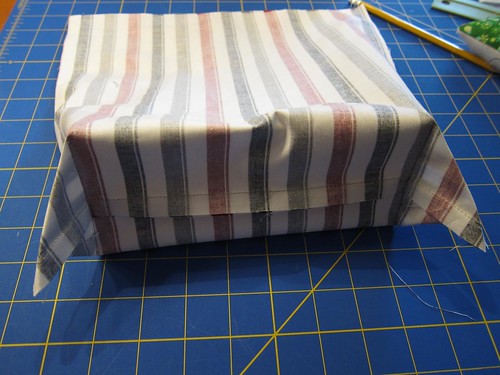
Trim the gussets. Press your seams.
8. Cut the webbing into two 8″ pieces and one 10″ piece. The 10″ piece keeps the main part of the bag from flapping open. My kids like to keep clipboards for drawing in the bags, so I needed the webbing to be long enough to go over a clipboard. For my own bag, I only planned on keeping knitting in it, so I didn’t need as long a piece of webbing. I would suggest you start with 10″ piece and then cut it to size when you know what will be in the bag. (or you can use the 10″ webbing and put a long piece of velcro on the it to adjust the length as needed.)
9. With the exterior of the bag still inside out, pin the webbing pieces to the back of the bag with about 1″ of the webbing sticking above the top of the bag. The long strap should be centered and the two shorter ones are on either side of it about 1″ apart. (When I made my boy’s bags I placed the webbing off center, so the bags hung side by side better.)
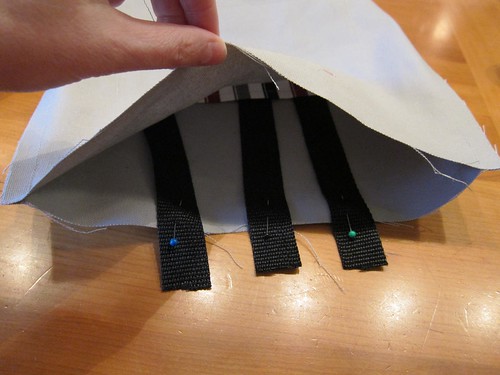
10. Turn the interior piece of the bag right side out. Put inside the exterior piece matching up the side seams. (The webbing will be in-between the two pieces.) Sew around the top of the bag leaving a section open that is big enough to pull the bag through, about 3 inches. Make sure that opening isn’t on the back where your webbing is because you want that sewed down.
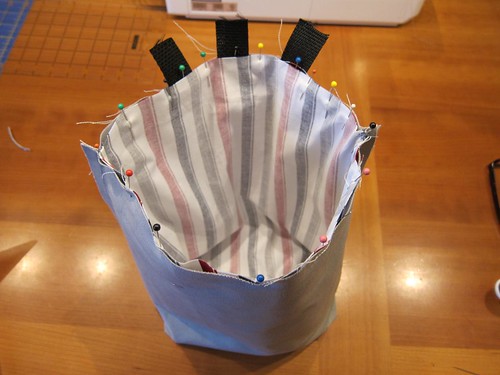
11. Turn the bag out through the hole.

Push the lining into the exterior of the bag. Press the top seam. (Be careful of your webbing because some webbing is made of plastic and will really mess up your iron and bag, I know from experience.) Topstitch 1/4″ in around the top of the bag, this will close the hole you left open.
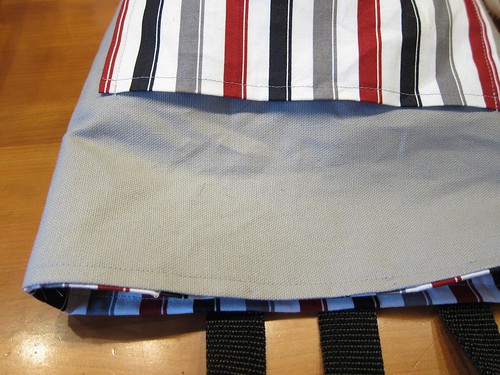
12. Sew opposing pieces of velcro to each end of the short pieces of webbing. Sew a piece of velcro to the end of the long strap. Sew it’s opposing piece to the front of the bag in the center above the pocket. Sewing this through both the exterior and lining of the bag will help keep the lining in place. My secret for sewing on velcro is that I tape it in place with scotch tape and then sew right through the tape. It really helps keep it in place.
13. If you plan on heavy items being in the bag you may want add some re-enforcing stitching where the ends of the webbing are inside the bag.
14. If you used plastic webbing you can use a lighter to melt the ends so it won’t fray. If you used cotton, fold the ends over an stitch them down.
Now you are ready to fill the bags and take a road trip.
© 2005 – 2012 Kathy Lewinski & Susan Cornish


3 Comments to Bag of the Month – Seat Back Tote