

It seems like a lot of people got Kindles or Nooks this year for Christmas. My husband Matt asked for one and also asked that I make him a sleeve for it. He didn’t care for the extra bulk that so many of the commercially available covers added. I had made myself a sleeve last year and he liked how this it is.
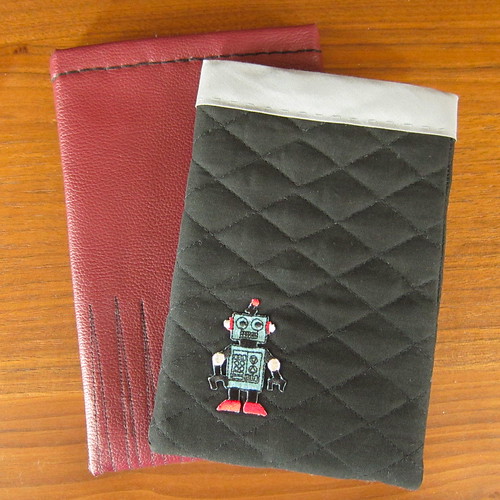
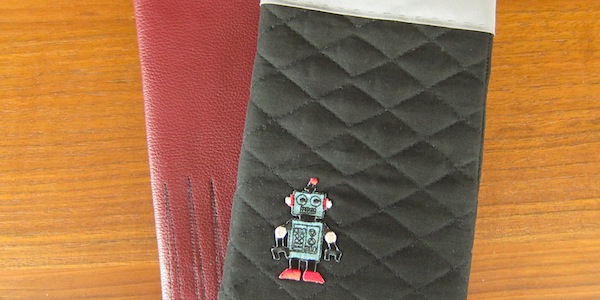
These are our two sleeves. Matt’s is made with pre-quilted fabric and mine is made from vinyl with a soft interior. They are so simple to make with just two side seams and a top hem. You can personalize them anyway you like with appliqué and embroidery. They are just tight enough that the reader doesn’t fall out, but is still easy to take in and out.
Easy eReader Sleeves
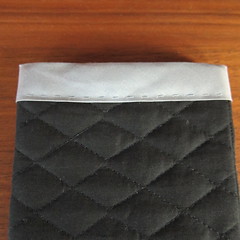
Quilted Sleeve
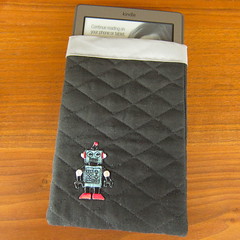
This pattern is written to fit the smallest, most basic Kindle. I’ve added notes so you can size it to any eReader you have.
Supplies:
- 1/4 yard pre-quilted fabric (this will actually give you enough fabric for 3 sleeves)
- Scissors
- 1 foot 7/8″ double fold tape
- matching tread
- pins
- hand sewing needle
- iron-on decoration (optional)
Cut the quilted fabric into a rectangle that is 5 3/4″ x 14 1/4″. (For other eReaders make the width 1″ wider than your reader. The height should be twice the height of your reader plus 3/4″.) Fold in half right sides together, you should have a rectangle that is 5 3/4″ x 7 1/8″. The fold will be the bottom of your sleeve. If you are adding any embellishment like an iron-on now is the time to figure out placement and attach it. Sew the side seams leaving a 1/4″ seam allowance. Trim the seam allowance to about 1/8″.
Turn right side out. Open the double fold tape and place it over the top edge of the sleeve. Pin it in place all the way around with the ends over lapping in the middle of the back.
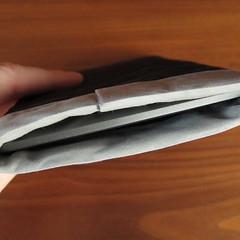
Sew in place by hand stitching close to the edge. It is a little tricky around the corners, but you can flatten it out as you go.
When you get to the end turn you want the edges to overlap, but you also want to turn the edge of the very end inside. Whipstitch that overlapping seam in place.
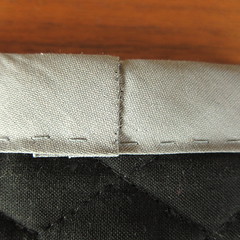
Press if you wish.
Vinyl eReader Sleeve
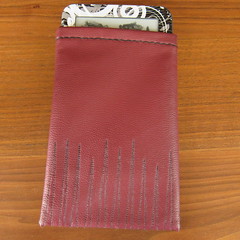
This is sized to fit a Kindle keyboard version. Once again I’ve added notes so you can make it for any eReader.
Supplies:
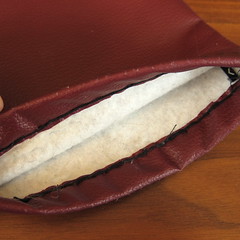
- 1/4 yard vinyl (Look for vinyl that has a soft, cotton on the wrong side)
- thread
- scissors
Cut a rectangle of the vinyl that is 6″ x 17 1/2″. (For other eReaders make the width 1″ wider than your reader. The height should be twice the height of your reader plus 1 1/4″.)If you want to add some contrasting stitching do it now. I did a large easy zig-zag design in contrasting thread using my sewing machine.
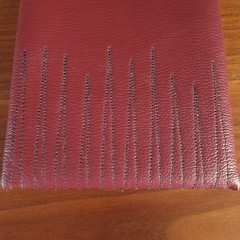
The center of the pattern is at the middle of the rectangle, so the pattern is on both side of the sleeve.
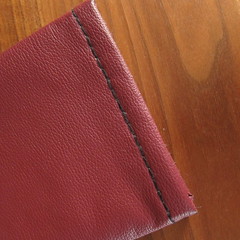
For the rectangle in half, right sides together. You will have a rectangle that is 6″ x 8 3/4″. Sew the side seams with a 1/4″ seam allowance. Turn right side out.
Fold the top edge in about 1/2″. Do not pin it down as that will leave holes in your vinyl, you can use paper clips or alligator clips to hold it in place if you wish. Hand sew down in backstitch. I did it twice around to really secure it.
You can trim the inside close to the stitching if you wish.
If you make a sleeve we’d love to see it in our Flick group.
© 2005 – 2012 Kathy Lewinski & Susan Cornish


3 Comments to Project – Easy eReader Sleeves