

I put my knitting project down a little while back and this week was the time to pick it up. It turned out the pattern for the sleeves was a little crazy. So there was some ‘figuring out’ work that needed to be done.
When I get stuck on a sweater, there is a series of steps that I run through to try to ensure my success in the end.
The first order of business is to get a out a sweater that has a similar silhouette to the stalled out project. Choose a sweater that you have that fits you well, and have it on stand by as a reference for the pattern.
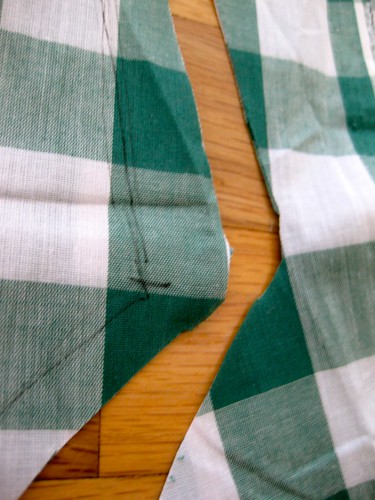
To work through the problems, I created a template. I used gingham for this, which has the advantage of working like a huge sheet of graph paper. Here are the steps involved:
- Sketch out the sleeve shape onto the fabric, using the schematic from the knitting pattern – leave 3 inches of length at the cuff end, and at least an inch all around
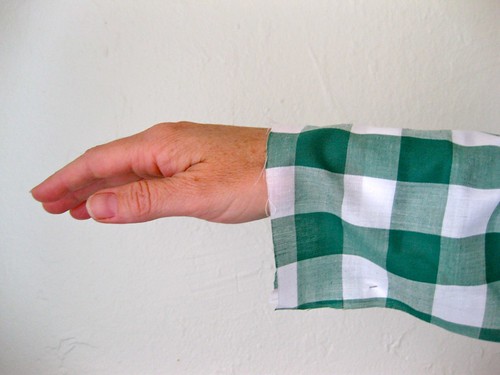
- -before cutting- hold up the fabric to your arm and try it on to see if it will be a good fit. If it is a little on the big side, go ahead and cut.
If it is snug, or too small, draw a second line around an inch away from the original, and then cut.

- Carefully pin your sleeve seam, and try the sample on again. Remember, knitting stretches, so the fit can be a little bit snug in the arms. (If you were using the ‘cut the pattern out of cloth first’ method for the whole sweater, and it was tight in the chest, that might not work as well. If it were a cardigan and it were tight in the chest, it would gap at the buttons, and just look ill-fitting. But that, dear readers, is another post entirely.)
- Lay the fabric template out on a flat surface (on carpet, or a bed spread, something to hold the fabric just a little bit. ) and then lay your knit piece out. Spread it out and stretch it gently. Here is where you fight your desire to just HAVE THIS THING DONE. You could stretch this piece to be any shape you wanted, so be realistic. You won’t regret it.
If you are a visual knitter, you can follow the template, and just knit to shape. Take a few notes, to make sure that your sleeves match and you are able to knit the second sleeve easily.
I made my sleeve mock up according to the pattern schematic, and as you can see from the pictures, the cuff area is just huge. The pictures the pattern provided do not show a bell sleeve, and this is not a look I was going for.
The pattern has a schematic, and it calls for a 12 inch cuff. My wrist is 6.5 inches around. So that is 6 inches of ease. At that point it literally becomes a ‘design element’, rather than a knitting issue or a fit issue.

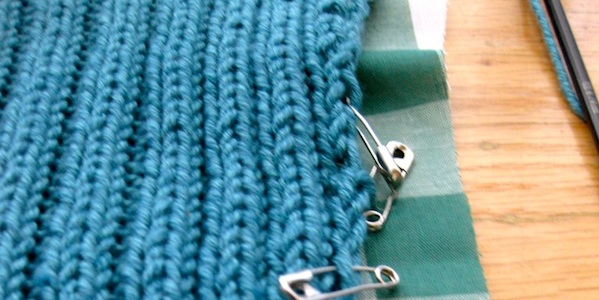
I laid my sleeve as it stands on the pattern, and we are right on track. I am also glad I left loads of extra length at the bottom, because it needed an extra 2 inches. Here is the sleeve ‘at rest’
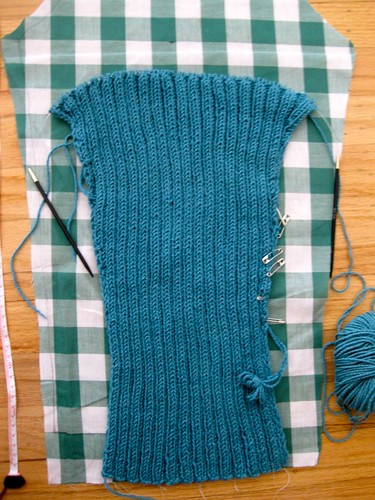
And here is the sleeve slightly stretched.
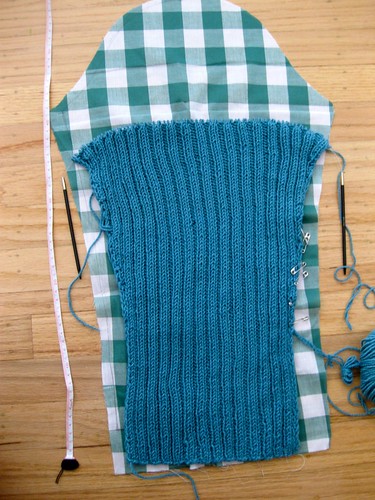
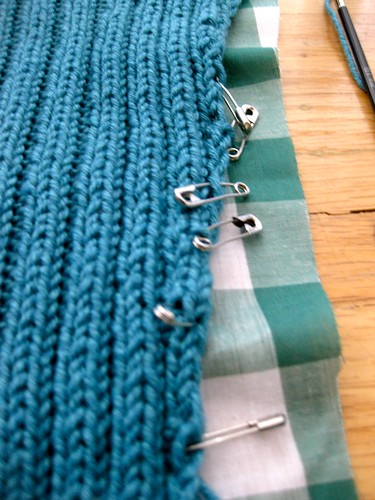
Because I made up the pattern for the sleeve, I needed to take careful notes on what I did. I used quilting safety pins to make the rows where I did increases. That way, I can make the second sleeve to match the first.
While I may not get the sweater done this week, I have done the work to move it from the “pile” to the bag. Now I can grab it and knit when I have time, and know that I am going to be “on course.”
I’ll post updates soon!

2 Comments to The Architecture of a Sleeve