

This week for Iron Craft Susi challenged us to make something from books. I knew I wanted to do something with words or quotes, but had no idea what. My first thought was to scan a favorite passage from a book and print it on water decal paper to use on a votive candle. Only problem was a couldn’t find my water decal paper and didn’t have time to order more. That started a challenge full of problems for me.
Then I remembered these cool shrinky dinky rings from PlanetJune that I’d been wanting to make. I though it might be cool to make them with a favorite quote from one of my favorite authors, Jane Austen.
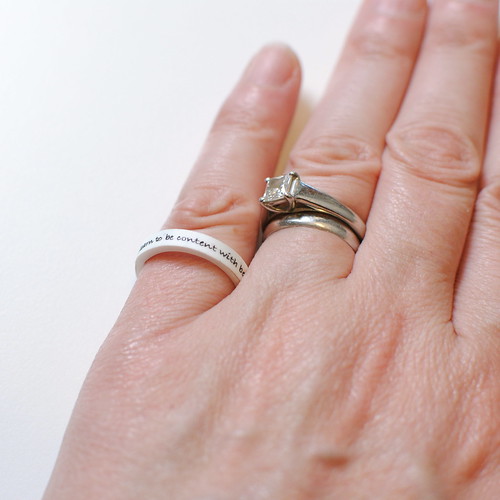
Yeah, this is the only one that worked. First, it was really hard to find something round that was the same size as my finger to shape the ring around, I ended up using a mini-flashlight. Then I had to make four test rings to come up with the right length to start with before shrinking (and even then my final ring needed to be trimmed). Next came printing on the Ink Jet Shrink Plastic, which came out a smudged mess except for two quotes on a whole sheet.
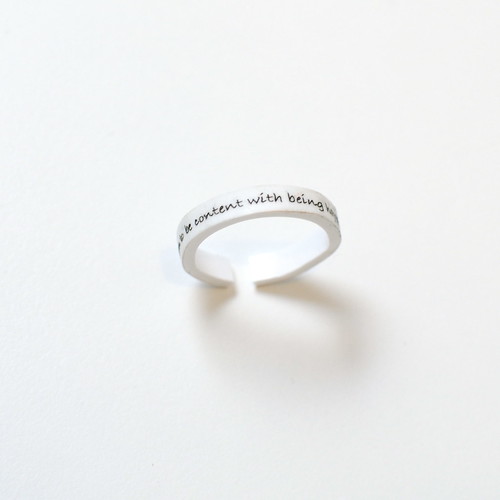
The baking was easy, but getting the hot plastic strip out of the oven and wrapping it around the flashlight before it cooled almost impossible (PlanetJune calls it tricky). You can reheat the plastic and wrap it again if the shape isn’t right, it took be three tries to get this ring to this shape. The second ring I tried stuck to itself when it was shrinking and was only good for the garbage. The final straw was that when I tried to put a clear coat of varnish on the ring as was suggested, it smudged the words ruining this ring.
Ok, I still like this idea, but need to work on it. I think the best thing would be to have someone with nice handwriting write the quote, so you wouldn’t have to worry about smudging in the printer. I would also maybe get a dowel or something that was the right size to use as a mold. Finally, I would practice, practice, practice wrapping the rings until a got good at it.
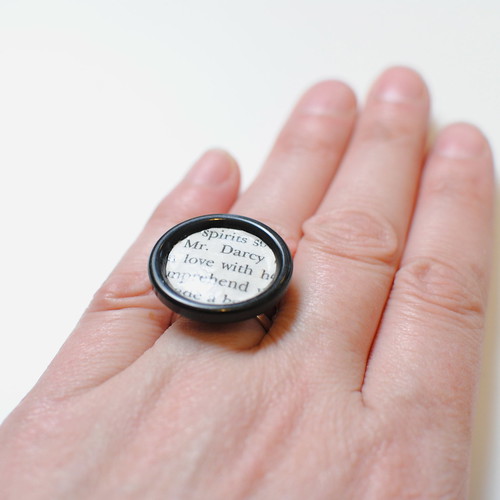
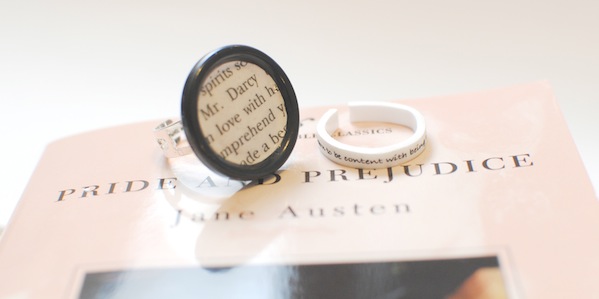
I did have one other idea for a ring. This time I wanted to mod podge a section cut right out of a book onto a button ring, sort of a cocktail ring for readers.
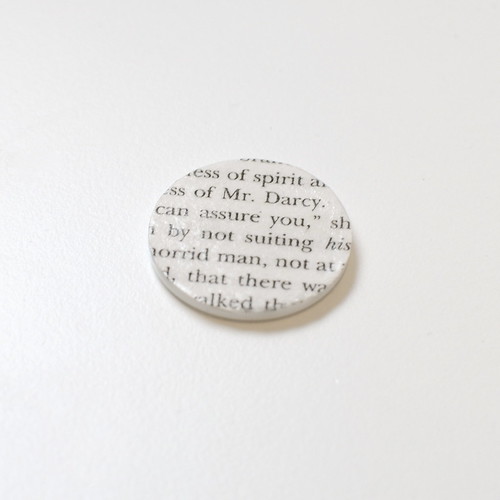
My first thought was to completely cover a flat button. I didn’t really care for it as a ring, though it might make a interesting pin. So then, I cut a smaller circle and mod podged it into the inside of a button with a raised edge. This one is better, though I might fill it with some resin.
So, no real winners this week, but I did get to try some new techniques and somethings I might play around with again.
© 2005 – 2011 Kathy Lewinski & Susan Cornish


6 Comments to Iron Craft Challenge #35 – Jane Austen Rings