

For this Iron Craft challenge, we were asked to create something for a man or boy in our lives…
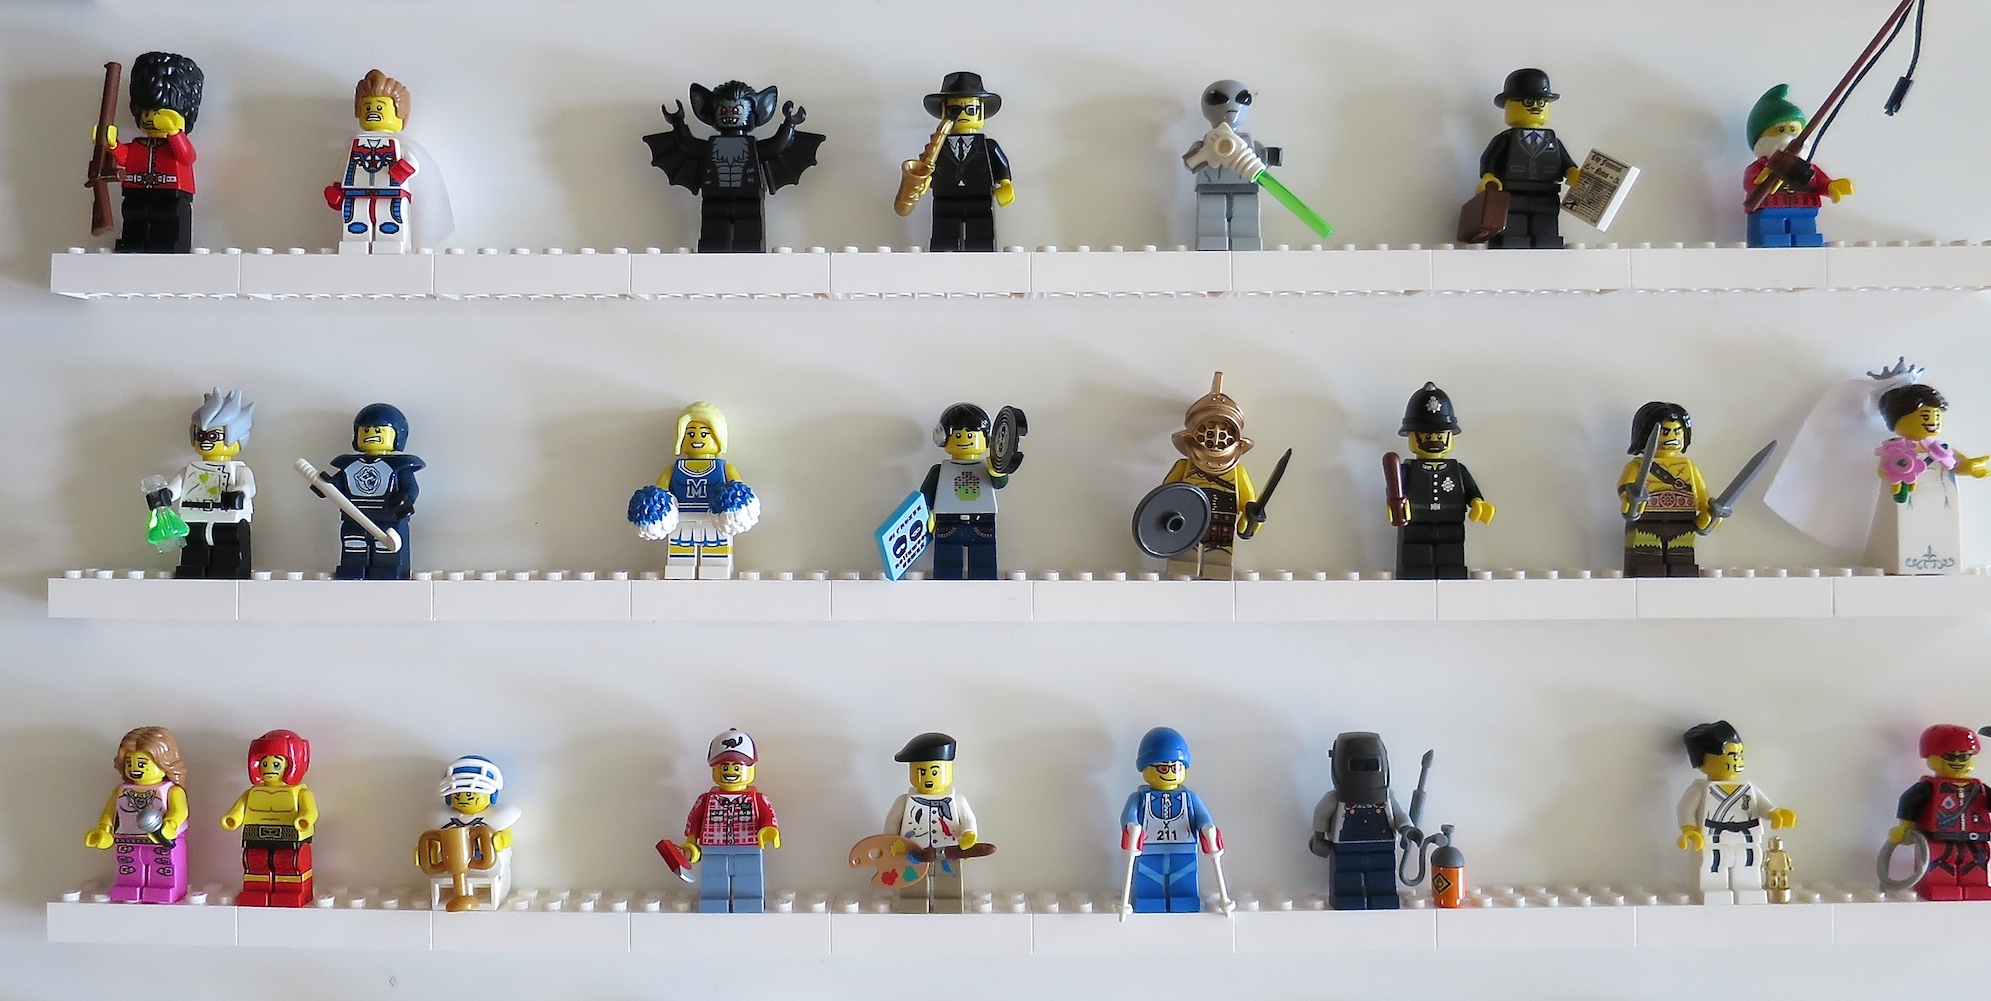
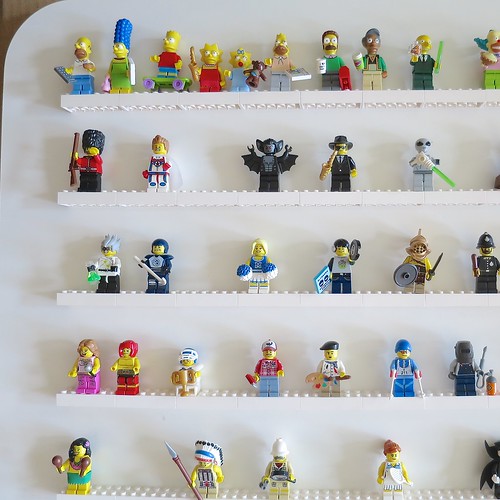
My husband is an adult fan of Lego. Since Lego started releasing the minifig mystery packs he has been collecting them, but we had no good way to display the collection. We saw lots of different ideas for making display for them online and decided to try our own version.
The first thing we needed to do was find a backing for the display. We wanted it to be white so the minifigs would stand out, but didn’t want to paint it. Our first thought was laminated shelving or cabinet doors at the hardware store. We found plenty at our local Home Depot, but they were all scratched and had dented corners. Plus they weren’t as wide as we would have liked. Our next thought was Ikea. They had lots of laminated shelves (all in good shape), but it was the tabletops that really fit the bill. We ended up with the Billsta tabletop. At $50 it was a little more than we had planned on spending, but Matt liked the size (27 1/2″ x 23 5/8″), curved corners and wood edges. (You can find tops there that would work for this project for as little as $6.)
Then we needed the Legos. Originally, our plan was to use 2×4 white bricks. (When I use numbers to talk about the bricks that refers to the number of studs, or bumps, on the top of the brick.) Then Matt decided he wanted the display shelves to go almost the length of the back, so that meant we could use longer bricks. We are lucky and have a Lego Store in town, so we were able to get a quantity of the same brick from their brick wall. The thing is, you never know which bricks will be on the wall. They had 2×6 whites so that is what we went with. Shorter or longer bricks will work just make sure they are 2 deep. You can buy the specific bricks you want online at the Lego Store.
Other than that this project just took some superglue, a ruler and some other Legos from his stash. It was a little tricky to get everything lined up just so, but once I got the hang of it, the whole thing when quickly. It took me less than 2 hours from planning to finished display full of minifigs.
Lego Minifig Wall Display
Supplies:
- flat surface to use as your backing (I used a laminated Ikea tabletop that measured 27 1/2″ x 23 5/8″)
- Legos that are two studs deep, length of choice (I used 2×6’s and needed 80)
- lengths of 1 stud deep Legos, enough to go across the shelves you are building twice (these are just for support while building)
- two 1x1x5 bricks (these are optional, but they really helped me when laying everything out.)
- masking tape
- ruler
- pen or pencil
- super glue
- picture hanging supplies
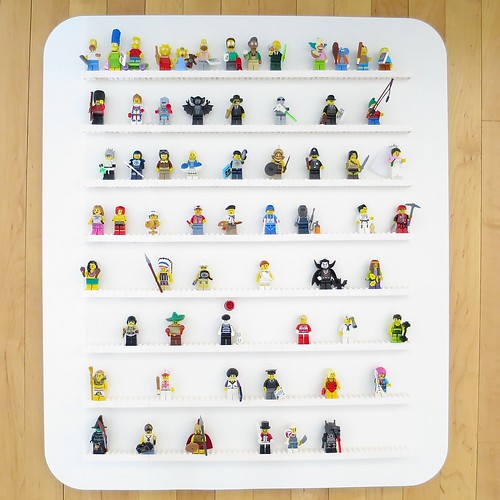
1. Figure out the layout of the Lego “shelves” you will be building for your minifigs – You need about 2 1/4″ between shelves, so you can fit the taller ones. Mine ended up being 2 3/4″ apart and ten bricks long. Matt wanted about a 2″ borders around the edge. Remember to leave extra room at the top, the height between rows plus any extra you want around the edges.
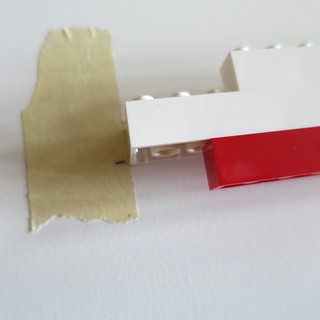
2. Make the shelves into one piece which will be a lot easier to glue on straight – You will do this without glue, instead you will use the 1 deep Legos to hold a length of 2 deep Legos together. Lay out a line of the 2 deep Legos the length of one shelf (these are the white Legos, mine were 10 long). Then attach 1 deep Legos (these are the colored Legos in my pictures) to the top and bottom of the shelf, so that they hold the 2 deep legos together in one straight line. (You will be removing the colored Legos once the shelf is glued on the backing.)
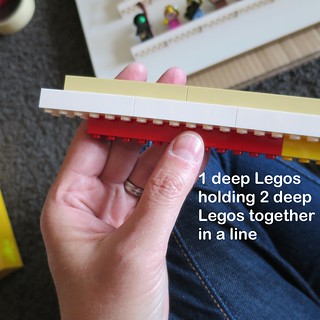
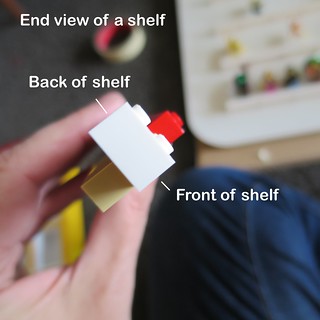
Here what the put together shelf looks like from the front and one end. You’ll notice the 1 deep bricks are all on the same side of the 2 deep bricks. This is the front of your shelf.
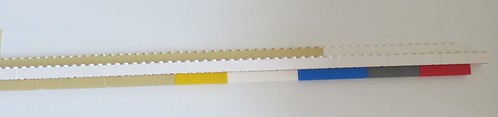
Here is a shelf assembled and ready to glue to the backing.
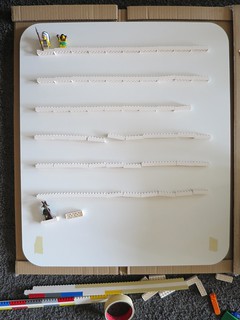
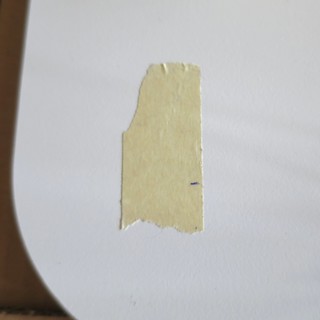
3. Mark where you want your first shelf to be – I did not want to draw on my backing, because I was afraid it would be hard to get off, so I used masking tape and marked on it to show where my shelves should be. I placed a piece of masking take at each end of the backing where the bottom of the shelf should hit. I marked a line on the masking tape where the bottom of the shelf should sit on each side.
4. Glue on the shelf – Draw a thin line of super glue across the full back of the shelf. (Remember the front of the shelf is the side you have the 1 deep Legos holding the self together attached, so basically when you glue it on the backing the 1 deep Legos are suspended above your backing.) Glue into place by matching the ends of the shelf to the marks you made on the masking tape. Be careful glueing it down, the shelves might want to bow a little, so try to place both ends in place at the same time. Let dry and removed the 1 deep Legos and the masking tape.
5. Continue glueing on the additional shelves – You can just use a ruler to mark where you next shelved go, but I found that by putting two 1x1x5 bricks together and on the edge of the shelf below the one I was getting ready to glue on, gave me a straight edge to place the masking tape that was inline.
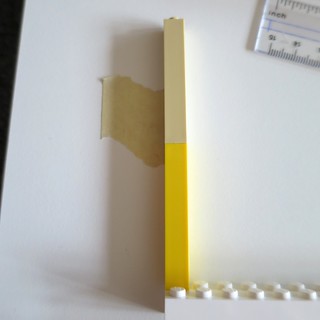
Then I just marked the spot on the tape where the new shelf should hit height-wise. Removed that tall piece and glued on the new shelf.
6. Attached appropriate picture hanging hardware on the back of your wall display for its weight.
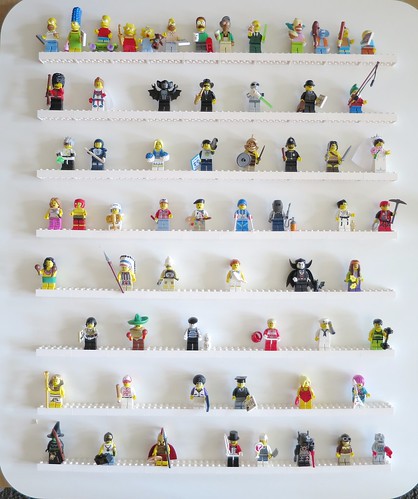
Hang an enjoy your new piece of Lego wall art.
© 2005 – 2014 Kathy Lewinski & Susan Cornish


Pingback: DIY Lego Minifig Wall Display | Indie Crafts | CraftGossip.com