

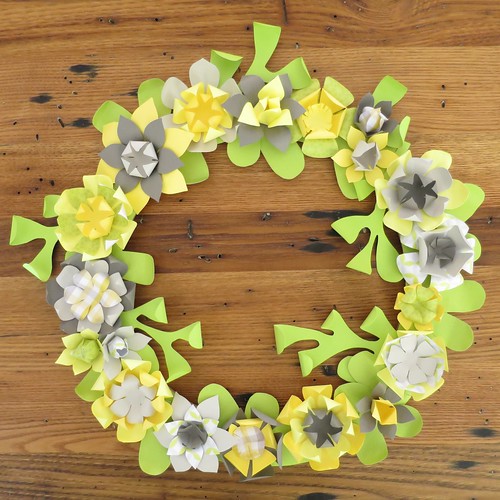
A week or so ago, I was walking by Paper Source and was blown away by this wreath in the window.

I kept thinking about it and decided to make my own version in colors to compliment my house in a slightly smaller size. (Funny story, I emailed Susi the picture above and she said that the same wreath had pulled her into Paper Source the past week too!)
I was afraid it was going to be really tricky, but it ended up being a lot of fun to make. I spent one afternoon and evening making flowers. Once I started, I didn’t want to stop. Then the next day about another hour or so cutting the leaves and gluing the whole thing together.
Some notes on this project:
- I used both cardstock and patterned scrapbooking paper. I liked the interest the pattern papers brought, but the cardstock rolled and held its shape better. Also the paper only had pattern on one side, so I only wanted to use it when you couldn’t see both sides. Next time I would look for patterned cardstock.
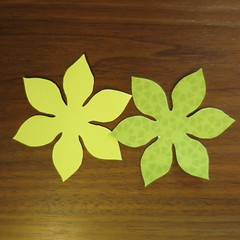
- I was going to draw my own templates for the flowers, but there are so many available online I didn’t bother. My favorite was the DIY Wall Flower Printable #2 from The Happy Homebodies. I also used this flower template, which I made into different sizes, that I found on Pinterest, but cannot find the original source for. If you google or search Pinterest for flower patterns you’ll find a ton.
- Paper Source does offer a kit to make the original wreath. It costs $22.95 and makes a 16″ wreath. The flower pieces are pre-cut which would save a lot of time. I spent about $5 – $6 on the paper and ring to make mine.
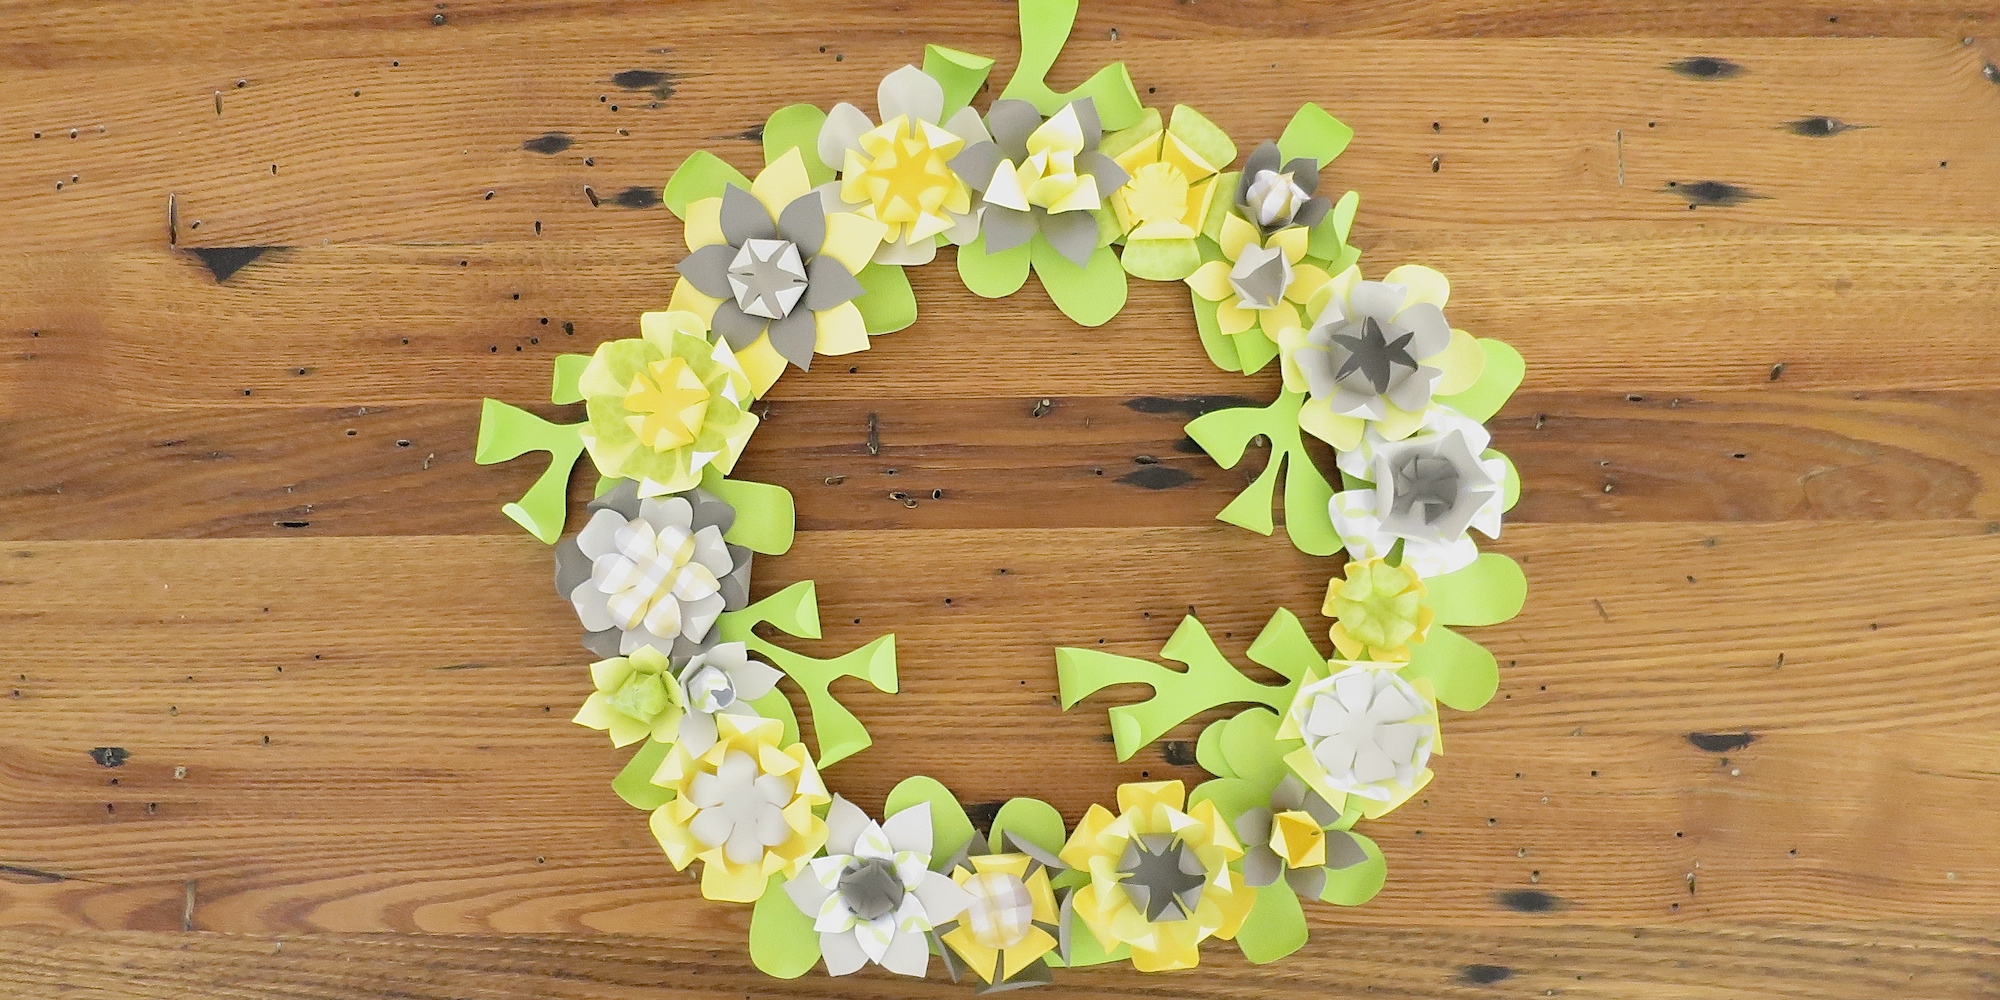
Paper Flower Wreath
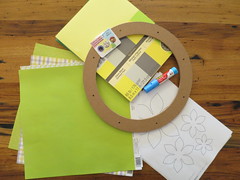
Supplies:
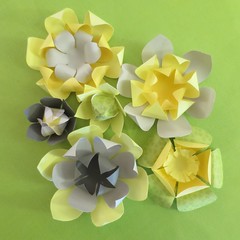
- paper and cardstock in different colors (I used two plain yellows, two plain grays, a plain green, and four patterned papers. All together I used about twelve pieces of paper.)
- paper scissors
- restickable glue stick
- something round like a chopstick, pencil or knitting needle to roll leaves
- glue, such as school or tacky glue
- flat craft and floral ring (I used a 12″ ring)
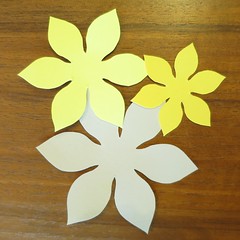
1. Print or draw your flower templates and cut them out. Use them to cut flower pieces out of the colored paper. I stuck the templates to the colored paper with restickable glue stick, then just cut around them. I was able to use the same templates over and over just adding more glue as needed.
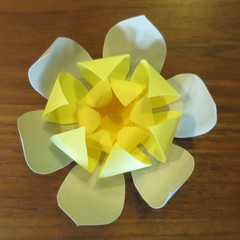
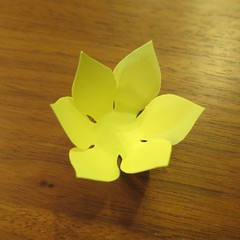
Use the colored flower pieces to create different shaped flowers by layering different sizes of the templates, curling the edges of the paper and gluing them together. Here is an example of a basic flower using three different sizes of the same template.
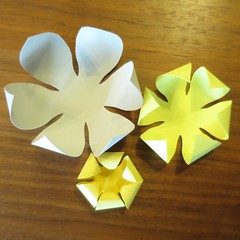
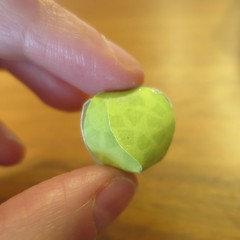
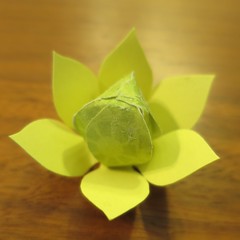
I also made buds using the same template. I cut two of the smallest size from different papers. For the center of the bud, I glued the tips of one of the pieces together. I folded the petals up on the other piece and glued the bud into the center.
Make flowers until you have enough to completely cover your ring pretty tightly. I needed thirteen larger flowers and six buds or small flowers to cover my 12″ wreath. Part of the fun is creating different flowers by mixing colors, using different templates and folding the petals in different directions.
2. Cut leaves from green paper.
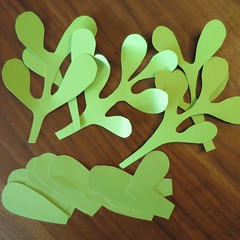
I did these free form from solid and a subtle patterned green. If you chose to draw them first make sure you use pencil and erase the lines so you can roll the leaves. Do not roll the ends of the leaves yet.
3. Cover the ring with green paper, so that none of the ring will show through.
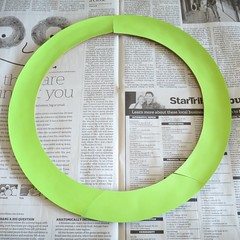
I just traced it and glued the paper on. I had to do it in pieces because I didn’t have a big enough piece of paper.
4. Glue the leaves and flowers on to the ring.
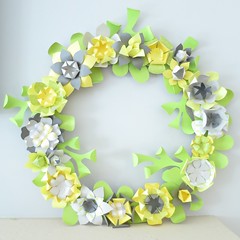
I laid the flowers out first so I had an idea of their order. Then layered in the leaves as I glued it together. I wanted mine to be able to sit on the mantle instead of hang, so I made sure to not have anything hanging off the bottom. Let dry.
5. Roll the ends of some of the leaves.
I did my wreath for spring, but you could definitely do something similar for the holidays with a poinsettia template and different colored papers.
© 2005 – 2014 Kathy Lewinski & Susan Cornish


Pingback: Tutorial | Paper Flower Wreath | Scrapbooking | CraftGossip.com
Pingback: Flower Crafts To Delight You – Crafty Like Granny