
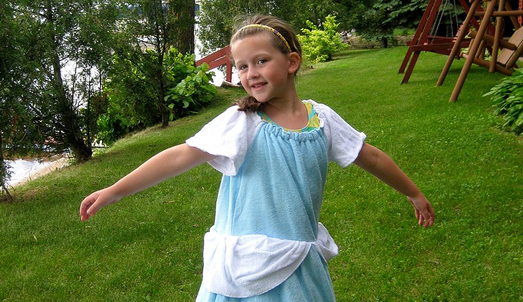

I had pinned the inspiration for this dress ages ago and I finally made one.
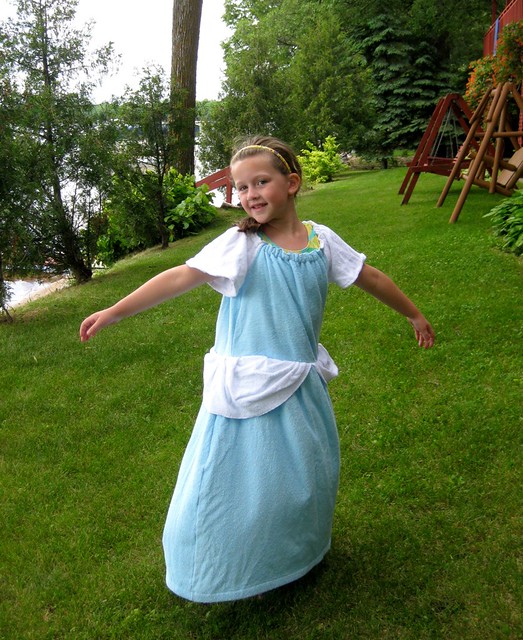
It’s a swimming cover up. A non-glitzy play on the traditional dress. I love the fact that all of our versions of this dress are light and ethereal and silky. (Or they are trying to be silky. Most are actually a little bit cheesy and even rayon/polyester-y.) In direct contrast, this dress is ALL cotton, NO bling and harkens to the original only in the color and shape. It is appropriate for a little girl.
Project Princess Towel Dress
Supplies:
(quantities for a 7 year old’s dress)
- 1.5 yards light blue terry
- 1/2 yard white terry
- Butterick Pattern B 4118
- white thread
- blue thread
- one package seam tape (white or light blue would work too)
- 3/4 inch non-roll elastic
- “horse hair” tape
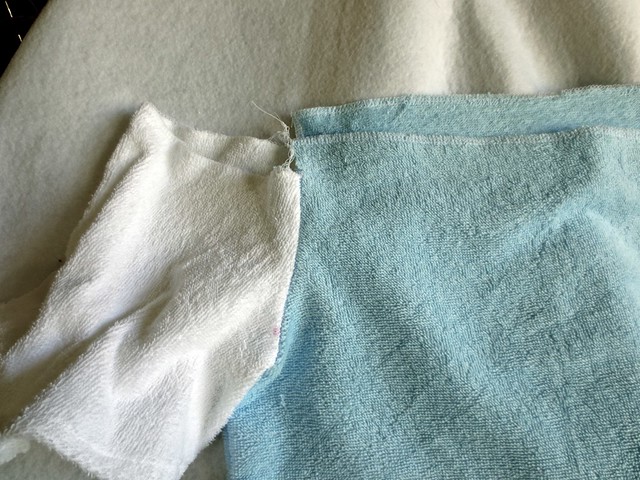
Note: for this project I went around all the edges of the pieces with my serger. This helped to keep the terry cloth loops under control. I would recommend cutting and serging or zig-zagging the edges.
Create the top using a “peasant blouse” type of pattern.
Butterick B 4118 works well. (You will remember this pattern from the Dorothy dress. Twice!)
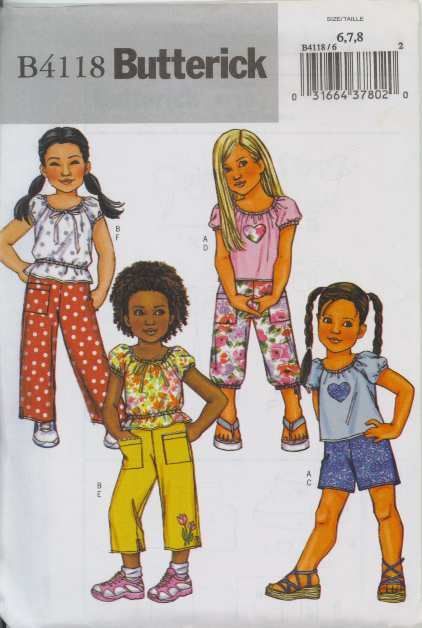
Cut the sleeves in white and the front and back in blue. Follow the pattern directions to sew the pieces together.
No need to create casings for the elastic on the bottom of the sleeves. Just hem them.
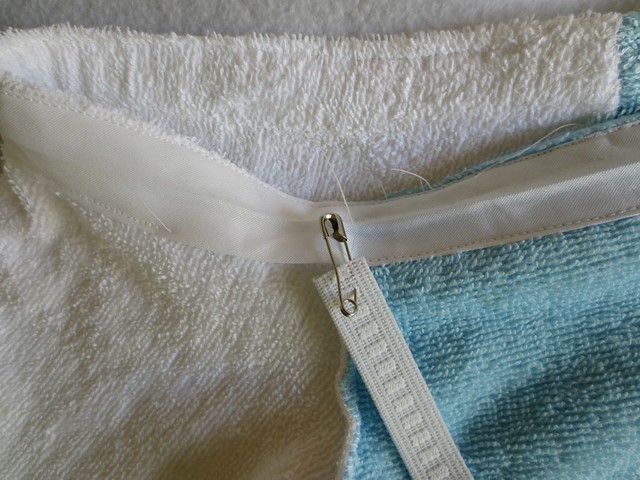
Create the casing for the neckline by using the seam tape around the inside of the top, all the way around, sleeve, front, sleeve, and back. Leave an opening to thread elastic through.

Insert a sturdy elastic into the casing you just made.
Leave the bottom edge(the waist) of the blouse unhemmed.
Cut a generous skirt with the remaining blue. It should be enough to gather, but not too much. (Too many layers of terry in a sewing machine will break a needle or worse.)
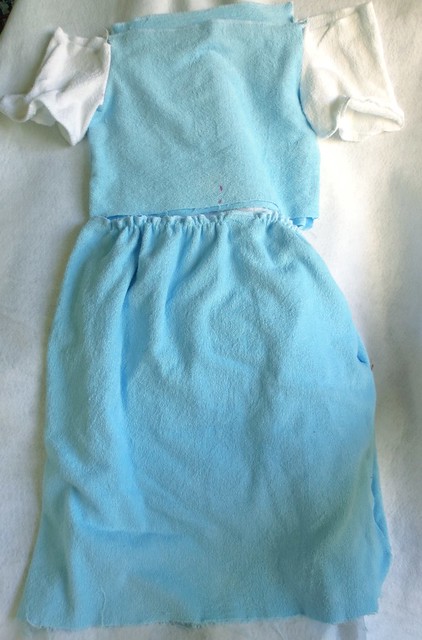
Take the remainder of the white and cut two “sashes”. Baste the sashes to the top edge of the skirt. Manipulate the gathers to make the tucks over the hips. You will not be sad if you take the time to hand baste these layers together, top, sashes and skirt. The sashes have some gathers, the skirt has some gathers, and the top is flat. At the best, you are sewing 3 layers of terry and, at the worst, you are sewing wicked thick gathers.
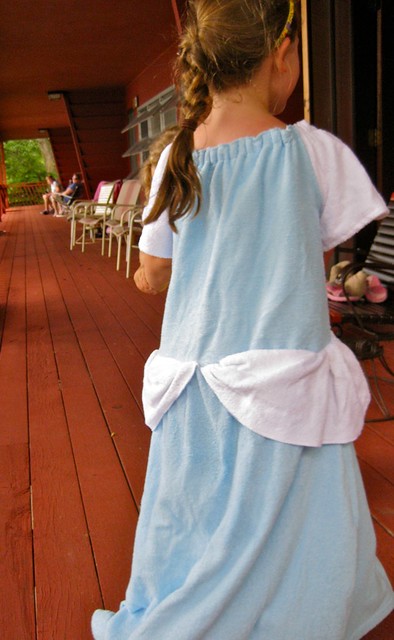
At the bottom of the skirt, finish off the edge of the fabric with a zig-zag or a serger edge. Then take the horse hair tape, and fold that into the hem, pinning as you go. Sew the hem around the horse hair tape. This offers a little bit of volume and “life” to the bottom of skirt.
Notes on pattern:
If I had my machine on-hand after the fitting, I would have added a stretch of elastic around the waist of this dress. It would be impossible to “gather” the waist and still get it through the machine because of all the layers of terry, but I would have cut a length of elastic, stretched it and sewn it into the waist. The dress fit well in the shoulders and length, but the hip sashes added a weight to the waist that was unexpected and threw the proportions of the dress off a little bit. Otherwise, I am thrilled with it. It was a GREAT pattern challenge. And the recipient of the dress, my lovely niece, was surprised and delighted. It is so satisfying to have a project so warmly received.
Happy summer swim cover up season to you all!!!
© 2005 – 2013 Kathy Lewinski & Susan Cornish

