

Here’s an easy little project you can whip up this weekend to dress up your Easter table next week.
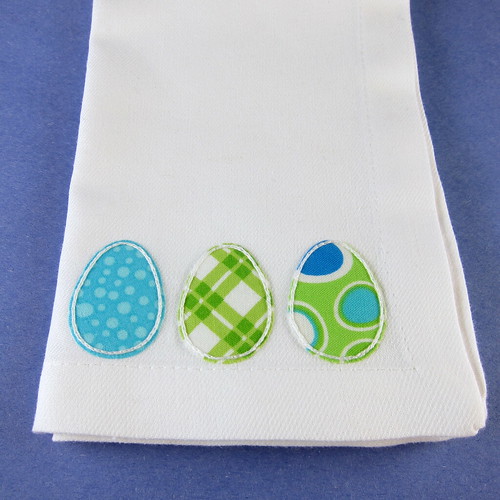
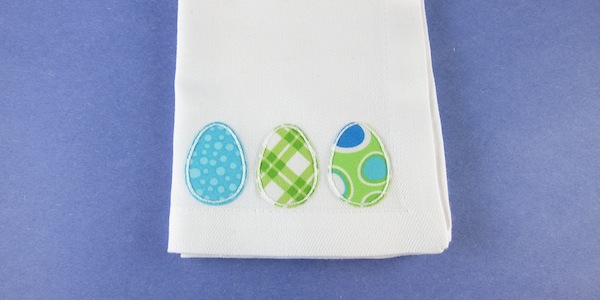
These are so simple and whip up quickly thanks to double stick fusible webbing. They are a great way to use up those little scraps of fabric. I used leftovers from a quilt. I chose fabrics with spring colors and fun designs that I thought would pop nicely against the white napkins.
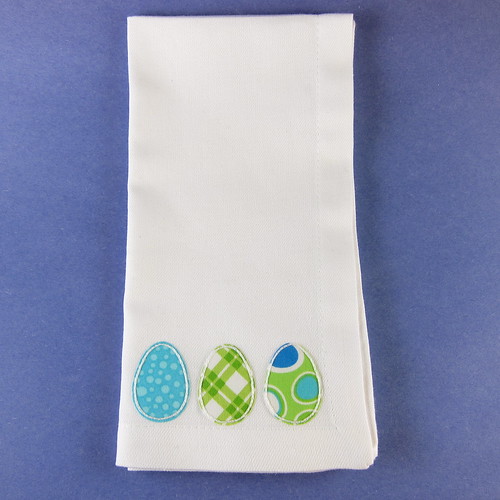
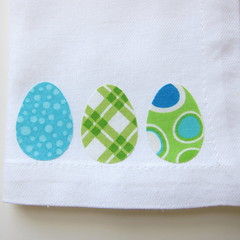
I did three smaller eggs, but you could do one large egg or even edge one whole side of the napkin with a bunch of small ones. Use all one fabric for a matched set look or mix it up with lots of different colors and patterns.
Easter Egg Napkins
Supplies:
- paper
- double stick fusible webbing (I used Steam to Seam 2)
- scrap fabric, don’t use anything with too loose a weave, quilting cotton is perfect
- cloth napkins
- embroidery floss
Tools:
- scissors
- iron
- hand sewing or embroidery needle
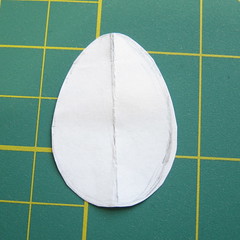
1. Draw or print from the internet and egg shape the size you desire. Cut out. This will be your pattern.
2. Use the pattern to cut out egg shapes from the fusible webbing. Cut out as many as eggs you plan on making.

Remove the paper from one side of the webbing eggs.
3. Place the webbing eggs on the wrong side of the fabric with the exposed webbing facing the fabric and the paper facing up.
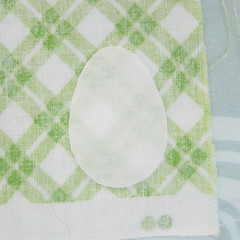
Iron the webbing egg to the fabric following the webbing instructions.
4. Cut the eggs from the fabrics using the webbing egg as a guide.
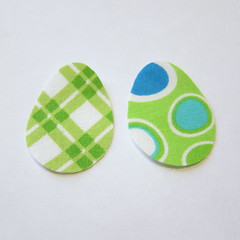

Remove the paper backing from eggs.
5. Place the eggs where you want them on the napkins and iron them in place.
You can stop and use the napkins at this point. The webbing claims it holds permanently, is washable and keeps the fabric from fraying. I went one step further…
6. Using two strands of the embroidery floss and a hand sewing needle, embroider an outline just inside the edge of the eggs.
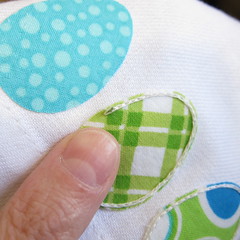
I did a basic split stitch, but you could do a back stitch or running stitch too. If you are good on your sewing machine you could also zig-zag around the edge of the eggs.
I think those are a couple eggs that woud make any Easter bunny proud.
© 2005 – 2013 Kathy Lewinski & Susan Cornish


Pingback: Tutorial: Appliqued Easter napkins · Needlework News | CraftGossip.com
Pingback: Even More Easter Craft Ideas | Dmcthread's Blog