


Every Friday for the twenty-four weeks leading up to December 1st, we will be making a handmade Christmas ornament. Follow along and make them all or pick and chose your favorites.
And off we go with our first ornament of 2015!
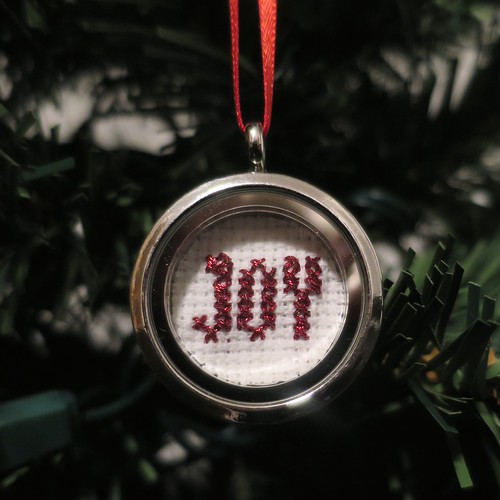
I really like the look of little needlework projects frames in embroidery hoops. I was wondering how I could get a similar look in a Christmas ornament. The smallest embroidery hoop I could find was 4″ and I wanted something smaller. I thought perhaps the jewelry aisle would be the answer and it was.
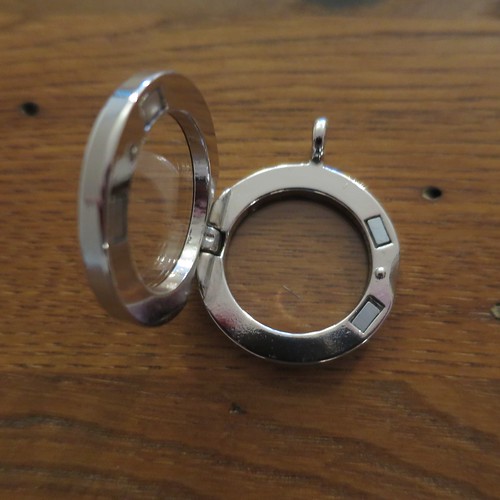
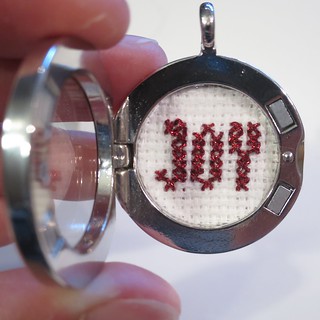
What I ended up finding was this “story locket,” a locket with glass at the front and back. I got mine at Joann, but it looks like Michael’s, Amazon and Walmart all sell it as well. It was just the tiny size I wanted, 1″ and I like that is opened up.You could also do something very similar with a small picture frame.
As I was making this, I realized it would be a great gift for newlyweds. You could stitch their first initials with a plus sign on the front and put a small picture of them on the back. What a great personalized Christmas ornament.
Cross Stitched Locket Ornament
Supplies:
- locket or something similar with a glass front.
- 18 count cross stitch fabric
- metallic embroidery floss
- embroidery needle
- scissors
- decorative paper like scrapbook paper
- glue
- ribbon
1. Use graph paper or excel to chart out your pattern, keeping in mind the size of the opening you have available. Here is the chart I made.
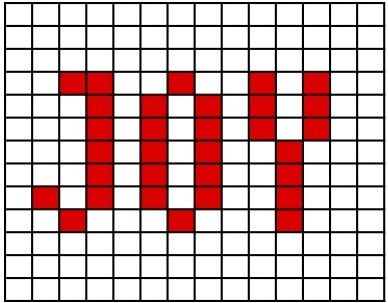
It was the perfect size for my 1″ opening.
2. Cross stitch the pattern onto your fabric using the metallic floss. I used one strand of floss doubled over. Because this is such a small thing to stitch, I didn’t bother with a hoop.
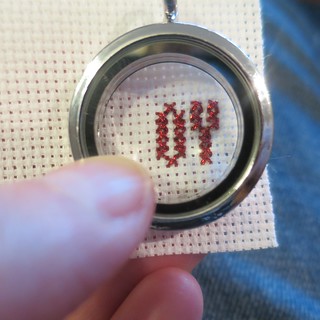
Metallic floss can be a pain the in neck to work with because it snag and unravels. Weelittlestitches has a nice post with tips to make it easier. I used them for this and it was a breeze.
3. Once you have finished stitching, cut the design out so it is slightly bigger than the inside of your locket.
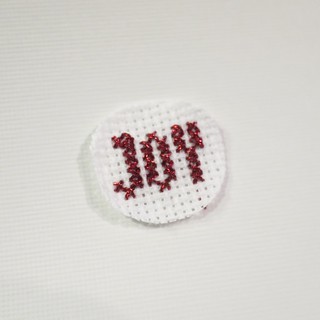
It is always best to err on the side of bigger. I free-handed this but really should have used a compass.
4. If your locket or frame has an open back you’ll want something to back your embroidery. I chose I piece of red decorative scrapbooking paper. I think a photo would be great too. Cut a circle the same size at the stitched piece.
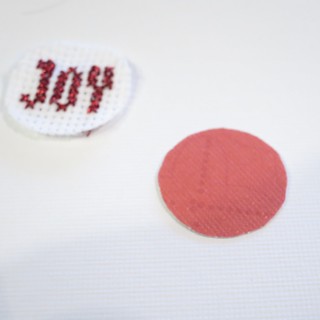
Glue the stitched fabric to the paper. This will also help keep your fabric from fraying.
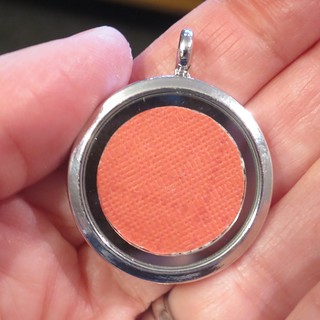
5. Trim the fabric/paper piece a little at a time until it fits snugly in the locket.
And here it is from the back.
© 2005 – 2015 Kathy Lewinski & Susan Cornish


One Comment to Advent Calendar Project ’15 – Week 1