

I was lucky enough to get a new computer for my birthday. What a difference. (My old computer was invented when Lincoln was President)
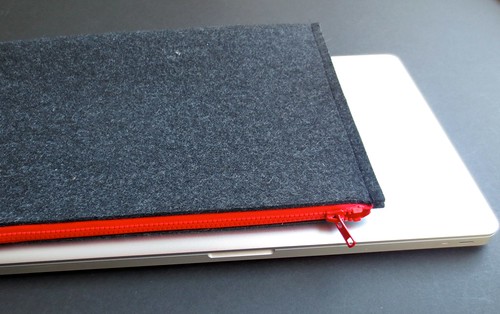
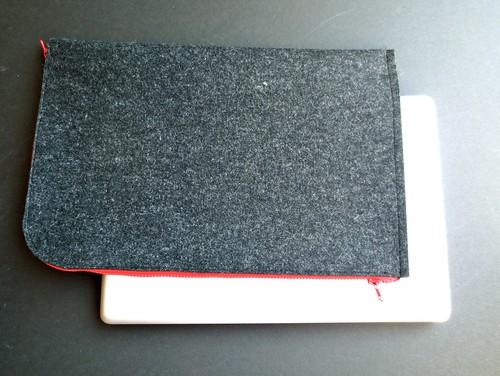
My computer is a new-to-me 17″ mac book pro. Sweet stuff.
I went marching out to get a laptop case, and there were none to be found. I learned that Apple has just discontinued the 17″ version of this fine machine. And so they do not sell the sleeves in the stores anymore. Well, to any good crafter, that just sounds like a challenge.
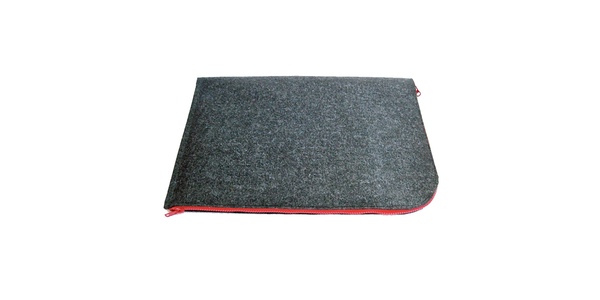
And from there was born the Felt Laptop Sleeve.
I have been wanting to work with this amazing thick felt for a LONG time. And here was my chance.
Felt Laptop Sleeve
Supplies:
- Thick Wool Felt (24 x 18)
- Double head zipper 28″ (In a fun contrast color)
- Thread (to match felt)
- Contrast thread (to baste zipper in)
- Sewing Machine
- Scissors/rotary cutter (sharp as razors)
- Dressmaker’s chalk
This is a fairly straight forward project, but I wanted it to be crisp. The cutting is crucial. And careful straight sewing is important to the finished look.
1. Cut the felt into 23.5 x 17.5 rectangle. Fold it in half and carefully pin it. (The pins will barely go through all of this felt.) Using dressmakers chalk and a dinner plate as a guide, round off one corner. Cut this corner carefully. Do not cut too much off. Make the rounding very shallow. Otherwise, you will lose too much fabric and the computer will not fit in the case.

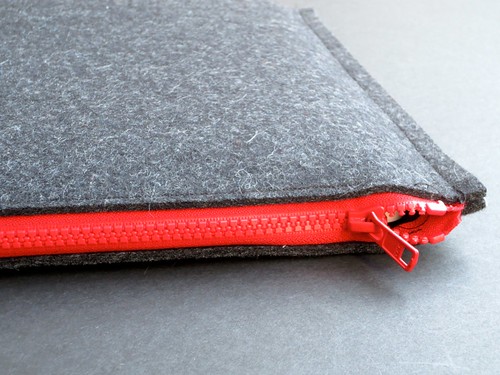
2.With the felt folded in half, place the zipper along the top and down the side over the rounded corner. Baste it in using the contrast thread.
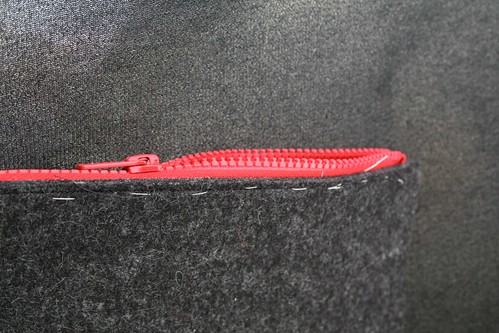
At the corner, where the zipper starts, turn down the edges a little bit, to hide them.

That way, the plastic edge will not take up too much room at the start, and, it won’t show up in the side seam.
Carefully baste in the zipper. This is slow work, but not hard. The basting will help insure that you have an even size opening all the way around. When you are satisfied with the placement of it, then you are ready to sew.
3. Sew in the zipper. Mine was so big that I didn’t even need to use a zipper foot. Big.
The main thing to keep in mind here is that the felt, while it is thick, it will smoosh down when the stitches run over it. And picking the stitches out of felt would be disastrous. Straight even sewing is critical here. It’s not hard, but it was slower going than just “run it through the machine” kind of project.
4.The last seam you have is the side with no zipper. That is just a straight shot. You could get fancy and do it in color. But I just used black thread and let the contrast be all about the texture instead.
5. The next step is to go in and pick out the contrast basting. I even broke out tweezers to help pull all of the little threads out.
The result is a neat sharp case.
Happy Computing.
© 2005 – 2012 Kathy Lewinski & Susan Cornish


Pingback: En taske af filt på to-do listen
Pingback: How to make laptop bag - how2make | how2make
Pingback: Upcycling Craftiness! » Teresa Rehmann Photography
Pingback: Tutorials for small things to sew
Pingback: DIY Felt Laptop Sleeve / Britex Fabrics | Britex Fabrics
Pingback: 52 DIYs in 2019 – Cleverly Caroline