
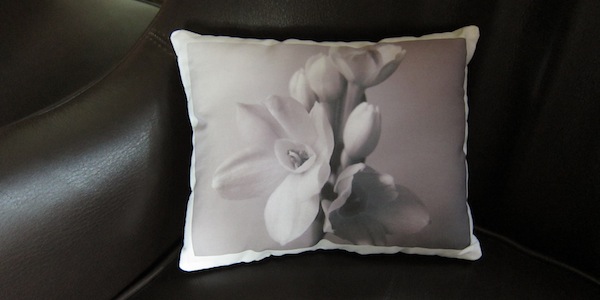

After seeing some cool ones around the web, I’ve been wanting to try making a pillow using one of my photographs for awhile. So this week’s Iron Craft photography challenge seemed like the perfect time. For me this challenge was more about learning how photographes transfered on to fabric than the finished item.

I started with this photo I took 3 years ago.

Then I used Aviary in Flickr to change the photo to black and white. I could have left it in color but I thought black and white would be prettier as a pillow plus I originally planned on adding some color through embroidery. After I saw how pretty it looked printed though I couldn’t bring myself to add the embroidery.
Next I had to figure out how to get the photo on to fabric. After some researched it seemed like Inkjet Fabric Sheets were the way to go. These fabric sheets are backed with paper that allow them to move easily through your printer. I read reviews of lots of brands and Jacquard Cotton Inkjet seemed to have the best comments.
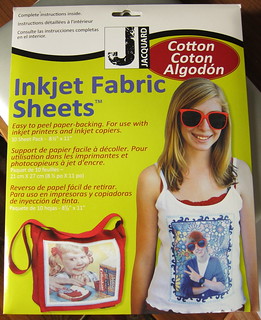
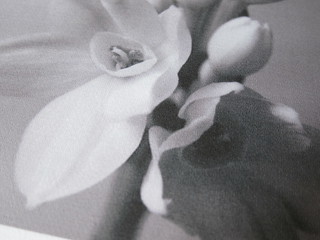
A lot of people complained the other brands made a really stiff finished product. This one gave me a beautiful sharp print and the final fabric is very soft, similar to pillow case fabric. Here is my print.
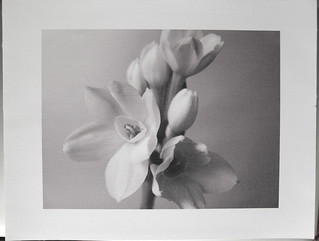
It looks like the image has been done on an artist canvas.
After the image is printed you can applique, sew or fuse with interfacing into any project you want. I just sewed it to some black wool felt to make a small accent pillow.
Some tips on using Inkjet Fabric:
- Set your printer to a high quality, slower print to get the best image on the fabric. Print a test on paper before using the fabric to make sure it’s perfect.
- Let the print dry for at least 15 minutes after it comes out of the printer.
- The image on the fabric is not water safe. You can spray it with Scotchguard.
- Be careful ironing your printed piece, you don’t want steam or water to damage the image.
I have nine sheets left to play with and an thinking for some applications for Christmas using old family pictures or perhaps pillow featuring our favorite cities.
© 2005 – 2012 Kathy Lewinski & Susan Cornish


6 Comments to Iron Craft Challenge #12 – Photo Pillow