

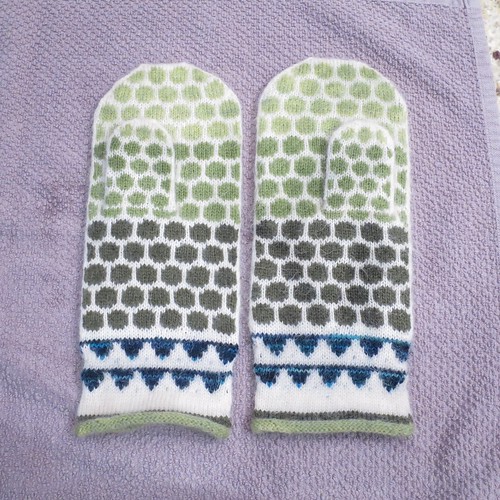
Recently, I’ve been wishing for mitten blockers. Usually, I just put my mittens between towels to block them, but it really doesn’t shape them as forcefully as I’d like. There are blockers for sale on Etsy, but I started thinking, “I knit custom fit mittens, shouldn’t my blockers be custom too?”
Some people in my Ravelry forms have talked about making blockers from cardboard wrapped in plastic wrap. It looked like it worked really well, but since I make so many pairs of mittens I wanted something a little more long lasting. I wanted them to be made with plastic to use over and over again.
They aren’t the prettiest things, but they work great!
The trick was finding the right plastic. I wanted something that wouldn’t just bend inside the mitten, but I needed to be able to cut it with utility scissors. The solution was flexible cutting boards.
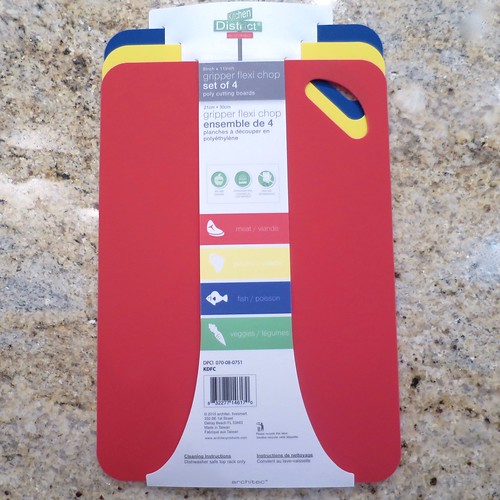
I found the perfect ones at Target in a four pack for $9.99. Each board was big enough to do one set of blockers. These boards are flexible, but they aren’t the super thin ones that are almost placemats. They were just under 1/8″ thick and took a little hand strength to cut. They weren’t too far off from a cutting mat, but so much cheaper!
To use the blockers, put the thumb blocker in first and then the hand blocker. I decided to put them in dry mittens and then wet them since I thought it would be easier to get them in a dry mitten. Oops, I forgot that meant I couldn’t squeeze out the water!
Still, after bring pressed between a folded towel they are almost dry after a few hours.
These were so worth the $2.50 they cost me to make!
Custom Mitten Blockers
Supplies:
- thin plastic cutting board
- sharpie or other marker
- ruler
- utility scissors like kitchen shears
- utility knife
- cutting board to work on
- sandpaper (optional)
- lighter or candle (optional)
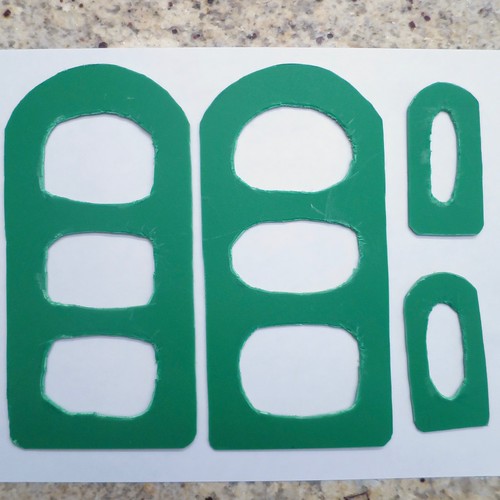
1. Use the marker and ruler to draw out the width, length and shape you want the final mitten to be.
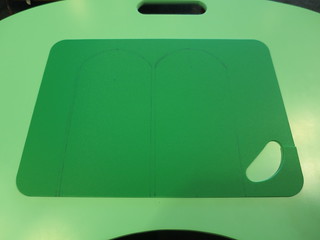
I did mine just the length of the hand, but you could include the cuff too. Cut out.
Draw the thumb blockers the width, length and shape of the thumb. Cut out.
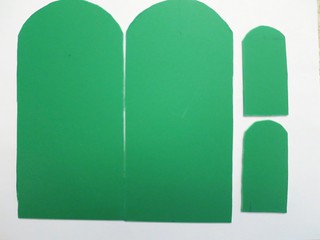
2. Round the bottom corners.

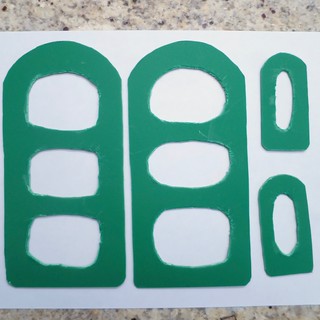
3. Cut holes in the blockers to help with drying. Leave at least 1/2″ between the sides and holes. I found it was easiest to cut a starter hole with the utility knife and then use the scissors.
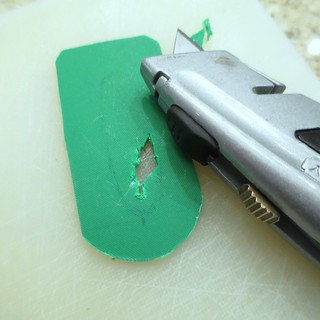
4. (Optional) If your edges are really ragged you can sand then with some sandpaper or melt them with a lighter or candle (make sure you are in a well ventilated area). The edges don’t need to be perfectly smooth, just make sure you don’t have big sharp points sticking out that might grab your yarn.
5. Make sure to wash off any marker (and soot if you melted the edges) before using.
© 2005 – 2016 Kathy Lewinski & Susan Cornish

2 Comments to Project: Custom Mitten Blockers