


Every Friday for the twenty-four weeks leading up to December 1st, we will be making a handmade Christmas ornament. Follow along and make them all or pick and chose your favorites.
We are using up a little more of the jute twine and some burlap in this week’s ornament.
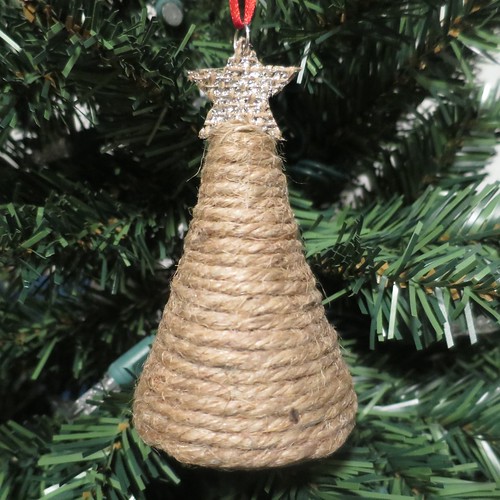
I love the rustic look of this one with just a little touch of glitter.
Once again, this is a really simple ornament to make. This biggest thing is to use a glue meant for styrofoam. I have tried all sorts of other glues and nothing else really holds.
Jute Tree
Supplies:
- styrofoam tree form
- glue for foam
- small paintbrush to spread glue
- jute twine
- straight pins
- small scrap of burlap
- silver glitter paint or glue
- small paintbrush
- small scissors
- glue such as tacky or school glue
- jump ring
1. Cover the bottom of the styrofoam tree form with a good coating of glue. Starting in the center, coil the twine around to cover the whole bottom. I found using a straight pin to hold the end of the twine in place helps a lot.
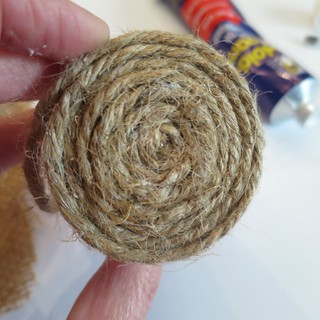
Let the glue set a little bit before moving on.
2. Now work up the sides of the tree by painting glue up and around 1/2″ – 3/4″ inch of the tree at a time. Push the twine together as you work so there are not gaps between rows. It helps to let each section set just for a minute or two before moving on.
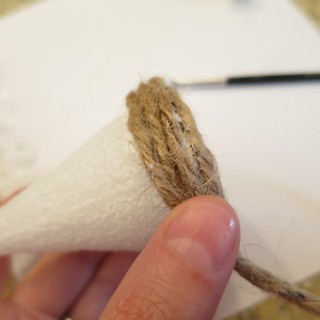
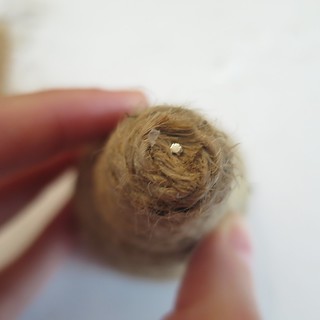
When you get to the top, coil into the center, cut the jute and then secure the end with a straight pin.
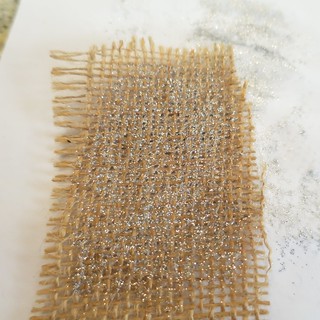
3. Cut a piece of burlap at least twice the size you want your star. Give it a couple coats of sliver paint of glue. You want it to stiffen the burlap and keep it from unraveling when you cut it. Let dry.
4. Draw the shape of your star on the burlap on the side that you don’t want showing for your star (so if the glitter is brighter on one side draw the star on the other).
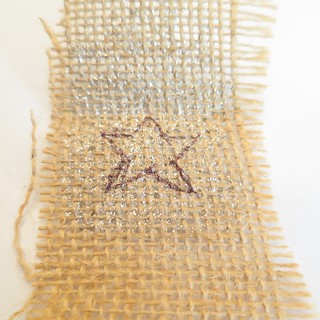
Fold the burlap in half at the tip of the star and cut the star out through the two layers. I left the layers attached at the tip, but you can cut them apart.
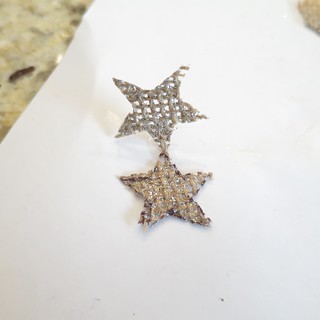
Glue the two star pieces together with a straight pin in between the sticking out at the bottom. Make sure to glue them so the burlap you drew on is on the inside. Use enough glue to make the burlap good and stiff, so it doesn’t fall apart when you put the jump ring through it later.
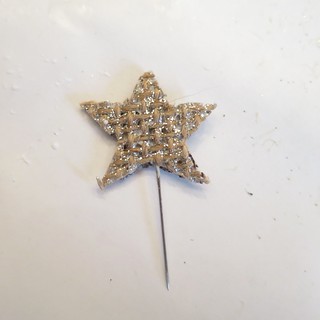
Remove the straight pin from the top of the tree where it was holding the jute. Dip the end of the pin attached to the star into some foam glue and insert into the top of the tree. Let dry.

6. Open the jump ring and insert through the top of the star. Close the jump ring. Hang with a ribbon or hook through the ring.
© 2005 – 2015 Kathy Lewinski & Susan Cornish


One Comment to Advent Calendar Project ’15 – Week 8