


Every Friday for the twenty-four weeks leading up to December 1st, we will be making a handmade Christmas ornament. Follow along and make them all or pick and chose your favorites.
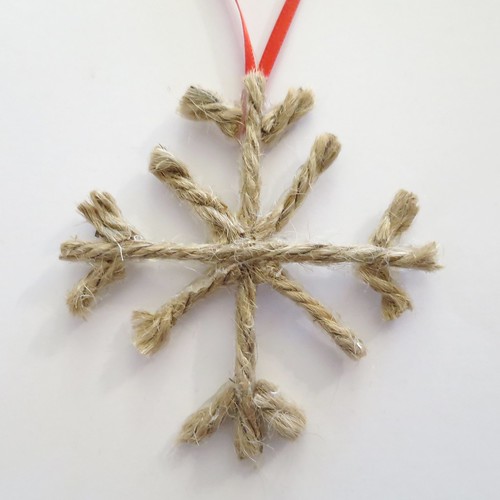
This week’s ornament is a snowflake made from jute twine. There is something about how this looks that makes me think of the classic straw ornaments from Scandinavia and Eastern Europe.
This ornament was inspired by the hot glue and glitter snowflakes I’ve seen around Pinterest. I’ve never been able to make them look as nice as the ones on there, but I thought what if you took the idea and laid the twine over the glue. It requires a bit of a steady hand with the glue gun, but you can also just cut away any excess glue when you are done.
Some of you may notice I am using a lot of the same materials in the ornaments this year, things like jute and burlap. Here’s the thing, just like you guys I want to use up the craft supplies I have on hand, so when I buy a spool or jute or a yard of burlap I want to use it up. I hope some of you find that useful too.
Jute Twine Snowflake
Supplies:
- jute twine (I found it in the Target $1 section!)
- wax paper
- sharpie
- ruler
- scissors, small scissors are nice for trimming extra glue
- hot glue gun
- hot glue
- 1/8″ ribbon
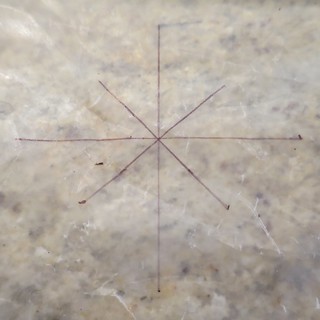
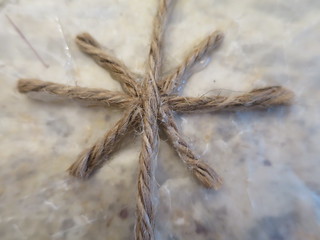
1. Draw your basic snowflake shape on a piece of wax paper with a sharpie. I used a ruler to keep things pretty straight. It is best to keep it simple, I just did two crosses, one over the other with one having longer legs.
2. Cut two pieces of twine the length of the longest cross. Draw a line of hot glue done on line on the wax paper and glue on a length of twine.
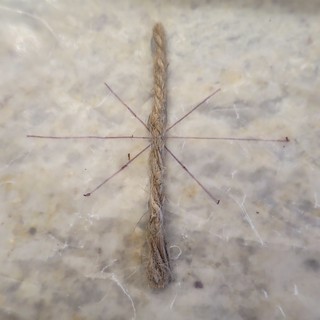
Repeat with the cross piece going right over the first.
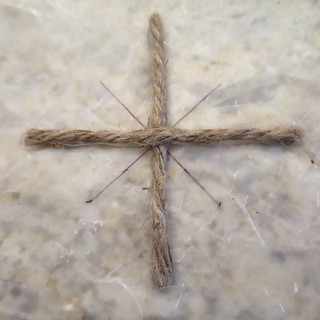
3. Cut four pieces of jute the size of the remaining legs. This time you will not be crossing over the center. Draw line of glue for these legs and glue on the twine pieces making sure to attach them to the center.
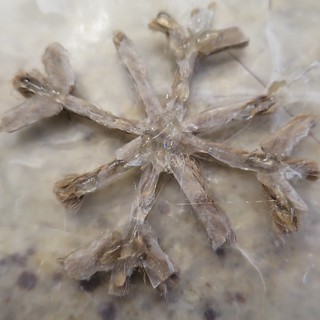
Let the glue cool and carefully remove from the wax paper. (I thought it would peel right off but there was a little sticking.) It will be bendy, but should retain its shape pretty well. This is a good time to trim excess glue from the edges.
4. Cut eight small pieces of twine and glue off of the four longer ends of the snowflake.
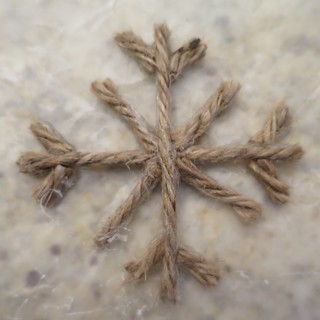
Once again let it cool, peel off and trim off excess glue.
5. Turn the snowflake over and add dots of glue where the twine meets if needed.
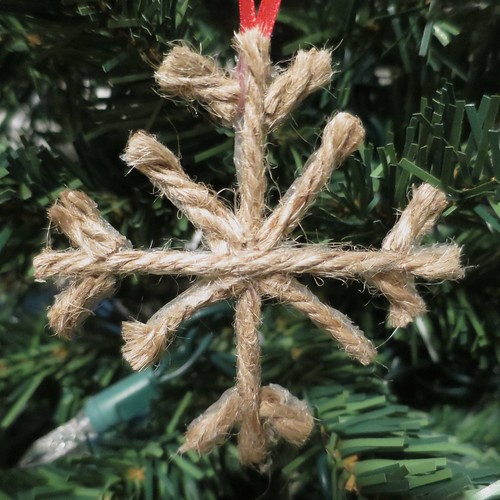
Decided what leg will be the top of your snowflake and glue two ends of a piece of ribbon to the back of it to make a loop for hanging.

Let cool and voila, a jute snowflake.
© 2005 – 2015 Kathy Lewinski & Susan Cornish


3 Comments to Advent Calendar Project ’15 – Week 6