


Every Friday for the twenty-four weeks leading up to December 1st, we will be making a handmade Christmas ornament. Follow along and make them all or pick and chose your favorites.
When doing this project every year, I spend a lot of time walking the aisles of the craft stores looking for inspiration. (Twenty-four ornaments is a lot to come up with four years in a row!) One of the things that caught my eye this year was these small, unfinished wooden letters.

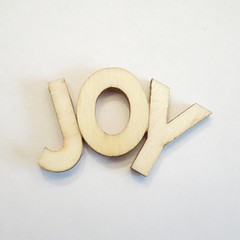
These letters are Art Mind brand (I think this is a Michael’s brand.) They are 3/4″ tall and I liked the fact they had darker edges. Since I go these I have seen similar ones at Joann, Target and online, so they aren’t hard to find.
I liked the look of these so much I wanted to do something simple with them and came up with this.
I was surprised at how sturdy they were once glued together into words. Having a letter with nice straight edges helps. I kept mine just natural and rustic, but you could paint them, add glitter or even edge with a little fake snow.
I think these will look great on a tree, but a series of them on a garland or wreath would be stunning too.
Wooden Word Ornament
Supplies:
- small wooden letters, mine were 3/4″
- tacky glue
- 1/8″ ribbon
- scissors
- jump ring, big enough to fit around the edge of a letter (optional)
- wax paper (optional)
1. Decide on what words you are going to make and lay them out. You can keep them very straight or make them a little wonky. Just remember you want surfaces that touch to glue together.

I stayed with pretty classic holiday words, but you could do names or initials too. The set came with “&” signs, so it would be fun to do initials for newlyweds.
If you are going to paint, stain or varnish your letters. I would do it now before gluing them together I would go glitter or fake snow afterwards.
2. Glue the letters together where they touch. You may want to do this on wax paper so that they don’t stick to your surface. Let dry.
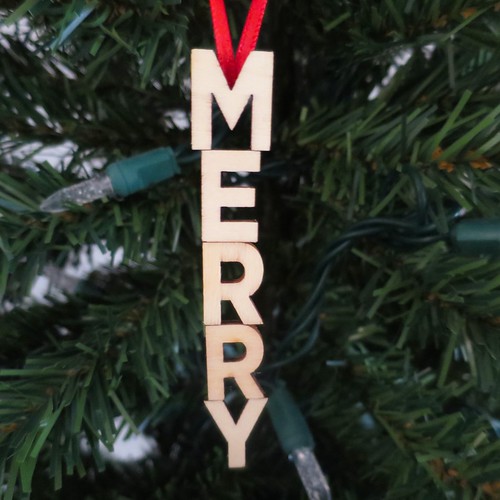
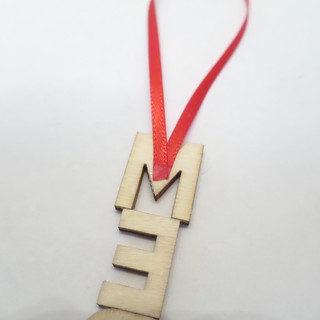
3. Add a ribbon to hang your words. There are a couple of ways you can do this. On “merry” I just glued the ends of a length of ribbon to the back to form a loop. This is the best way to make sure your letter will hang straight because you can attach the ribbon at the balance point.
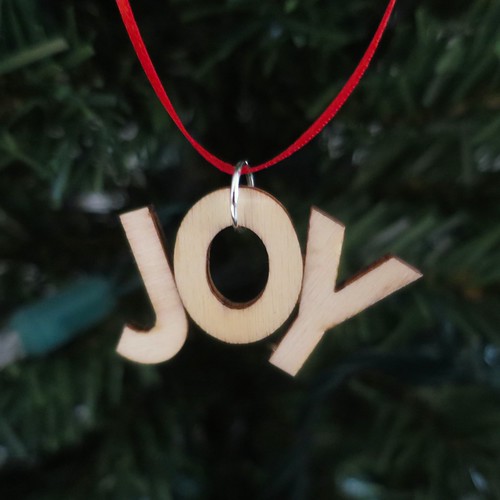
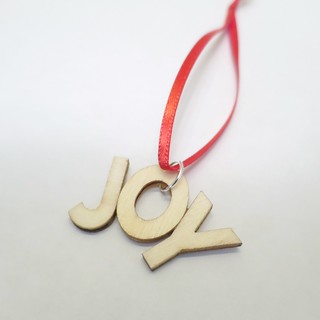
On “joy” I added a jump ring to the “o” and tied the ribbon to that. The jump ring can move so the word may not hang straight this way. I actually like that look.
You could also tie the ribbon around one letter. I decided I didn’t want to have the ribbon across the front of the letters, so I didn’t use this method.
I’m trying to think of other good words for a wreath now….
© 2005 – 2015 Kathy Lewinski & Susan Cornish


4 Comments to Advent Calendar Project ’15 – Week 5