


Every Friday for the twenty-four weeks leading up to December 1st, we will be making a handmade Christmas ornament. Follow along and make them all or pick and chose your favorites.
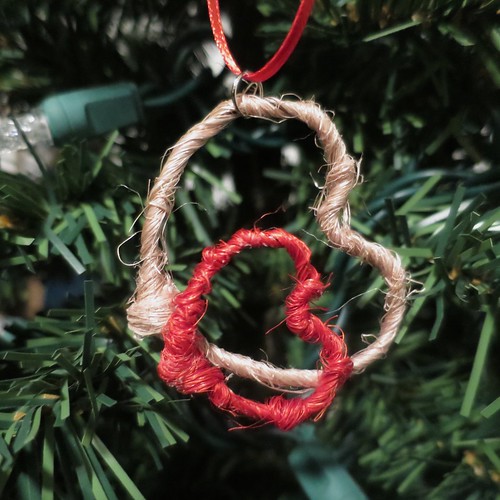
This week’s ornament reminds me of the traditional straw ornaments you often see in Scandinavia and Eastern Europe. Though it is a lot easier to make than braiding or shaping straw. I wasn’t sure about this one when I started playing around with it, but in the end I love the rustic simplicity of it.
I found my red jute at Ikea a few years ago, but jute is so popular now, you can probably find it elsewhere. Just looking online, I see it in tons of colors now.
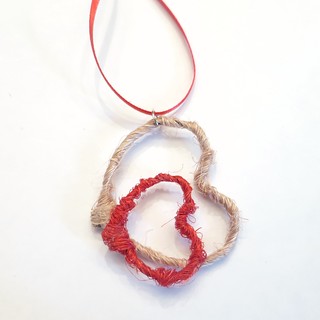
Jute Heart Ornament
Supplies:
- wire (You want a wire that is pliable, yet not too thin. Mine was a black floral wire, but I’ve lost the packaging listing the exact gauge.)
- wire cutters
- small pliers
- jute twine(I used red and natural)
- tacky glue
- scissors
- jump ring
- 1/8″ ribbon
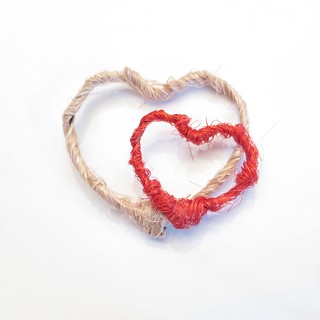
1. Shape the wire into two hearts, one smaller than the other. Your heart does not have to be perfect, the jute will hide some shape imperfections. Twist the wire together at the bottom and crimp it to hold it tight. Trim any excess.

(I left wire hanging off the larger heart because I thought I might hang the smaller one from it, but I ended up not liking the way it looked and cut it off later.)
2. Cut a piece of jute big enough to cover the whole heart. Starting at the bottom of the heart wind the jute around the wire. I held the end down with one finger while wrapping. When you have covered all the wire, wrap the jute to cover the twist wire at the bottom.

Cut off any excess jute and glue the end down to what will be the back of the heart, covering the wire twist at the bottom.
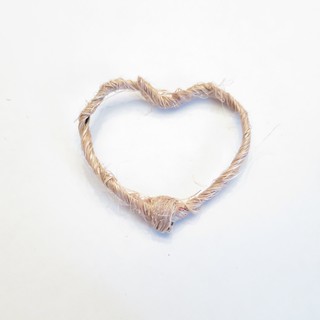
Let dry. I found it helped to put it under something heavy to dry because the jute end wants to pop up. Jute can be a get a lot of shedding ends sticking out, so I trimmed those off for a neater look.
3. Glue the smaller heart to the larger. Let dry.
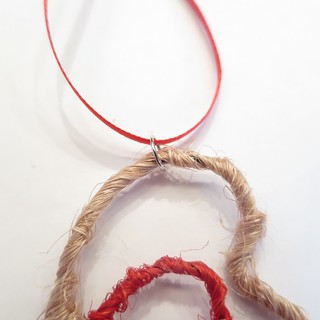
4. Attach the jump ring to the bigger heart and tie ribbon on for hanging.
© 2005 – 2015 Kathy Lewinski & Susan Cornish


2 Comments to Advent Calendar Project ’15 – Week 3