


Every Friday for the twenty-four weeks leading up to December 1st, we will be making a handmade Christmas ornament. Follow along and make them all or pick and chose your favorites.
This week’s ornament is dead simple, but super cute!
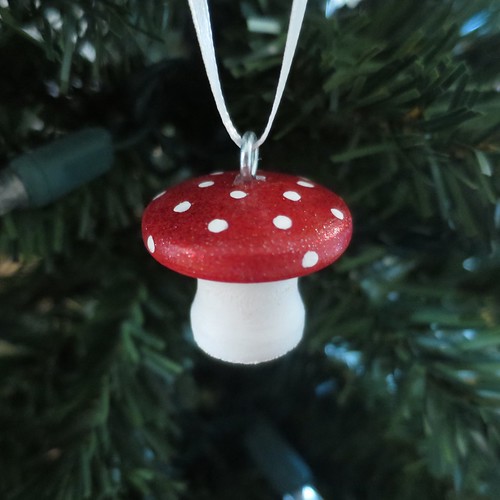
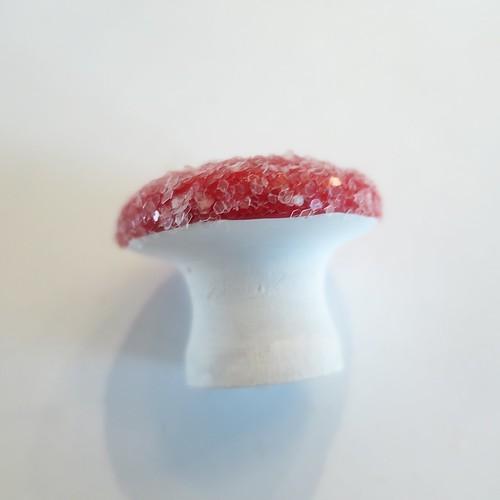
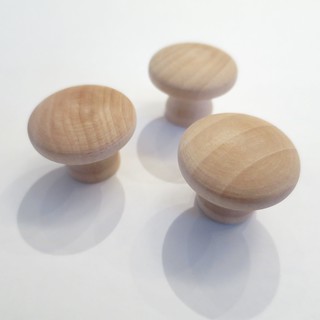
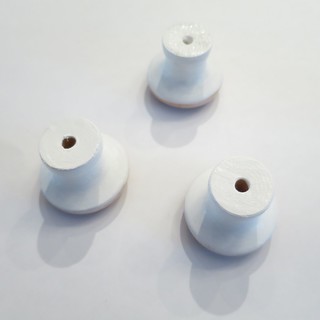
A tiny mushroom made from a wooden drawer knob. The shape is just perfect and you can easily find the knobs at any hardware store. You want to start with an unfinished wooden knob so you don’t have to sand off a finish before painting.
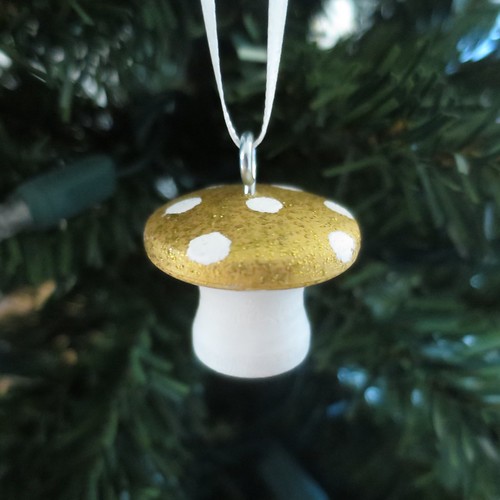
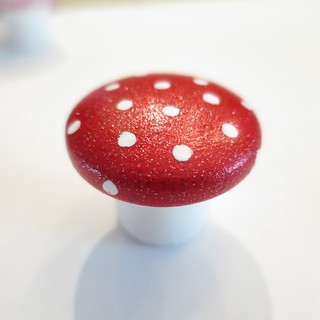
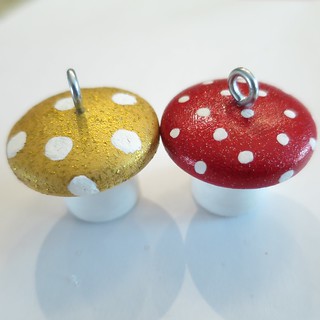
Glitter paint gives them a shimmer that really shows up in the lights of a Christmas tree. I find that glitter paints don’t really cover a surface, so I like to paint a solid color first and then paint the glitter on after.
I also tried coating one with glue and dipping in in a clear glitter. I gave kind of a cool frosted look, but I thought the glitter painted ones were much nicer. Plus you lose the dots with glued on glitter.
Drawer Knob Mushroom Ornaments
Supplies:
unfinished wooden drawer knobs
acrylic paint in colors of your choice (I used white, red and gold)
glitter paint in colors of your choice (I used gold and red)
small paintbrushes
small eye screw
spackling paste (optional)
fine sandpaper (optional)
polyurethane (optional)
hammer (optional)
small nail (optional)
1. The bottom of the drawer knobs will have a hole in it for a screw. I just left it, but if it bothers you fill it with some spackling paste and sand it once dry.
2. Paint the stem and underside of the knob/mushroom white. Let dry. Add more coats as needed. I need three coats to get mine as white as I wanted.
3. Paint top and side of top with the base color. Once again add coats as needed. My red needed two coats, but the gold only needed one. Let dry.
4. Paint glitter paint on the top and sides of top. Let dry and re-coat if needed. I only needed one coat of the red, but two of the gold.

5. Add white dots to the top. I used a small paintbrush to do this, but you could use an eraser or something else round as a stamp. Let dry. Try not to get too concerned about making them perfect.
6. Seal with polyurethane if desired. I didn’t bother with this step and find sometimes it takes away from the glitter.
7. Screw the eye screw into the center top of the mushroom. If the wood of the knob isn’t super soft, I find it helps to hammer a small nail in first to create a hole to screw into.
© 2005 – 2015 Kathy Lewinski & Susan Cornish


3 Comments to Advent Calendar Project ’15 – Week 2