
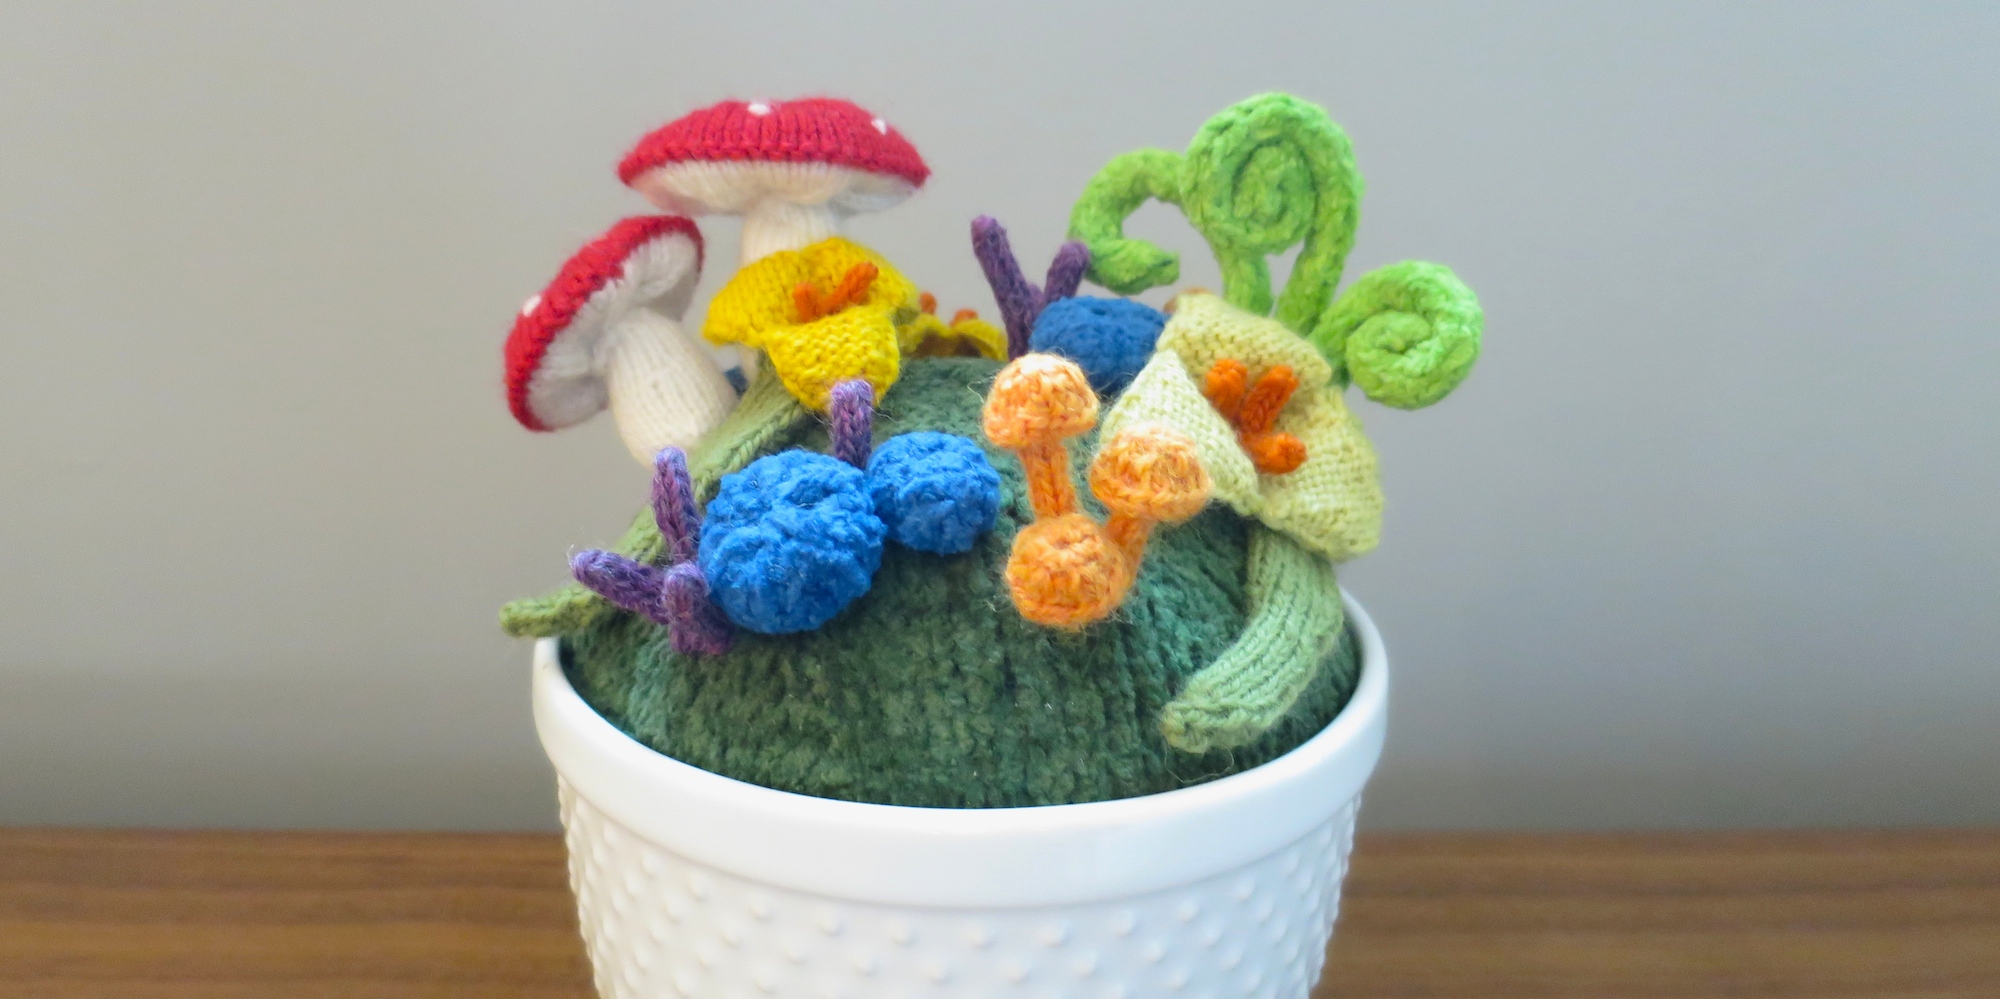

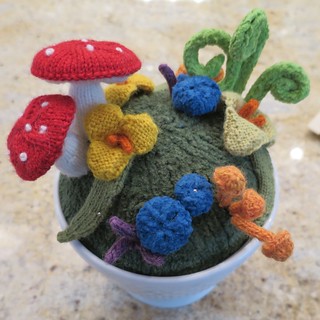
As promised, here is the tutorial and patterns for the fantasy garden I made for the Iron Craft “faux” challenge.
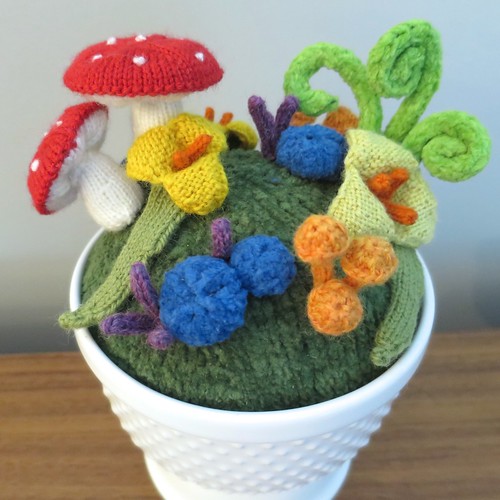
This was such a fun project and I am thrilled by how it came out. I can see lots of different options for it. I was inspired by Alice in Wonderland, so I used bright, and some unnatural, colors in mine, but you could also make it look very natural. You could put your garden in all sorts of containers. I used a footed bowl (actually it is one I made from two Target bowls glues together), but you could use a pretty garden pot or look for interesting containers at thrift shops. I could even see sweet little gardens made in tea cups. I’m pondering a bigger garden to fill an unused terrarium in my storage unit.
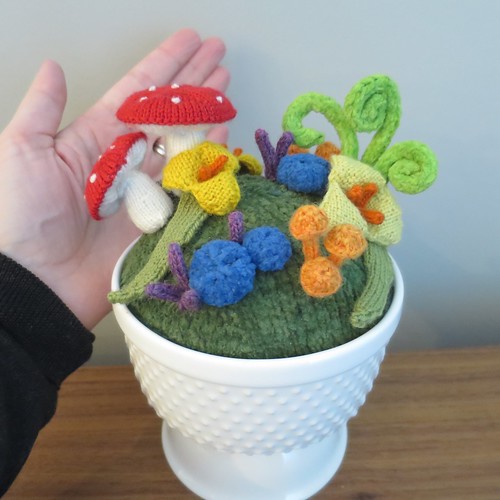
Some people were wondering how big this is, so here is my hand for reference.
I will admit to you that some of the pieces are a bit fiddly to knit. They aren’t hard, but for many things you are starting with six stitches in the round on three needles. It is only for one row and once you get the hang of it, it isn’t bad. I found that using 4″ double-points (like this set I have from Knit Picks) made things a little easier. Yes, you can use your regular double-points, these just gave me a lot less needle to deal with.
Knit Fantasy Garden
Below are the instructions for how I put the garden together and some of the simpler knit parts.
I’ve created downloads for the Toadstool and Tiny Mushrooms Pattern and the Trillium Flower Pattern. Both downloads do contain a few pictures to help illustrate how the items go together.
Supplies:
- container for your garden (my bowl was 5″ in diameter)
- styrofoam ball, or other styrofoam shape of your choice, to fit in container, depending on you container you make have to piece something together.
- serrated knife (to cut styrofoam as needed)
- foam glue (I used Hold the Foam)
- yarn, this is a great project for using up scraps (I used Knit Picks Palette which is fingering weight and Crystal Palace Cotton Chenille which is aran weight.)
- four double-pointed needles in appropriate sizes for your yarn. (I used size 0 for the fingering and 2 for the chenille.)
- stitch marker
- tapestry needle
- scissors
- stuffing
- floral wire
- straight pins
- strong thick glue like Tacky Glue
Gauge: Gauge is not particularly important with a project like this, just keep in mine that the bigger the stitch the bigger your final item will be. Also a tighter stitch looks better than a looser stitch in this use, especially for things that are stuffed like the toadstools. My gauge, just for reference, was 5 stitches per inch for the items knit with the cotton chenille (grass, fiddleheads and rocks) and 10 stitch per inch for the items knit with fingering yarn (mushrooms, toadstools, flowers, etc…).
1. Cut your styrofoam to fit snuggly in your container. You’ll need enough space to have the “grass” tuck in around the edges.
For my container, I had a flat disc of foam on the bottom and then cut a foam circle in about a third to sit on top of it. I also had to trim the edges of the circle a bit.
2. Knit grass to cover the foam, the cotton chenille had great texture for this, but a boucle would be fun to. I was covering a partial circle, so I basically knit a little cap for it by doing the following.
Cast on 6 stitches. Divide between 3 needles. Join together to knit in the round placing a stitch marker between the first and last stitch.
Row 1: kfb into every stitch (12 stitches)
Row 2 and every even row: k
Row 3: (k, kfb)6x (18 stitches)
Row 5: (k2, kfb)6x (24 stitches)
Continue in this manner adding one more knit stitch each time until you have a circle big enough to cover the styrofoam. Then add a few more knit rows before binding off. For me that was up to k12, kfb. Weave in your ends.
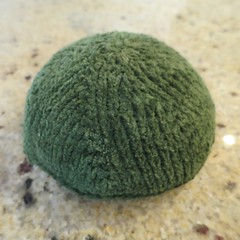
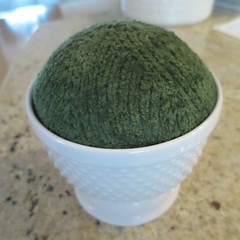
Use the foam glue to glue the grass to the foam. You can also glue the foam into your container, but I want to use mine for other things seasonally, so I didn’t.
The shape of your foam base will really determine what you need to knit here. If your foam is flat on top instead of rounded like mine, you could just knit up an easy square to cover it. You could also go really easy and use felt or fleece for your grass.
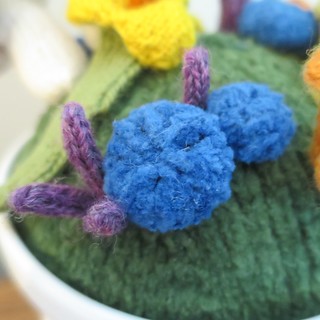
3. Knit up your bigger pieces like the toadstools, flowers, leaves and fiddleheads.
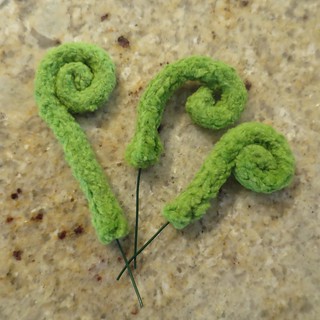
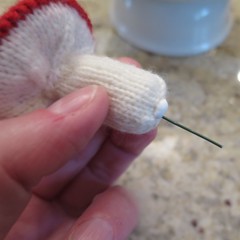
For the fiddleheads, I knit a four-stitch i-cord from cotton chenille. Once it was about 5″ – 6″long, I finished it off and wove in my ends. I carefully inserted a piece of floral wire about 1/2″-1″ longer than the icord into it. The wire allowed me to roll one end to create the fiddlehead. Use the wire sticking out from the bottom of the icord to insert the fiddlehead into your foam when you are ready to layout the garden.
Downloads for the toadstool and flower patterns are above.
4. Knit up smaller pieces to fill in your garden, mushrooms, i-cord “grass” and “rocks”.
The i-cord grass is pretty self explanatory, just small 4-stitch i-cords. The rocks are little knit balls of cotton chenille, made like so…
Both sizes of rock:
Cast on 6 stitches. Divide between 3 needles. Join together to knit in the round placing a stitch marker between the first and last stitch.
Row 1: kfb into every stitch (12 stitches)
Row 2: k
Small rock:
Row 3: (k2tog)6x (6 stitches)
Pull the cast on tail in to the wrong side. I used it to stuff the rock. Cut the yarn leaving about a 5″ tail. Weave through the stitches on the needles and pull tight. Weave in end.
Large rock:
Row 3: (k1, kfb)6x (18 stitches)
Row 4 – 5: k
Row 6: (k1, k2tog)6x (12 stitches)
Row 7: k
Row 8: (k2tog)6x (6 stitches)
Pull the cast on tail in to the wrong side. I used it to stuff the rock and added a little bit of polyfil. Cut the yarn leaving about a 5″ tail. Weave through the stitches on the needles and pull tight. Weave in end.
5. Layout your garden using straight pins to place things. Keep in mind whether or not your garden will be seen for all sides or just the front.
6. Glue everything in place using tacky glue. As I mentioned above for the fiddleheads you have the floral wire to stick them into the foam base, I also added a little glue to help keep the icord attached to the grass. I also put wire with a touch of glue on it in the toadstool and mushroom stems to give them a little more support.
Everything else was just attached with glue.
Let dry and enjoy your new garden.
Copyright 2015 Kathy Lewinski JustCraftyEnough.com
Do not duplicate for distribution, repost pdfs for download, repost, teach or sell without permission.
© 2005 – 2015 Kathy Lewinski & Susan Cornish

Pingback: Knit a Fantasy Garden – Knitting