


(For the 24 weeks leading up to December 1st, we’ll be making a Christmas ornament, giving you enough to fill an advent calendar.)
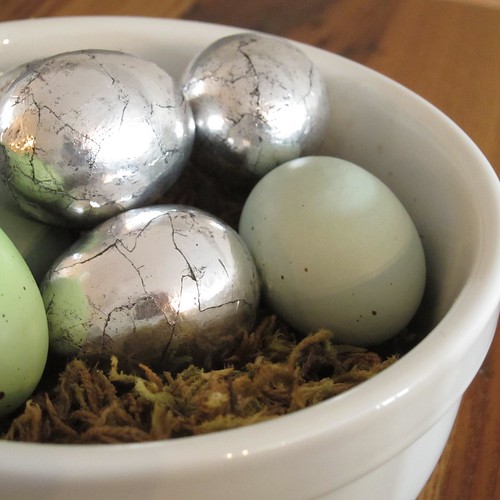
Some of you might remember that this past Easter I did an antiqued silver effect with tin foil and black paint on eggs and a bunny.
I really loved the way it looked and thought it would look fabulous on a finish for icicle ornaments. I wasn’t sure what to use to make the icicle shape, but then the obvious hit me, clay.
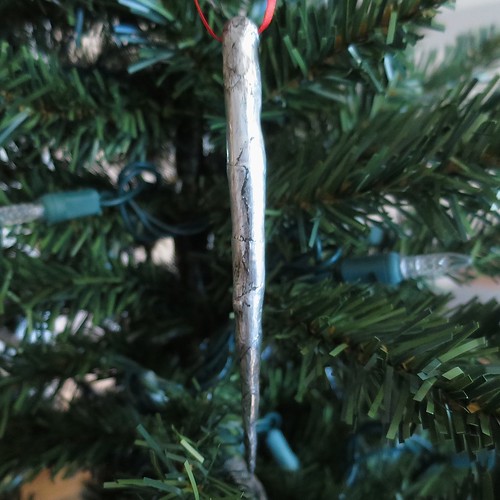
These look spectacular on the tree, like antiques past down through generations. I think a bunch of them hung on green garland on a mantle would also look fabulous…hmmmm I might just have to do that.
“Antique Silver” Icicle Ornament
Supplies:
- sculpting clay (I used Fimo Air Light because I had it, but oven baked clays would work great as well)
- toothpicks
- tin foil
- glue (I used tacky glue)
- small paint brush
- something round and smooth for burnishing, like a knitting needle or chopstick
- black acrylic paint
- paper towels
- water
1. Roll the clay out into an icicle shape any length you want. Use a toothpick to make a hole at the top for hanging. I left the toothpick in while it dried.
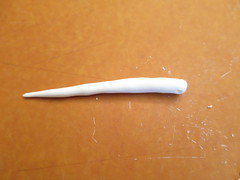

If using air dry clay, let dry until solid, for me that was overnight. If using any other clay follow the instructions to harden.
2. Rip the tin foil into small uneven pieces, mine were between 1″ and 1/2″. Using a small paintbrush, coat the back of a piece of tin foil (the non-shiny side) with glue. Make sure to get all the edges. Glue on to the icicle. Repeat with another piece of tin foil overlapping them.
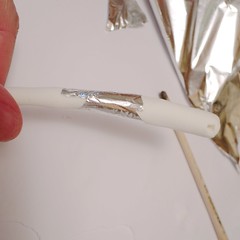
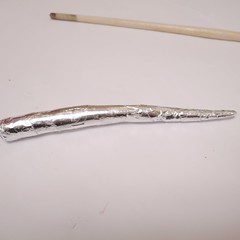
Continue with more pieces of tin foil until the entire icicle is covered, including the holes. Use a toothpick to open the holes again.
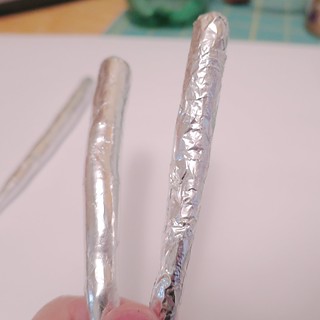
3. Use a wet paper towel to clean off excess glue. Burnish the tin foil to smooth it out but rubbing it with the edge of something round like a knitting needle. Be gentle around the thinner end of the icicle, I found it helped to have it against the table top for support when I did the tips. Wipe of any excess glue that oozes out while you are working. (Also wipe it from your burnisher from time to time.) You are not trying to get the foil completely flat, but you want the pieces to have a hammered look. Here you can see and icicle before and after burnishing.
4. Get a paper towel wet and squeeze out the excess water. Dip it into the black paint and wipe it on the foiled icicle. Keep working with the towel and paint until you get as much black into the seams and folds as you like. Let dry.
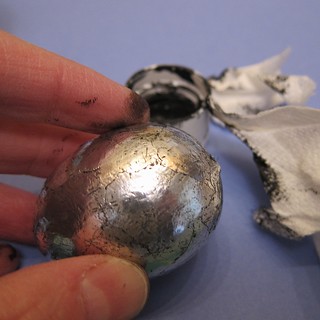
(Yes, this is an egg and not an icicle, but the effect is the same.)
5. Put a ribbon through the hole and hang.
© 2005 – 2014 Kathy Lewinski & Susan Cornish

Pingback: Déco pour le sapin | Pearltrees