
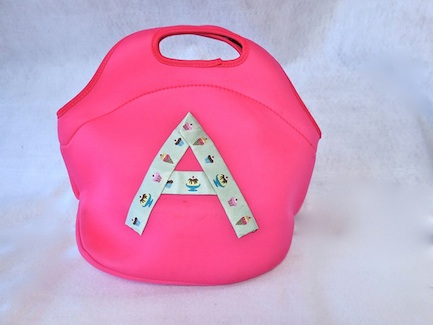

We got this new insulated lunch bag in the Dollar isles in the front of Target. (Full disclosure, this was $3.00) It was screaming out for some sort of embellishment or personalization. Here is how I did it.
Supplies and Tools
- lunch tote
- decorative ribbon
- double sided iron on adhesive
- disappearing fabric marker
- fray check
- sharp sewing scissors
- iron

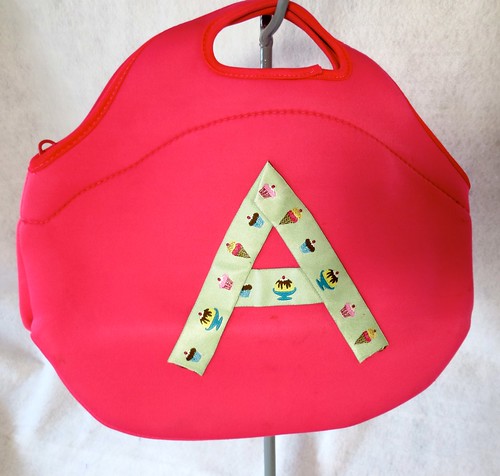
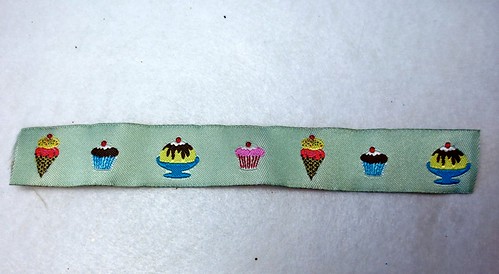
I started with the lunch tote and this amazing ice cream ribbon.
I wanted to personalize the bag for my daughter, so I did her initial on the front. Draw the letter first and lay it out in the ribbon so that the pattern in the ribbon is used to it’s best advantage. Cut the ribbon to the correct lengths and apply fray check to the very ends. (For me, the fray check dried clear and was unnoticeable.) Once the fray check is dry, cut strips of double sided iron-on that are nearly as wide as the ribbon itself. Heat the iron to a low-med setting. Iron the interface onto the back side of the ribbon. Beware at this stage: this jacard ribbon is “all threads” on the back, and the surface really curled and puckered in an alarming way when the adhesive attached to it. Not to fear, it will right itself in the next step. Place your ribbon on the outline you drew on your bag and carefully iron it down. (I did test a panel on the bottom to make sure my dollar-bin tote would hold up to the heat.) For the “A” I got the interfacing right up under the point on both pieces of ribbon so that the fold would stick down and the ribbon in the fold would hold itself down. I was pleased with this detail.

The bag is a great easy quick craft. No sew. These would make great gifts for the holidays.
To me the magic is in the ribbon. So look what I found: beautiful ribbon.. Beware!
© 2005 – 2014 Kathy Lewinski & Susan Cornish
