


(For the 24 weeks leading up to December 1st, we’ll be making a Christmas ornament, giving you enough to fill an advent calendar.)
Sometimes the idea for a Christmas ornament comes from the strangest places. Earlier this summer, I was in Chicago and spent a day at the Shedd Aquarium. In the entrance hall, they have these amazing lamps topped with octopuses.
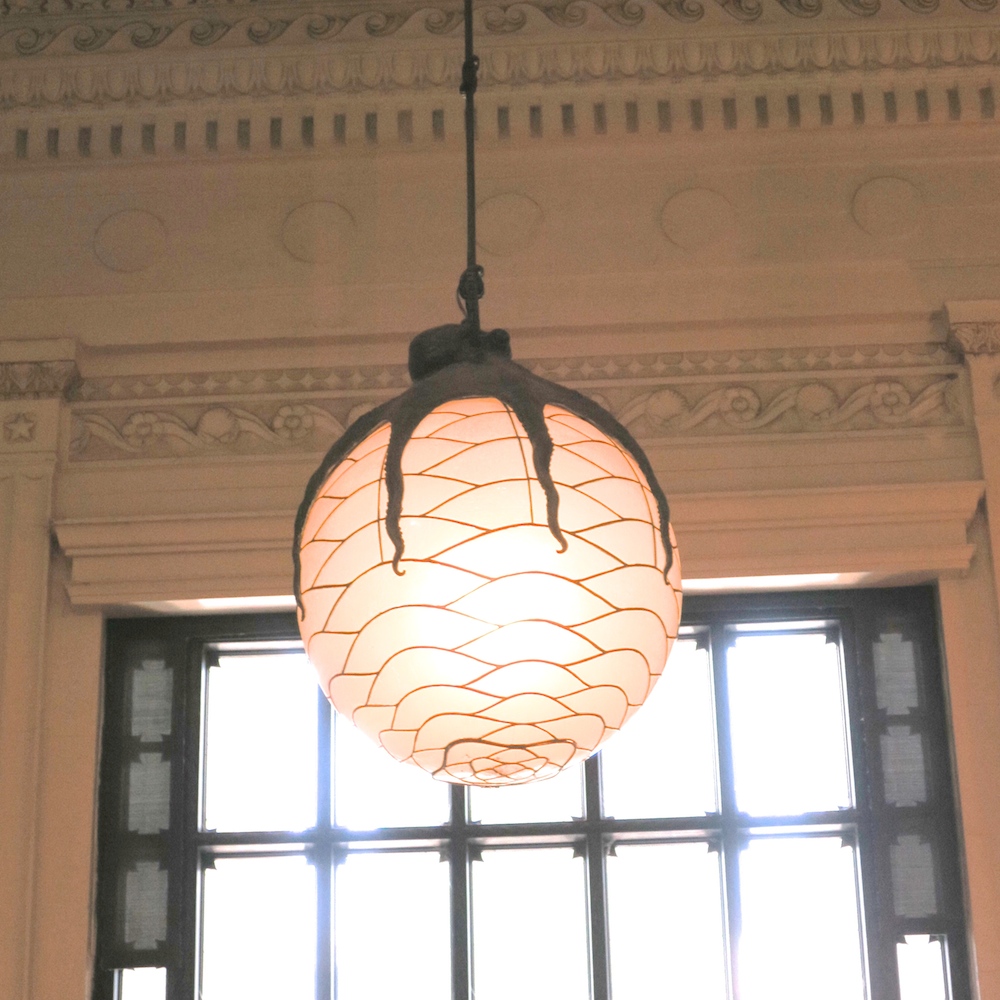
I took one look at them and thought, that would make a fantastic Christmas ornament.
It is important to use an air dry clay for this, because you want it to dry on the Christmas ball. That means you can’t put it in the oven. * I used Fimo Air Light. I was perfect for this application because it dried quickly and it didn’t make for a super heavy ornament.
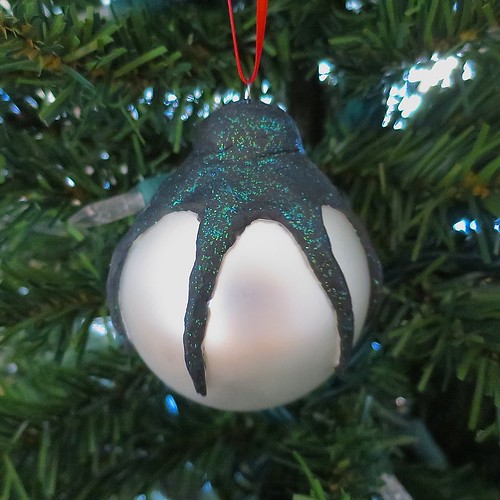
Octopus-Topped Ornament
Supplies:
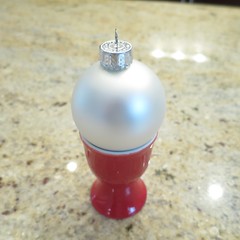
- Christmas ball ornament
- something to stand the ball on like an egg cup
- Fimo air light or other air dry clay (do not use the clay that needs to be baked) *
- black or dark grey acrylic paint
- glitter paint, I used Bella Star Dust which is green (optional)
- thin paintbrush
- scrap paper
- glue such as tacky glue
1. Cover the topper on the Christmas ball with clay for the body of the octopus, leaving part of the loop exposed for hanging. You want it to be round around the topper and then flatten out around the top of the ball. I found putting a little water on my finger helped smooth it out.
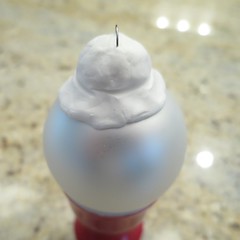
I used a toothpick to make a line around the top, but that is optional.
2. Evenly attach eight legs to the flat area on the top. I made thin snakes that were wider on one end and the came to a point. Curl the ends of the legs a little.
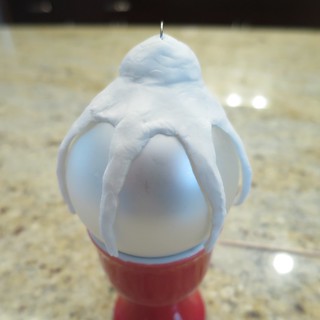
Use a fingernail to make the area between the legs curved. I also flattened the area between the legs a little. Smooth everything out as much as you can (the black paint hides a lot of flaws). Let dry completely, typically overnight.
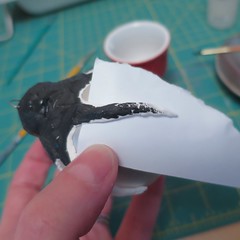
3. Carefully, paint the octopus with the black or grey paint. I did the body first and then the legs. Using the air dry Fimo the legs did not stick to the ball, so I was able to slide a piece of scrap paper under them. That way I could paint without getting it on the ball. Let dry.
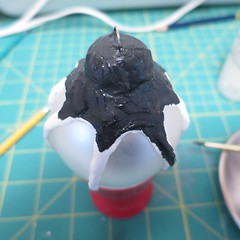
I had mixed some of the glitter paint into the black, but it didn’t show up enough for me. So once it was dry, I added a coat of glitter.
4. As I mentioned above, the legs do not stick to the ball. Most actually stuck out a little once dried. They were pliable enough for me to lift them just enough to paint a little glue on the bottom and stick them down.
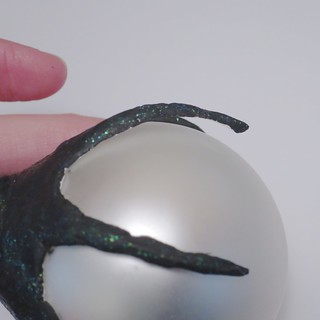
Once glued down they felt very secure and unlikely to get broken off.
* Update 11/8 I say not to use a clay you have to bake because I assumed that covering the hole in a glass ornament and making it bake would make it crack. According the the Polymer Clay editor at Craftgossip you can bake clay covered glass or oven-safe plastic ornaments. I have not tried it, but she says she has.
© 2005 – 2014 Kathy Lewinski & Susan Cornish


Pingback: Décorations de Noël 3 | Pearltrees
Pingback: Tutorial: Octopus Ornament – Polymer Clay