


(For the 24 weeks leading up to December 1st, we’ll be making a Christmas ornament, giving you enough to fill an advent calendar.)
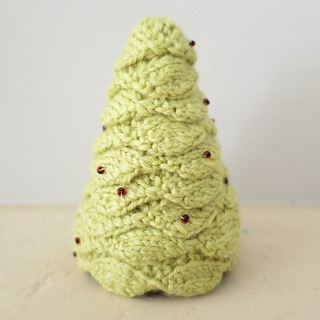
I often see patterns out there to make crocheted scalloped Christmas trees, but hadn’t seen a knit version. So, this week I decided I wanted to try my hand coming up with a design for knitters.
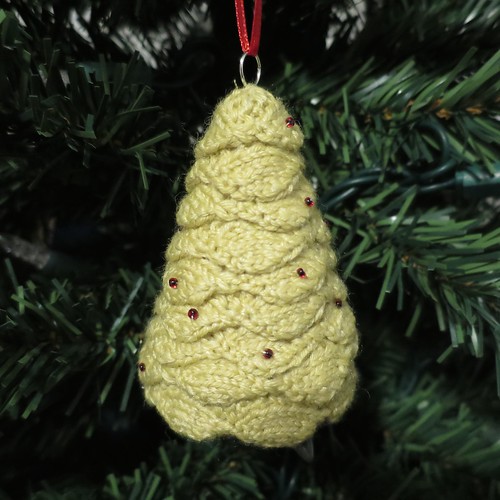
Basically, what I ended up with was a knit scalloped trim that I used to cover a foam tree form. (My local dollar store has these in a couple different sizes.) It took a little trial and error to get the pattern for the scallops just right, but once I did they were a cinch to knit. It’s one of those patterns you memorize after a few times doing. I knit 55-inches of the trim in two evenings.
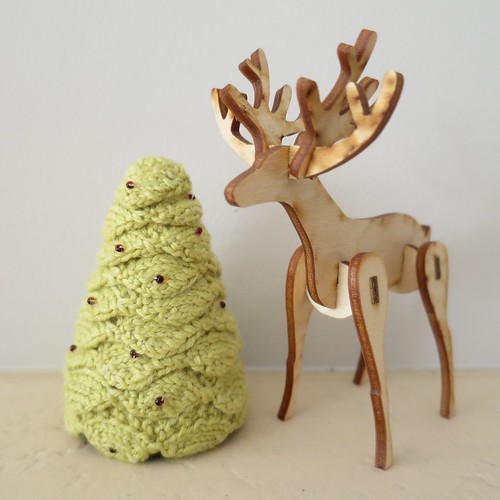
In this small size it is perfect to hang on the tree, but it also looks cute as a decoration on a shelf or table. I’m actually knitting up a bigger version right now using sport weight yarn on size three needles for a 7-inch tree.
Knit Scalloped Tree
These instructions are written to make a tree that is 3-inches tall with fingering yarn, but you can easily make bigger ones or use a different weight yarn. (Though for a small tree like this I would still stick to fingering.)
Supplies:
- fingering weight yarn, about 60 yards (I used Premier Yarns Serenity. You want something you can block, so steer away from 100% acrylic.)
- two size 0 needles
- scissors
- tapestry needle
- steam iron
- beads (optional)
- sewing needle small enough to fit through the beads (optional)
- thread
- sewing needle
- jump ring
- felt
- foam tree form about 3 inches tall
- glue for styrofoam (I used Hold the Foam)
- small paintbrush (optional)
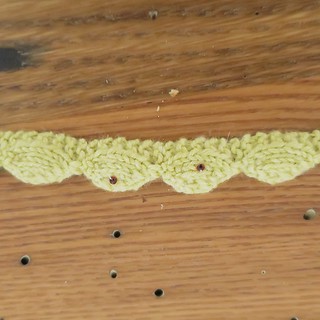
1. Knit the scallops. I needed 41 scallops to cover my tree, yours many vary depending on your gauge and tree form. I tested until I had the right length, keep in mind blocking will slightly lengthen it, I need one less scallop after blocking.
Knit Scallop Trim
Gauge: Gauge is not super important here, but mine was 8 stitches per inch. Each scallop was about 3/4 inches wide once blocked.
Abbreviations:
- k – knit
- p – purl
- pfb – purl front and back into the same stitch
- kfb – knit front and back into the same stitch
- p2tog – purl two stitches together
- k2tog – knit two stitches together
- RS – right side
Cast on 4 stitches
Row 1: k (RS)
Row 2: k2, pfb, p1 (5 stitches)
Row 3: k1, kfb, k3 (6 stitches)
Row 4: k2, p2, pfb, p1 (7 stitches)
Row 5: k1, kfb, k5 (8 stitches)
Row 6: k2, p6
Row 7: k8
Row 8: k2, p3, p2tog, p1 (7 stitches)
Row 9: k1, k2tog, k4 (6 stitches)
Row 10: k2, p1, p2tog, p1 (5 stitches)
Row 11: k1, k2tog, k2 (4 stitches)
Row 12: k2, p2tog (3 stitches)
Row 13: kfb, k2 (4 stitches)
Repeat rows 2 – 13
On the last scallop bind off. Weave in ends.
2. Block the trim with a steam iron.
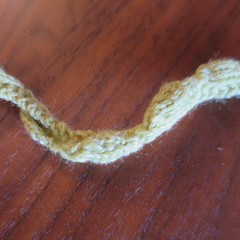
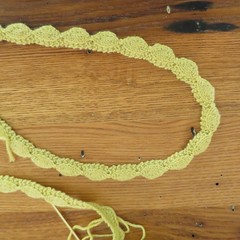
Trim before and after blocking.
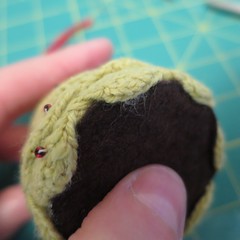
3. If desired, sew beads onto the front of some of the scallops. (You could also knit the beads in, but with all the increases and decreases in the pattern I thought sewing them afterwards would be easier.)
I didn’t even bother to knot and cut the thread between beads. I just wove it behind the knitting to where I wanted the next bead.
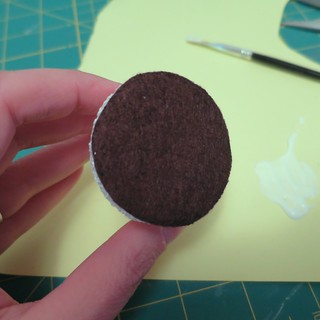
4. Cut a piece of felt to fit the base of the tree form and glue it on.
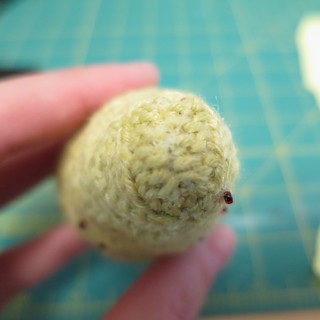
5. Starting at the base, glue on the first round of scallops. (I found a paintbrush was good for getting this really thick glue on the foam evenly.) You want all the foam to be covered so let the edge of the scallops go under the base a bit.
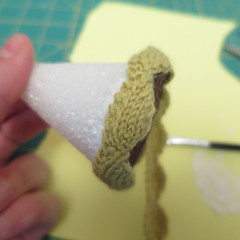
Now continue glueing and spiral the scallops all the way up the tree overlapping each layer.
When you get to the top, leave a little of the scallop edging higher than the tree form and glue it down to cover the top.
Let dry.
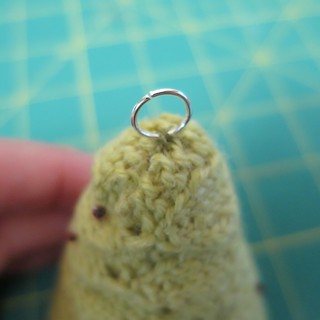
6. If you want to use your tree as a hanging ornament, sew a jump ring to the top of the tree.
© 2005 – 2014 Kathy Lewinski & Susan Cornish

Pingback: A Couple of Cute Christmas Projects – Knitting