


(For the 24 weeks leading up to December 1st, we’ll be making a Christmas ornament, giving you enough to fill an advent calendar.)
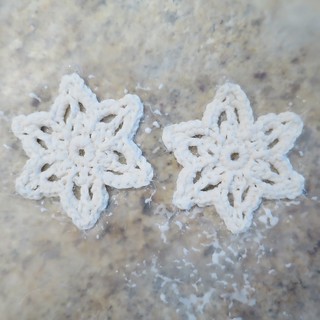
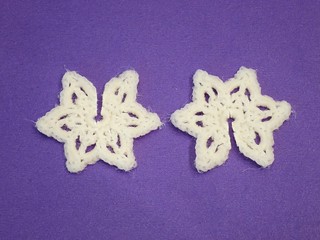
This week’s ornament is for the crocheters. There are lots of crocheted snowflakes out there, but I was wondering if it was possible to put two of them together to make a more 3-D ornament. Thanks to fabric stiffener it is!

The stiffener allows you to cut the finished snowflakes so you can slide them together for a 3-D look. With little finer yarn or crochet thread, you may even be able to put three flakes together.
I am not a good enough crocheter to create my own snowflake pattern (yet), but there are lots of free ones online. I used this Petite Flake Pattern from Snowcatcher, because it was rather simple and I wanted to experiment with one I could hook up quickly. I want to try this with something more elaborate and she has a whole library of snowflake patterns.
3-D Crocheted Snowflake Ornament
Supplies:
- yarn (I used fingering weight)
- crochet hook appropriately sized for the yarn (I used a D/3mm)
- tapestry needle
- fabric stiffener or craft glue like Elmer’s (I used Stiffy fabric stiffener)
- wax paper or foil
- scissors
- tacky glue
- jump ring
1. Crochet two identical snowflakes. Weave in the ends.
2. Saturate the snowflakes with either fabric stiffener or glue mixed with a little water. Dry flat on wax paper or foil. (If your snowflakes need more intense blocking to get the correct shape, do this step on something you can pin them to.) Let dry completely. They should be very stiff. (I find with Stiffy, I have to do this step twice to get it as firm as I would like.)
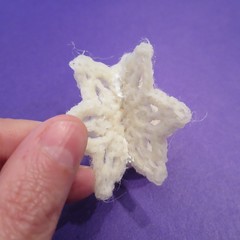
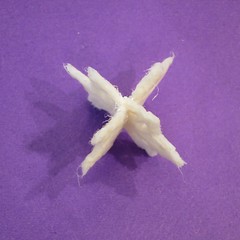
3. Cut a slit in each snowflake, one through the top and one through the bottom. The slit should go slightly past the middle, so that when slid together the snowflakes are even in height. Start with a smaller slit and increase the length until correct.
4. Slide the two snowflakes together and glue the edges of each slit to the other snowflake. (Technically the snowflakes stayed together without glue, but the glue held them closer together and more secure.) Let dry.
5. Use the needle to put a hole through one of the snowflakes where you want it to hang from. Open the jump ring, insert it through the hole, and close it.
© 2005 – 2014 Kathy Lewinski & Susan Cornish


4 Comments to Advent Calendar Project ’14 – Week 11