

When I taught knitting, I started by using the pattern Fabulous Felted Tote. This is a GREAT pattern for beginner knitters. The instructions are detailed and well laid out, with clear illustrations to help with some of the tricky spots.
I just knit another one. Here are my notes.
This is the small size. I used 3 skeins of Lambs Pride Bulky in Sapphire and one skein of the Mountain Colors Wooly Feathers. The pattern calls for the yarn to be doubled, but I used a very bulky yarn and held it singly. This cuts the amount of yarn the pattern calls for in half (and cuts the price in half as well). However, the finished bag certainly would have been thicker if it was knit with a double strand. If I were to knit a gigantic version of this bag (which I am tempted to do) I would probably go for double stranding the yarn, just to give the bag more strength and weight in the end.
Here is the gauge on my bag before I felted it.

A way to measure gauge carefully is to stick in bobby pins or fine knitting needles 4″ apart, and then count the stitches between the markers you have set.
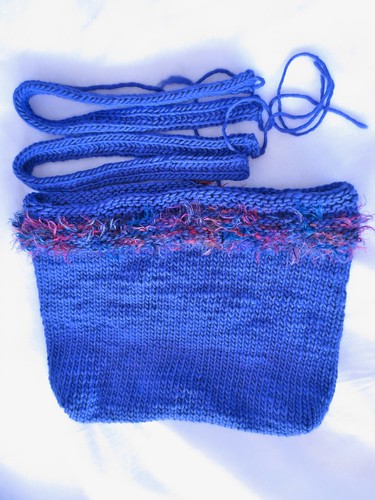
Prefelting size was 14″ (bottom with box tucks already taken) 17″ high and 19″ wide at the mouth of the bag.
Once the bag was felted it measured 15 at the mouth, 11 across the bottom, and the height was just 11 inches. When felting, the length will shrink more than the width. It will be about 25% narrower, but nearly 45% shorter.
Here is how the boxed feet look from the outside:
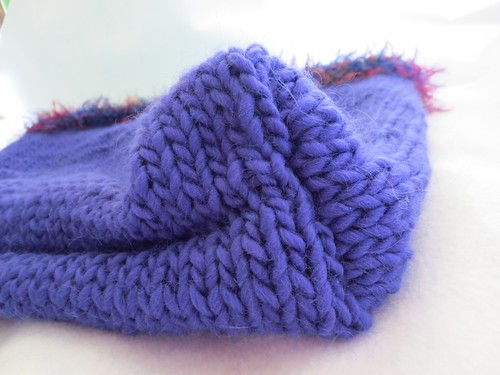
And from the inside:

There is a trick to sewing on the handles. Line them up so that they are “flat” and have a curve at the top. Make sure that one side is not twisted 1/2 way around and then attached.
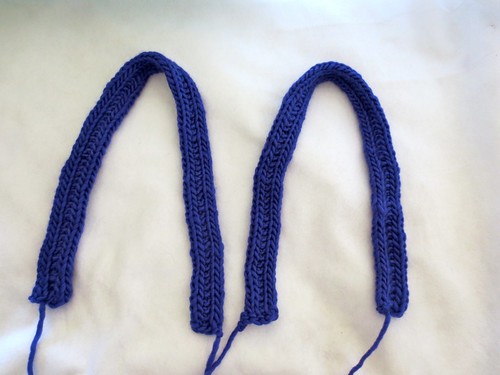
In this picture the handle on the left has a twist. The handle on the right is correct.
Prepare to attach the handles with a ruler and pins. Measure to make sure the handle is the same distance from the edge on each side, then pin it in place. Fold the bag closed, and place the straps on the other side in the same place. Then measure the distance on each side of the second handle, and make sure they are the same.
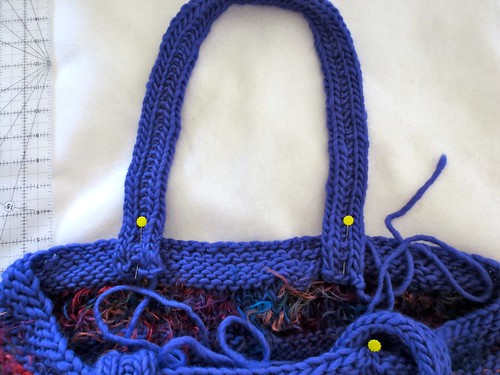
Then sew the handles down with the wool from the body of the bag. Take care to use nice even stitches, so that even after felting, the work will look good. Unless you line the bag, these handle joins will show when you are carrying your bag.
Felting the bag is an issue in the modern times we live in. My washing machine, being the new and beautiful beast that it is, kisses the fabric clean. My clothes come out of a short cycle clean and nearly dry already. This is not conducive to felting.
The process of felting takes place at a fiber level. Yarn is made up of actual hairs. The hairs have scales on them. When you expose the yarn to hot water, the scales relax and lift up up a little bit. Then, when you rub the yarn back and forth the scales start to cling to each other and the piece shrinks. It is similar to dread locks. The resulting fabric is a beautiful piece of wool. But here is the trick, a high efficiency, front load, gentle, warm water wash is not a great environment for felting. I ran this bag in every dark load I did for a while. I had it in a fine mesh zip bag, so that the hairs the yarn gave off would not get into the plumbing of my washer.
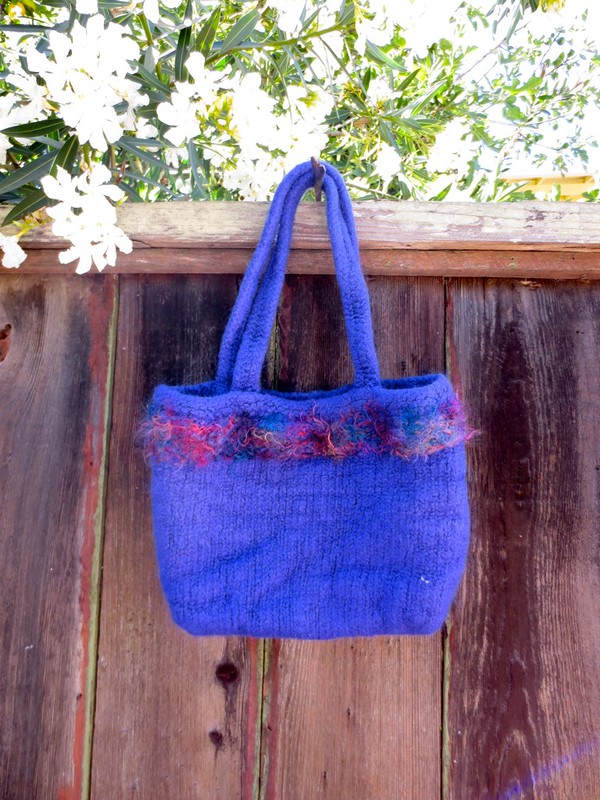
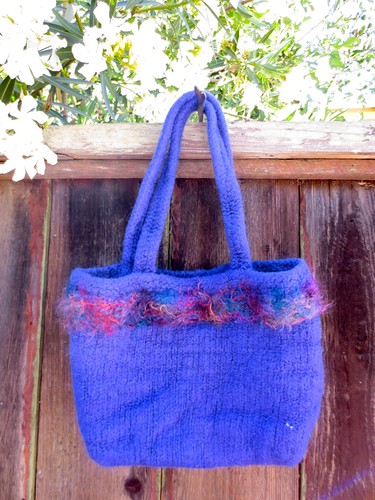
I love the finished bag. The color is glorious deep periwinkle blue. It’s a fun project, and a GREAT first project for someone to dive into. Happy Knitting!
© 2005 – 2014 Kathy Lewinski & Susan Cornish

Pingback: Just Crafty Enough – Knitting Lessons: Fa...