
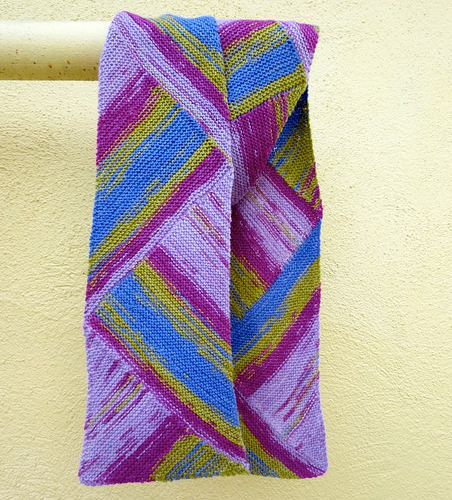

Recently I finished the Multi Directional Diagonal Scarf. It is a great pattern for a beginner because it does not involve the purl stitch, only the knit stitch. There are some increases and decreases.

There are some notes about the pattern that I would like to share. The whole original pattern is written out here. Karen, on Douma, wrote the pattern. It is also a well visited pattern in Ravelry, if you have an account, and want to check it out there.
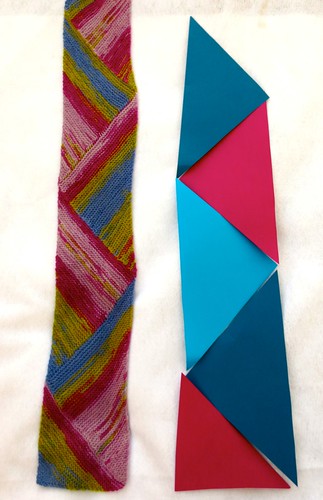
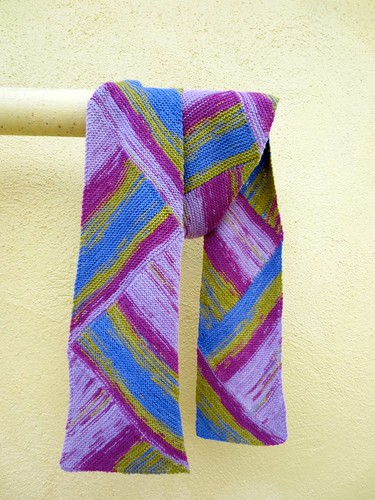
The most common mistake is the direction of the triangles. You will create a bend in your scarf if you head in the wrong direction. I have cut out triangles to illustrate how to build your work.
Here is how the pattern reads:
“…Work until you’ve SSK-ed the last two stitches of the row.
Next Row: start over at Row 1 of the Short Row Section.”
The trick here is that you have been turning and knitting back. You are in a rhythm, and you are a focused knitter, so nothing is going to throw you off. But after the first triangle, if you turn and knit back, you will be on the wrong side.
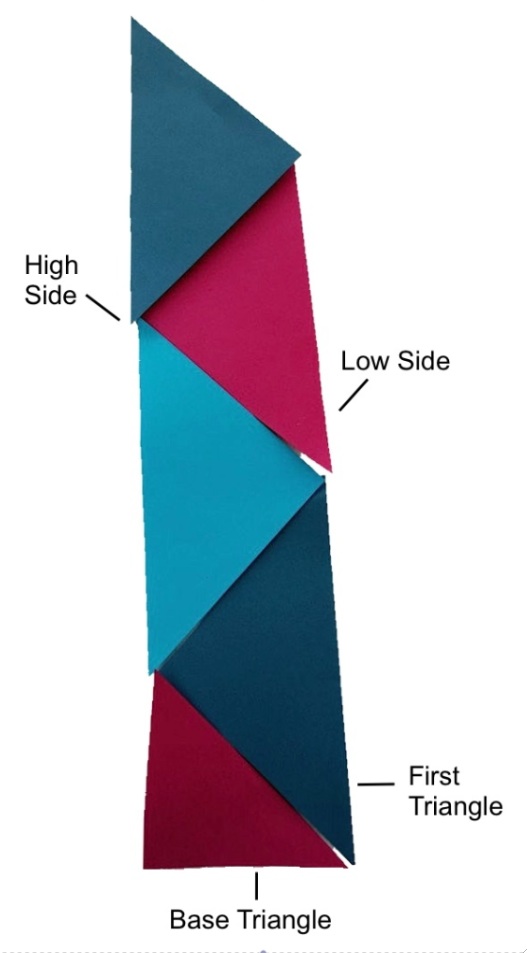
First you knit the base triangle. Then you knit the first triangle. Because the scarf is reversible, the first triangle cannot go wrong. (So you have an early feeling of success! yeah! But watch closely, so that you can keep that up!) After that, you always have to start your next triangle on the “low side”.
If you start a triangle from the “high side” it will grow at an angle, and make a turn in your scarf. (The picture above shows the potential error.)
So, to recap
“…Work until you’ve SSK-ed the last two stitches of the row.
Next Row: start over at Row 1 of the Short Row Section.”
When you finish the last two stitches of the previous triangle, IMMEDIATELY turn and start the next row. Do not knit back.
The other issue I had was with the last triangle.
The last triangle pattern reads like this:
For the last Triangle:
Work as with previous triangles until 1/2 of the stitches are on the right needle and 1/2 of the stitches remain on the left needle. Instead of starting each garter stitch ridge with an increase, start the ridge with a decrease (i.e., K1, k2tog). Continue to work the decrease in the “middle” of the row as before, and after making this second decrease, both needles will have the same number of sts. When 6 sts remain, work as follows:
K1, K3tog, turn, k2
k3tog, turn, k1
K2tog, cut yarn & pull through last remaining loop
In my experience there were not 6 stitches left, there were 7. Maybe I made a simple mistake somewhere. But if I did, then it is likely that others may make the same error. If you find yourself with 7 stitches then follow these instructions:
k1, k2 tog slip 1 (before the gap) slip one (after the gap) knit them together, and there will be 2 left on the left needle.
Turn and knit the three back. (5 on needle)
Knit 1, slip 3 as if to knit (2 before the gap and one after) knit 3 together.
Turn knit 2 back (3)
Slip 1, 2 tog, slip stitch over , cut, pull yarn through
Have fun! Enjoy!
© 2005 – 2014 Kathy Lewinski & Susan Cornish

9 Comments to Diagonal Scarf Pattern Notes