

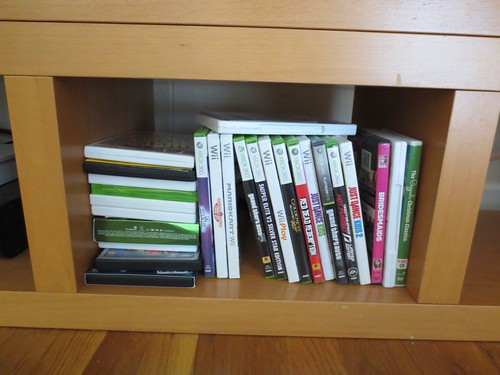
I am always looking for an elegant storage solution so I decided to try making a felt bin to reign in some of the chaos. I started my attack in the DVD/games area, but this could be used anywhere.
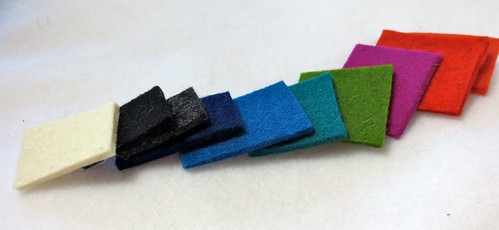
I LOVE to work with felt. This thick beautiful wool felt. I have done Christmas things and generally crafty things with “Craft Felt,” but what that means is “not wool”. If you have not worked in 100% wool felt, seek it out and just feel the difference. It is amazing. And this SUPER thick stuff is so substantial, it has a beautiful weight and heft to it. I wanted to see the colors all lined up, so I went to Britex Fabrics.
Here is how you can make one too:
Felt Storage Box
Supplies:
- 3mm felt (The felt is sold by the yard on the bolt. Do a careful sketch of your pieces first so that you know what will fit and you do not over-buy.)
- thread
Tools
- rotary cutter
- cutting mat
- straight edge/quilters ruler
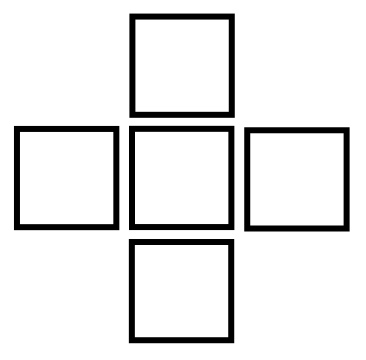
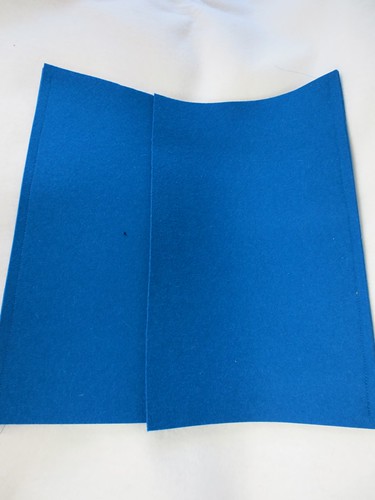
Carefully cut the felt to the right size. You will be cutting four sides and a bottom. If you are making a square box all five pieces will be the same size square.
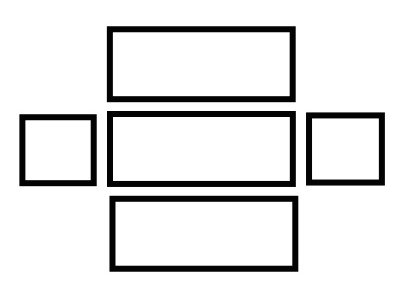
If you are making a rectangular box your sides will be two different sizes. Two of the sides will be the height you want the box and the length of the longer side of the rectangle. The other two sides will be the height you want the box and the length of the smaller side of the rectangle.
The space I was going to fill is 15 x 15 x 10. My pieces of felt are cut to be 1/2 inch smaller all the way around then the space.
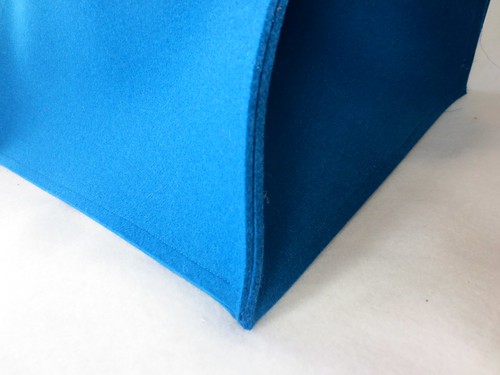
Sew two opposite sides on to the bottom first. You will sew to within about 3/4 inch of the corners, but no further.
Note: pins will not go through two 3mm sheets of felt, so lining up the sheets and feeding them into the sewing machine will need to be done manually. This is slow, steady, careful sewing.
Here you can see the sides, and the stitching almost to the end. I used a 1/2 inch seam allowance all the way around. And note that the seams are on the outside. (It would be impossible to bend the felt and “hide” the seams inside. )
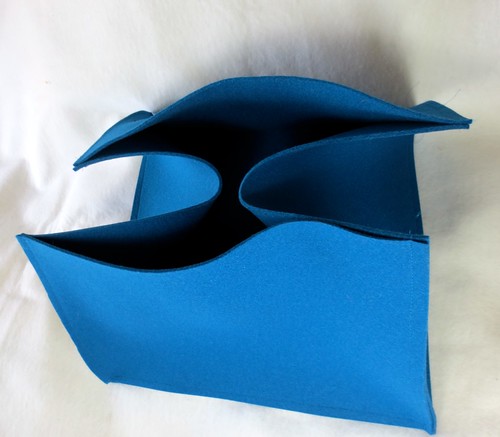
Next add the other two sides to the bottom.
And lastly sew up the vertical side seams. These you will sew all the way from top to bottom.
The best way is to line the seam up and just try to get the bottom out of the way as much as possible. The container you are sewing will not be “water tight”. The corners will have a hole in them, but you would have to pull on the fabric to find it.
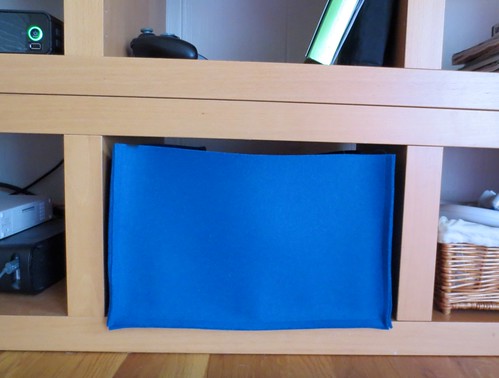
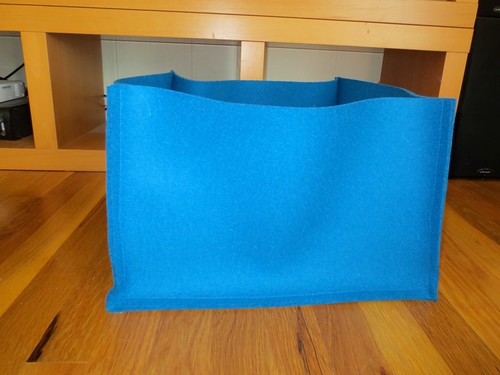
My box is a little bit more floppy than I had anticipated. But I think that is because it is really large.
Once it was filled, you can see that it holds a shape nicely.
Here is your before and after.
The felt pictured above came from Britex Fabric and they have those colors on hand. They are not pictured on the web site, but you are most welcome to call and talk to someone there and they will fill your order. Britex Fabric was nice and gave me a discount on my felt because I was doing a project for Just Crafty Enough. They did not compensate me in any way for the post, or influence it’s content here.
© 2005 – 2014 Kathy Lewinski & Susan Cornish

2 Comments to Project: Felt Container Box