
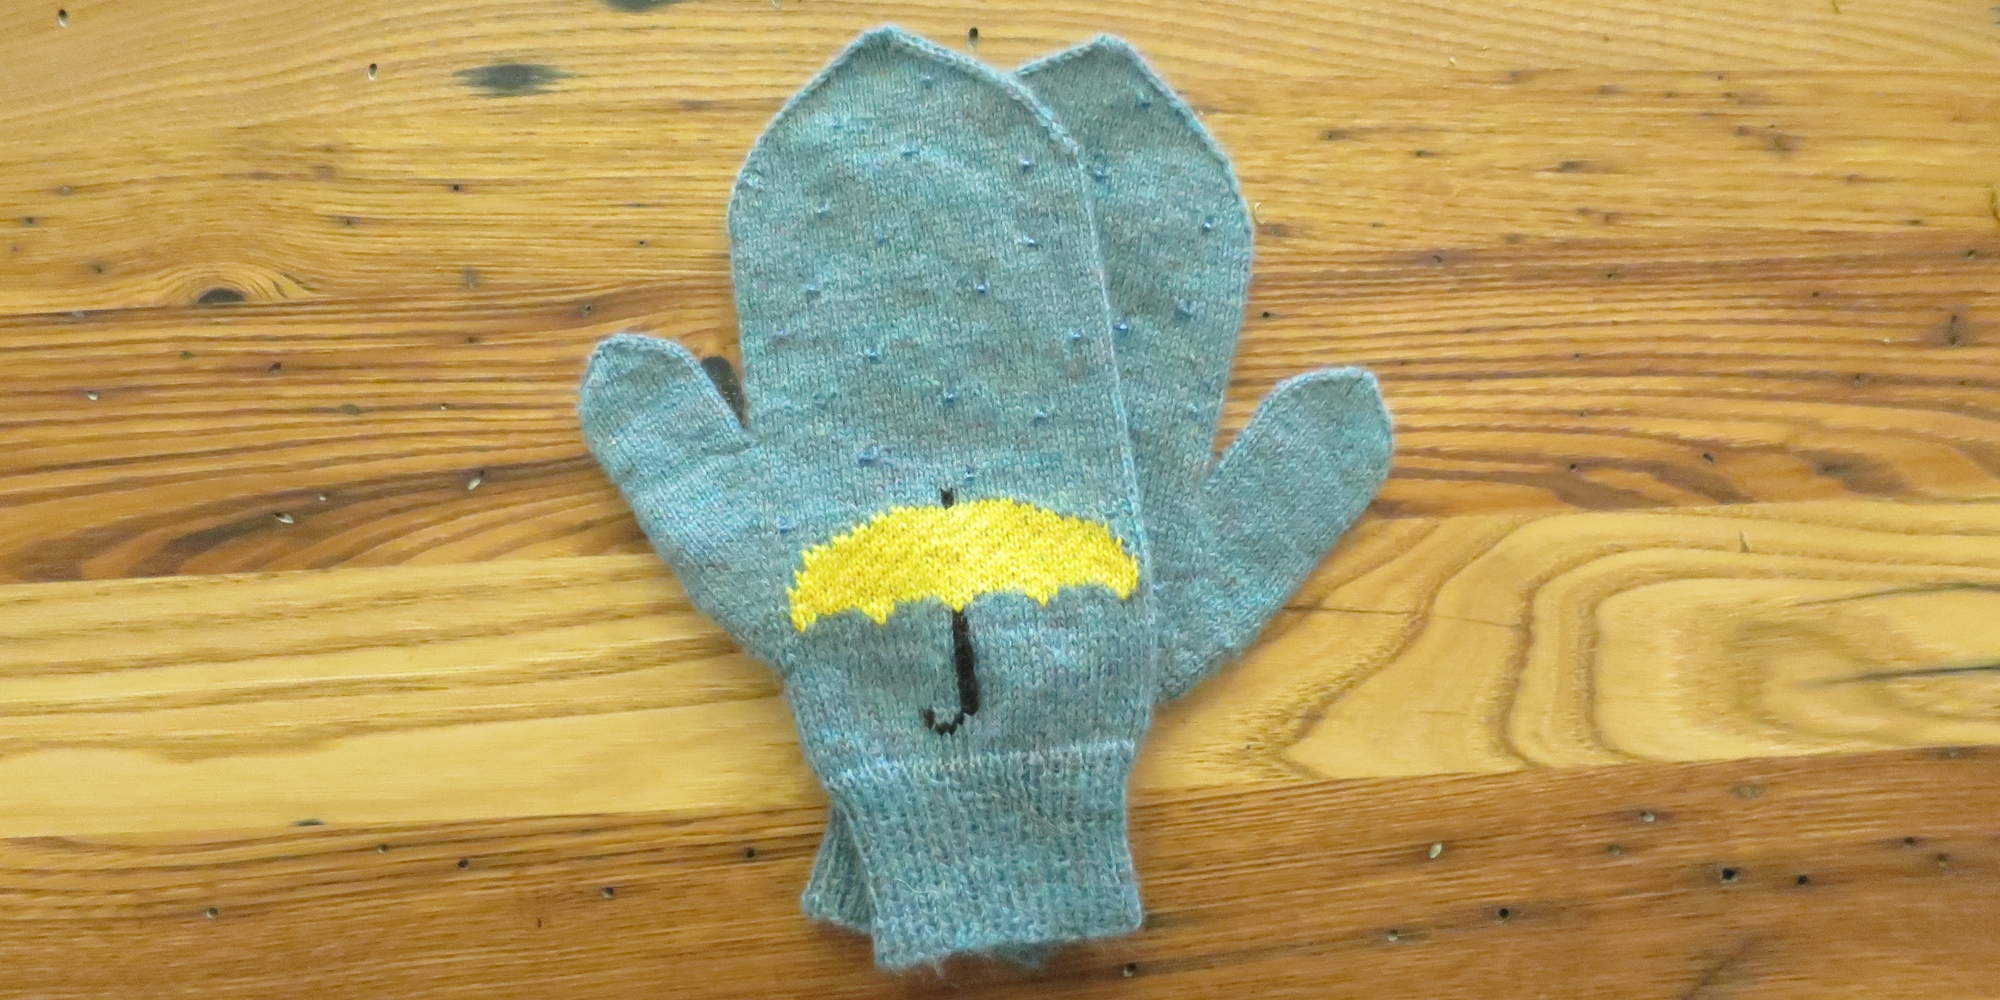

Finally, the April mittens are done! (I got a little sidetracked by the Hello Sailor Handwarmers).

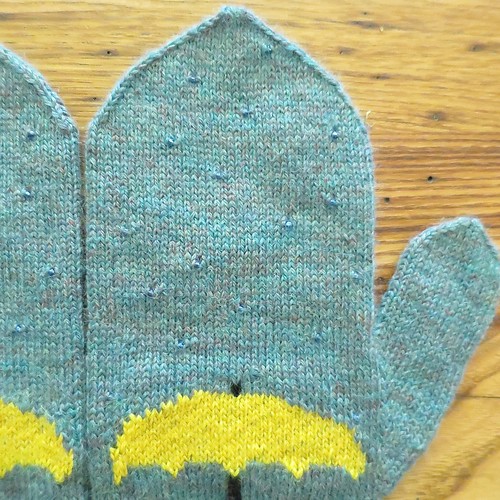
Of course, for April I went with an April showers theme. This mitten is knit in a heathered blue that I thought looked a lot like a rainy sky with its touches of grey. Blue seed bead raindrops fall on a bright yellow umbrella.
A few notes on knitting these mittens:
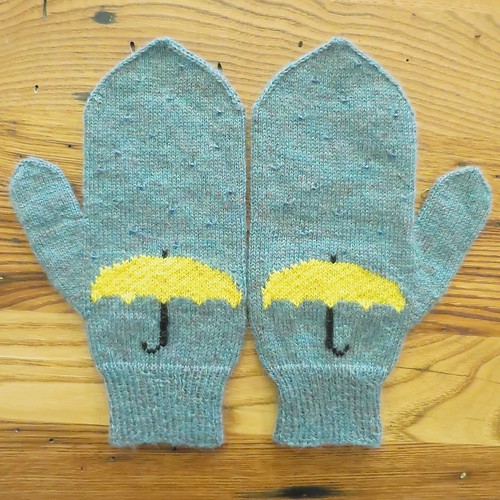
- The umbrella is only on the back of each hand. I added it with stranded knitting twisting the yellow yarn every three stitches across the palm. You could also use intarsia in the round if you don’t want to strand the yarn for that distance.
- I had never knit with beads before, but it was really easy and they added just the effect I wanted.
- The handle of the umbrella is stitch on after the mittens are knit using duplicate stitch.
April Showers Mittens
Download the April Showers Mittens Pattern (with chart) or just the April Showers Mittens Chart.
For the right hand work the umbrella chart before the thumb. For the left hand work the chart after the thumb.
Size: Woman’s Medium (7.5 inches)
Supplies:
- fingering weight yarn in blue (230 yards), yellow (5 yards) and black (scrap), I used Knit Picks Palette and Opal Heather, Canary and Black
- four size 00 double-pointed needles (or size needed to get gauge)
- stitch markers
- 38 blue seed beads
- tapestry needle
- scrap yarn or stitch holder
Gauge: 10 stitches and 12 rows in one inch
Abbreviations:
- k – knit
- p – purl
- m1 – make one
- m1r – make one stitch right
- m1l – make one stitch left
- ssk – slip, slip, knit
- k2tog – knit two stitches together
Skills needed to do this pattern:
- knitting and purling in the round
- basic increases and decreases; ssk, k2tog, m1r, m1l
- stranded colorwork or intarsia on the round
- following a color chart
- adding beads to knitting
Beading:
String the beads on the yarn before you start knitting. I turned the end of the yarn into a “needle” to make the stringing easy. I trimmed the end to a point and then coated it in glue (just a school glue will work). I twisted it into a tight point. Once dry, I was able to slip the beads right on.
When you come to a stitch where you want to add a bead, bring the yarn to the front. Slip the stitch purlwise. Pull a bead up and place it as close to the right needle as you can. Bring the yarn to the back and continue working the row.
Cuff:
Cast on 70 stitches. Divided between three needles. Join together to knit in the round placing a stitch marker between the first and last stitch to make rows.
Work in k1,p1 ribbing for 24 rows (2 inches)
Hand:
Row 1 of the chart starts here. (The umbrella handle is shown on the chart, but you will duplicate stitch it on when the mittens are finished.)
Row 1 – 12: k
Row 13: (k10, m1) 7x (doesn’t matter whether you use m1r or m1l) (77 stitches)
Row 14: k38, m1l, k1, m1r, k38 (79 stitches) You may find it easier to keep track of where the thumb stitches are if you place a stitch marker before the m1l and after the m1r.
Row 15: k
Row 16: k38, m1l, k3, m1r, k38 (81 stitches)
Row 17: k
Row 18: k38, m1l, k5, m1r, k38 (83 stitches)
Row 19: k
Row 20: k38, m1l, k7, m1r, k38 (85 stitches)
Row 21: k
Row 22: k38, m1l, k9, m1r, k38(87 stitches)
Row 23: k
Row 24: k38, m1l, k11, m1r, k38 (89 stitches)
Row 25: k
Row 26: k38, m1l, k13, m1r, k38 (91 stitches)
Row 27: k
Row 28: k38, m1l, k15, m1r, k38 (93 stitches)
Row 29: k
Row 30: k38, m1l, k17, m1r, k38 (95 stitches)
Row 31: k
Row 32: k38, m1l, k19, m1r, k38 (97 stitches)
Row 33: k
Row 34: k38, m1l, k21, m1r, k38 (99 stitches)
Row 35: k
Row 36: k38, m1l, k23, m1r, k38 (101 stitches)
Row 37: k
Row 38: k38, m1l, k25, m1r, k38 (103 stitches)
Row 39: k
Row 40: k38, m1l, k27, m1r, k38 (105 stitches)
Row 41 – 43: k
Row 44: k38, put the next 29 stitches on a piece of scrap yarn or a stitch holder, k38 (76 stitches on the needles, 29 on the stitch holder)
Row 45 – 82: k (or until the mittens hits the top of the little finger)
Row 83: ssk, k34, k2tog, ssk, k34, k2tog (72 stitches)
Row 84: k
Row 85: ssk, k32, k2tog, ssk, k32, k2tog (68 stitches)
Row 86: k
Row 87: ssk, k30, k2tog, ssk, k30, k2tog (64 stitches)
Row 88: k
Row 89: ssk, k28, k2tog, ssk, k28, k2tog (60 stitches)
Row 90: k
Row 91: ssk, k26, k2tog, ssk, k26, k2tog (56 stitches)
Row 92: ssk, k24, k2tog, ssk, k24, k2tog (52 stitches)
Row 93: ssk, k22, k2tog, ssk, k22, k2tog (48 stitches)
Row 94: ssk, k20, k2tog, ssk, k20, k2tog (44 stitches)
Row 95: ssk, k18, k2tog, ssk, k18, k2tog (40 stitches)
Row 96: ssk, k16, k2tog, ssk, k16, k2tog (36 stitches)
Row 97: ssk, k14, k2tog, ssk, k14, k2tog (32 stitches)
Row 98: ssk, k12, k2tog, ssk, k12, k2tog (28 stitches)
Row 99: ssk, k10, k2tog, ssk, k10, k2tog (24 stitches)
Row 100: ssk, k8, k2tog, ssk, k8, k2tog (20 stitches)
Row 101: ssk, k6, k2tog, ssk, k6, k2tog (16 stitches)
Row 102: ssk, k4, k2tog, ssk, k4, k2tog (12 stitches)
Row 103: ssk, k2, k2tog, ssk, k2, k2tog (8 stitches)
Cut the yarn leaving about a 10-inch tail. Finish the hand with either kitchener stitch or by weaving the tail through the remaining stitches and pulling tight. I used kitchener stitch.
Thumb:
Place the 29 stitches from the stitch holder on three needles. Pick up and knit two stitches from the hand of the mitten. Place a stitch holder after those two stitches to mark rows.
Row 44: k29, k2tog (30 stitches)
Row 45 – 63: knit (or until thumb reached the middle of the thumbnail)
Row 64: ssk, k11, k2tog, ssk, k11, k2tog (26 stitches)
Row 65: k
Row 66: ssk, k9, k2tog, ssk, k9, k2tog (22 stitches)
Row 67: ssk, k7, k2tog, ssk, k7, k2tog (18 stitches)
Row 68: ssk, k5, k2tog, ssk, k5, k2tog (14 stitches)
Row 69: ssk, k3, k2tog, ssk, k3, k2tog (10 stitches)
Row 70: ssk, k1, k2tog, ssk, k1, k2tog (6 stitches)
Cut the yarn leaving about a 10-inch tail. Finish the hand with either kitchener stitch or by weaving the tail through the remaining stitches and pulling tight.
Finishing:
Weave in ends. Use the chart to duplicate stitch the handle of the umbrella on in black.
Copyright 2014 Kathy Lewinski JustCraftyEnough.com
Do not duplicate for distribution, repost, sell or teach without permission.
This pattern was not test knit so please let me know if you run into any mistakes.
© 2005 – 2014 Kathy Lewinski & Susan Cornish

Pingback: Rainy Day Mittens to Knit | Knitting | CraftGossip.com