
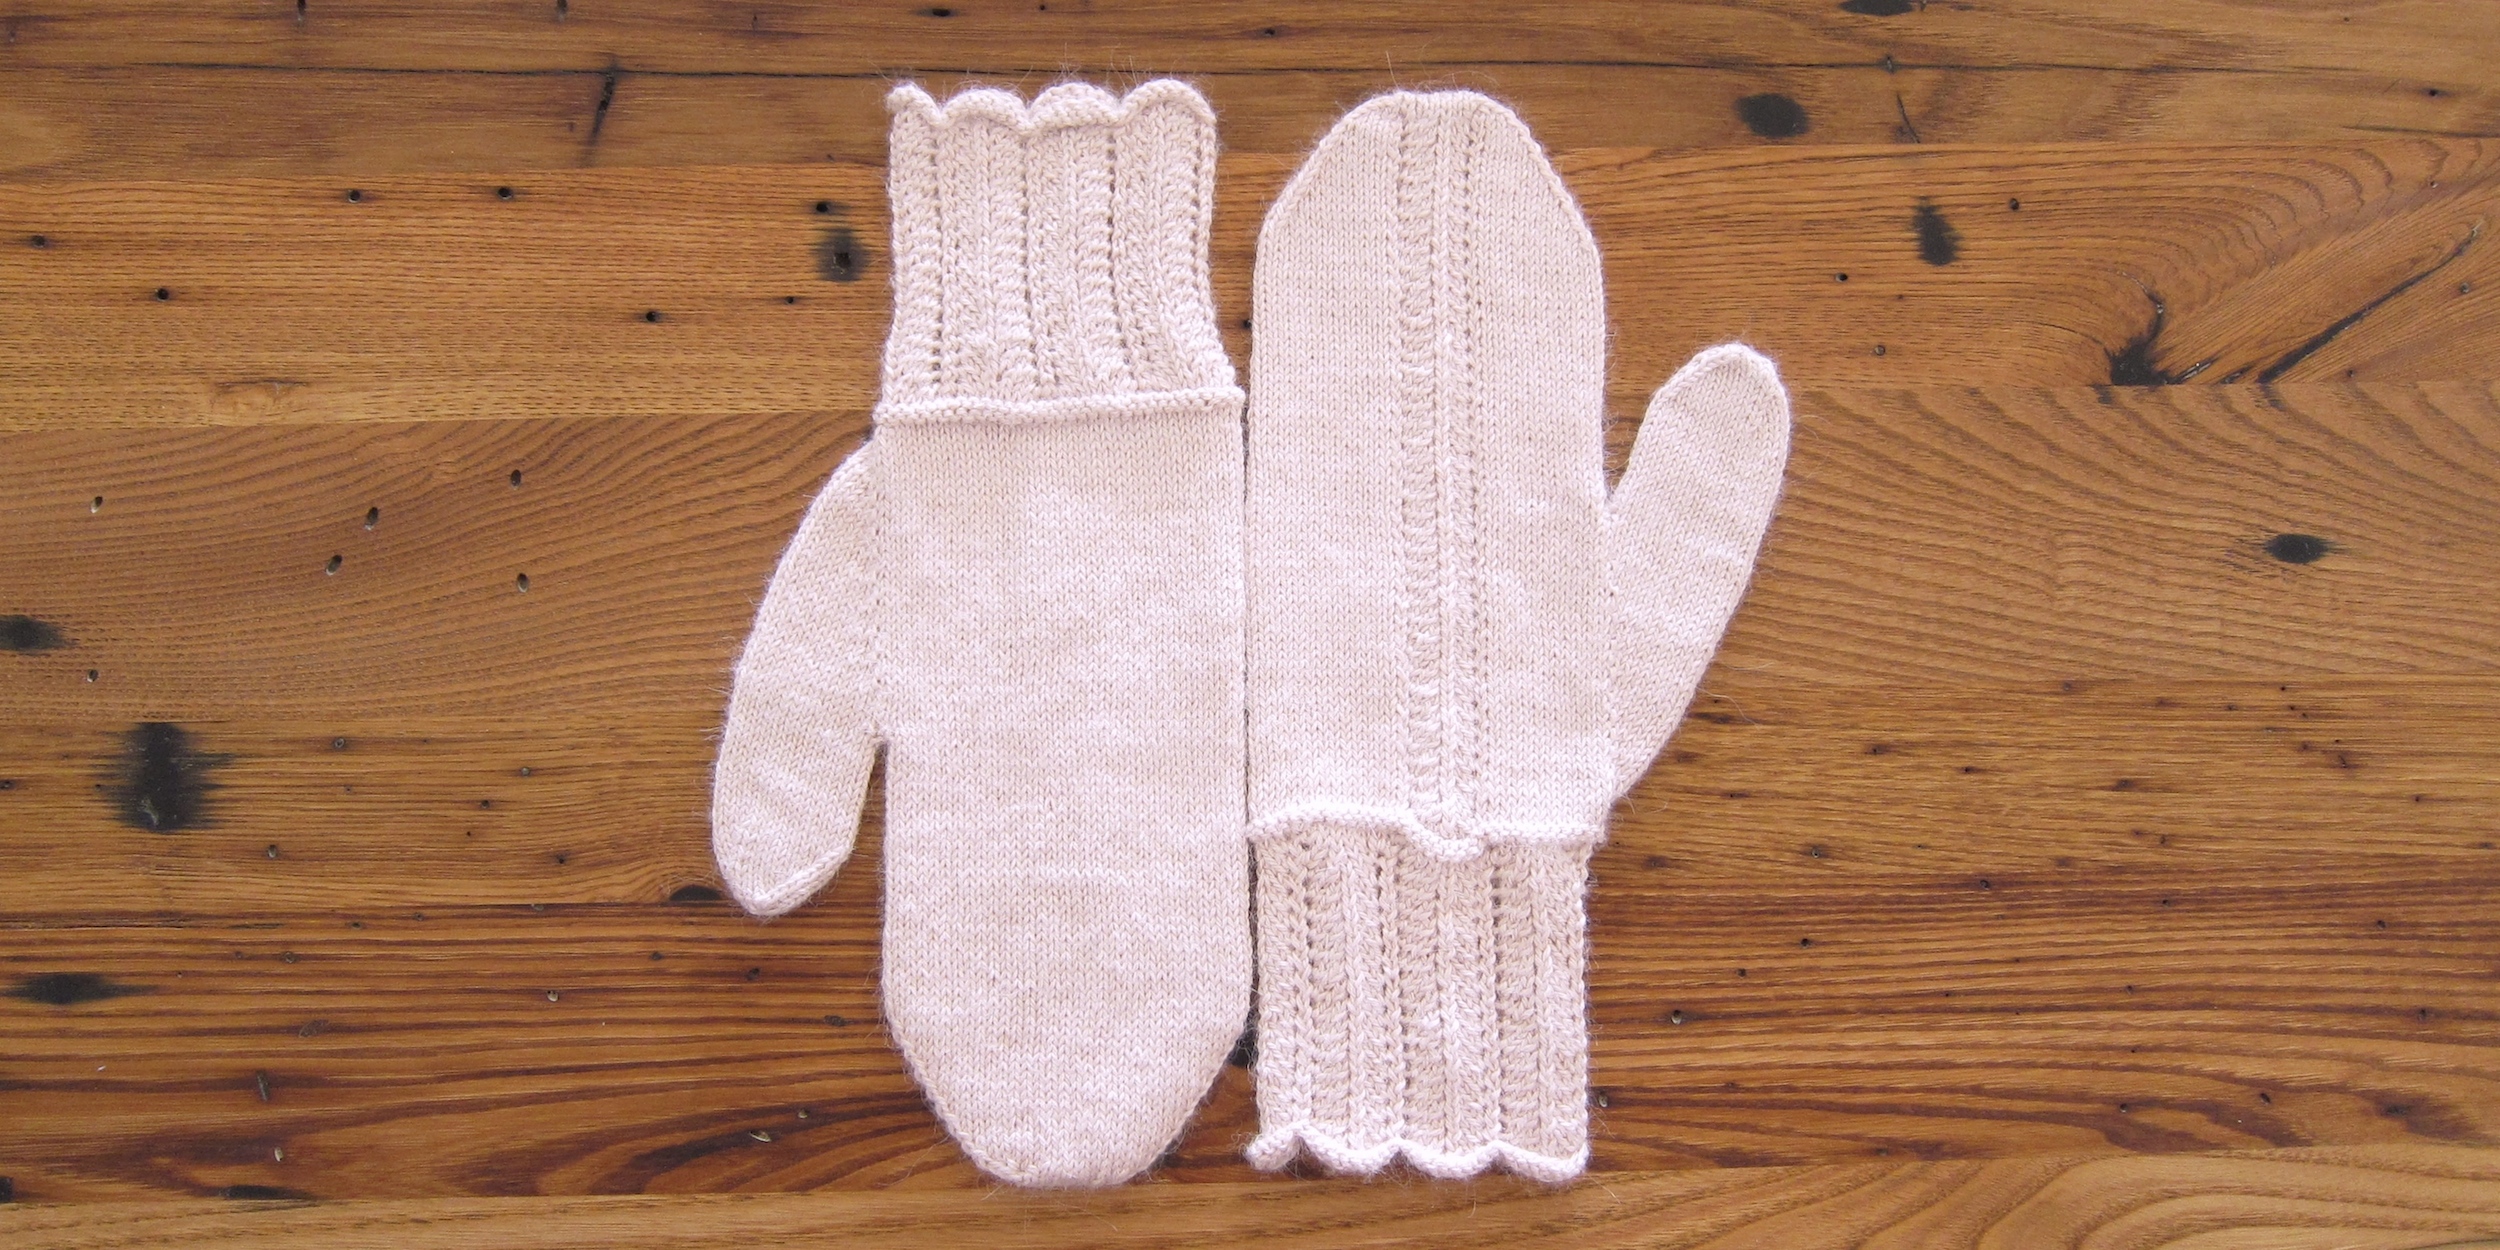

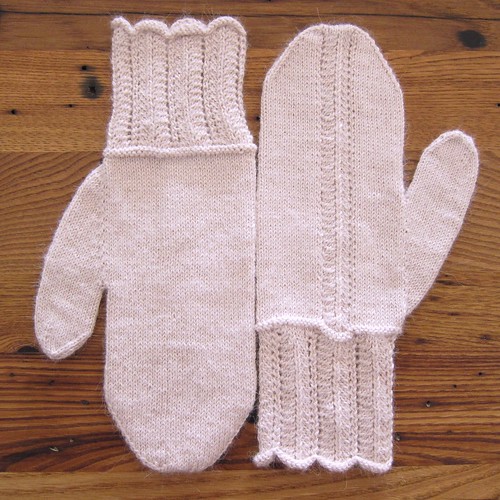
I’ve set a goal to design and knit a pair of mittens every month in 2014. For February’s mittens, I want to make something a little lacy and romantic, BUT they still had to be warm. The answer was a beautiful, fuzzy silk alpaca yarn in the palest of pinks and a not-too-open lace pattern. These are not your “play in the snow” mittens, but rather your “look pretty even though it’s freezing out” mittens.
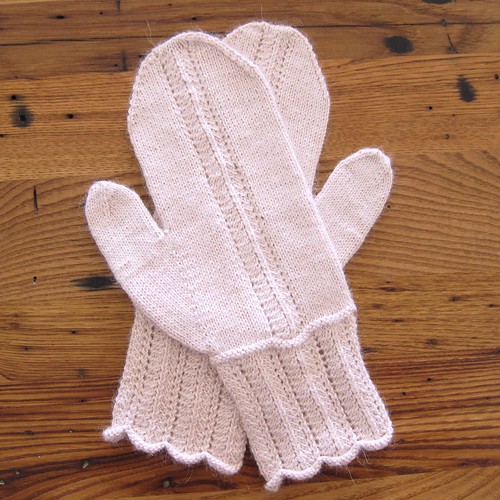
This is a great pattern if you haven’t had much experience knitting lace patterns as it is only a two row repeat. Plus, you are only doing simple knit 2 togethers and yarn overs to get the lace pattern.
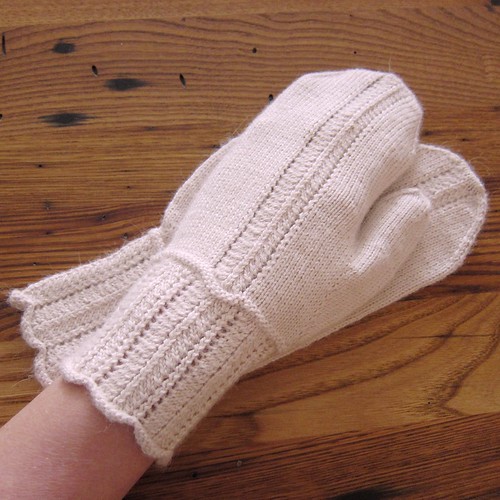
February Mittens
This mittens are knit to fit a women’s medium.
Download a printable pdf of the February Mittens Pattern
Supplies:
- Approximately 250 yards of dk or sport weight yarn (I used slightly less than 2 skeins of Blue Sky Alpaca Silk)
- Four size 0 double-pointed needles
- Stitch markers
- Tapestry needle
Skills Needed:
- knit and purl in the round
- work a yarn over
- work basic increases and decreases: ssk, k2tog and kfb
- work make one increases
- kitchener stitch
Abbreviations:
- K – knit
- P – purl
- Yo – yarn over
- K2tog – knit 2 stitches together decreasing one stitch
- M1r – Make one stitch right
- M1l – Make one stitch left
- Ssk – slip two stitches and then knit them together decreasing one stitch
Gauge: 18 stitches and 23 rows in 2 inches
Cast on 63 stitches with smaller needles. Divide stitches between three needles. Join to knit in the round, placing a stitch marker between the first and last stitch to mark rows.
Cuff:

Row 1: k
Row 2: *k1, yo, k2, k2tog, k2tog, k2, yo, repeat from * until end of row.
Row 3 – 34: Repeat rows 1 & 2 sixteen more times.
Row 35 – 36: k
Row 37 – 38: p
Row 39: k
Right Hand:
Row 40: k30, kfb, k31, place stitch marker, kfb remove stitch marker (65 stitches)
Row 41: k10, yo, k2, k2tog, k2tog, k2, yo, k12, m1l k1, m1r, k32 (67) (You may want to put a stitch marker before the m1l and another after the m1r to keep track of where you so them on future rows.)
Row 42: k
Row 43: k12, yo, k2, k2tog, k2tog, k2, yo, k12, m1l, k3, m1r, k32 (69)
Row 44: k
Row 45: k12, yo, k2, k2tog, k2tog, k2, yo, k12, m1l, k5, m1r, k32 (71)
Row 46: k
Row 47: k12, yo, k2, k2tog, k2tog, k2, yo, k12, m1l, k7, m1r, k32 (73)
Row 48: k
Row 49: k12, yo, k2, k2tog, k2tog, k2, yo, k12, m1l, k9, m1r, k32 (75)
Row 50: k
Row 51: k12, yo, k2, k2tog, k2tog, k2, yo, k12, m1l, k11, m1r, k32 (77)
Row 52: k
Row 53: k12, yo, k2, k2tog, k2tog, k2, yo, k12, m1l, k13, m1r, k32 (79)
Row 54: k
Row 55: k12, yo, k2, k2tog, k2tog, k2, yo, k12, m1l, k15, m1r, k32 (81)
Row 56: k
Row 57: k12, yo, k2, k2tog, k2tog, k2, yo, k61
Row 58: k32, m1l, k17, m1r, k32
Row 59: k12, yo, k2, k2tog, k2tog, k2, yo, k63
Row 60: k
Row 61: k12, yo, k2, k2tog, k2tog, k2 , yo, k12, m1l, k19, m1r, k32
Row 62: k
Row 63: k12, yo, k2, k2tog, k2tog, k2, yo, k65
Row 64: k32, m1l, k21, m1r, k32
Row 65: k12, yo, k2, k2tog, k2tog, k2, yo, k67
Row 66: k
Row 67: k12, yo, k2, k2tog, k2tog, k2, yo, k 12, m1l, k23, m1r, k32
Row 68: k
Row 69: k12, yo, k2, k2tog, k2tog, k2, yo, k69
Row 70: k32, m1l, k25, m1r, k32
Row 71: k12, yo, k2, k2tog, k2tog, k2, yo, k71
Row 72: k
Row 73: k12, yo, k2, k2tog, k2tog, k2, yo, k71
Row 74: k
Row 75: k12, yo, k2, k2tog, k2tog, k2, yo, k12, put the 27 thumb stitches on a pieces of scrap yarn or stitch holder, k 32 (If you used stitch markers to mark the thumb stitches, remove them now.)
Row 76: k
Row 77 : k12, yo, k2, k2tog, k2tog, k2, yo, k44
Repeat rows 76 and 77 until mitten reaches top of your little finger. For me that was 13 more times, which made the hand length of my mitten 5 ½ inches.
Do one more k round.
Shape Top:
Row 1: ssk, k10, yo, k2, k2tog, k2tog, k2, yo, k10, k2tog, ssk, k28, k2tog (60 stitches)
Row 2: k
Row 3: ssk, k9, yo, k2, k2tog, k2tog, k2, yo, k9, k2tog, ssk, k26, k2tog (56 stitches)
Row 4: k
Row 5: ssk, k8, yo, k2, k2tog, k2tog, k2, yo, k8, k2tog, ssk, k24, k2tog (52 stitches)
Row 6: k
Row 7: ssk, k7, yo, k2, k2tog, k2tog, k2, yo, k7, k2tog, ssk, k22, k2tog (48 stitches)
Row 8: k
Row 9: ssk, k6, yo, k2, k2tog, k2tog, k2, yo, k6, k2tog, ssk, k20, k2tog (44 stitches)
Row 10: k
Row 11: ssk, k5, yo, k2, k2tog, k2tog, k2, yo, k5, k2tog, ssk, k18, k2tog (40 stitches)
Row 12: k
Row 13: ssk, k4, yo, k2, k2tog, k2tog, k2, yo, k4, k2tog, ssk, k16, k2tog (36 stitches)
Row 14: k
Row 15: ssk, k3, yo, k2, k2tog, k2tog, k2, yo, k3, k2tog, ssk, k14, k2tog (32 stitches)
Row 16: k
Row 17: ssk, ssk, yo, k2, k2tog, k2tog, k2 yo, k2tog, k2tog, ssk, ssk, k8, k2tog, k2tog (24 stitches)
Row 18: ssk, ssk, k4, k2tog, k2tog, ssk, ssk, k4, k2tog, k2tog (16 stitches)
Row 19: k
Place the first eight stitches on one needle and the second eight on another.
Bind off with the kitchener stitch.
Left Hand:
Row 40: k30, kfb, k31, remove stitch marker, kfb, place stitch marker (65 stitches)
Row 41: k32, m1l, k1, m1r, k12, yo, k2, k2tog, k2tog, k2, yo, k12 (67) (You may want to put a stitch marker before the m1l and another after the m1r to keep track of where you so them on future rows.)
Row 42: k
Row 43: k32, m1l, k3, m1r, k12, yo, k2, k2tog, k2tog, k2, yo, k12 (69)
Row 44: k
Row 45: k32, m1l, k5, m1r, k12, yo, k2, k2tog, k2tog, k2, yo, k12 (71)
Row 46: k
Row 47: k32, m1l, k7, m1r, k12, yo, k2, k2tog, k2tog, k2, yo, k12 (73)
Row 48: k
Row 489: k32, m1l, k9, m1r, k12, yo, k2, k2tog, k2tog, k2, yo, k12 (75)
Row 50: k
Row 51: k32, m1l, k11, m1r, k12, yo, k2, k2tog, k2tog, k2, yo, k12 (77)
Row 52: k
Row 53: k32, m1l, k13, m1r, k12, yo, k2, k2tog, k2tog, k2, yo, k12 (79)
Row 54: k
Row 55: k32, m1l, k15, m1r, k12, yo, k2, k2tog, k2tog, k2, yo, k12 (81)
Row 56: k
Row 57: k61, yo, k2, k2tog, k2tog, k2, yo, k12
Row 58: k32, m1l, k17, m1r, k32
Row 59: k63, yo, k2, k2tog, k2tog, k2, yo, k12
Row 60: k
Row 61: k32, m1l, k19, m1r, k12, yo, k2, k2tog, k2tog, k2, yo, k12
Row 62: k
Row 63: k65, yo, k2, k2tog, k2tog, k2, yo, k12
Row 64: k32, m1l, k21, m1r, k32
Row 65: k67, yo, k2, k2tog, k2tog, k2, yo, k12
Row 66: k
Row 67: k32, m1l, k23, m1r, k12, yo, k2, k2tog, k2tog, k2, yo, k 12
Row 68: k
Row 69: k69, yo, k2, k2tog, k2tog, k2, yo, k12
Row 70: k32, m1l, k25, m1r, k32
Row 71: k71, yo, k2, k2tog, k2tog, k2, yo, k12
Row 72: k
Row 73: k71, yo, k2, k2tog, k2tog, k2, yo, k12
Row 74: k
Row 75: k 32, put the 27 thumb stitches on a pieces of scrap yarn or stitch holder, k12, yo, k2, k2tog, k2tog, k2, yo, k12 (If you used stitch markers to mark the thumb stitches, remove them now.)
Row 76: k
Row 77: k44, yo, k2, k2tog, k2tog, k2, yo, k12
Repeat rows 76 and 77 until mitten reaches top of your little finger. For me that was 13 more times, which made the hand length of my mitten 5 ½ inches.
Do one more k round
Shape Top:
Row 1: ssk, k28, k2tog, ssk, k10, yo, k2, k2tog, k2tog, k2, yo, k10, k2tog,(60 stitches)
Row 2: k
Row 3: ssk, k26, k2tog, ssk, k9, yo, k2, k2tog, k2tog, k2, yo, k9, k2tog (56 stitches)
Row 4: k
Row 5: ssk, k24, k2tog, ssk, k8, yo, k2, k2tog, k2tog, k2, yo, k8, k2tog (52 stitches)
Row 6: k
Row 7: ssk, k22, k2tog, ssk, k7, yo, k2, k2tog, k2tog, k2, yo, k7, k2tog (48 stitches)
Row 8: k
Row 9: ssk, k20, k2tog, ssk, k6, yo, k2, k2tog, k2tog, k2, yo, k6, k2tog (44 stitches)
Row 10: k
Row 11: ssk, k18, k2tog, ssk, k5, yo, k2, k2tog, k2tog, k2, yo, k5, k2tog (40 stitches)
Row 12: k
Row 13: ssk, k16, k2tog, ssk, k4, yo, k2, k2tog, k2tog, k2, yo, k4, k2tog (36 stitches)
Row 14: k
Row 15: ssk, k14, k2tog, ssk, k3, yo, k2, k2tog, k2tog, k2, yo, k3, k2tog (32 stitches)
Row 16: k
Row 17: ssk, ssk, k8, k2tog, k2tog, ssk, ssk, yo, k2, k2tog, k2tog, k2 yo, k2tog, k2tog (24 stitches)
Row 18: ssk, ssk, k4, k2tog, k2tog, ssk, ssk, k4, k2tog, k2tog (16 stitches)
Row 19: k
Place the first eight stitches on one needle and the second eight on another.
Bind off with the kitchener stitch.
Thumbs:
Put the 27 thumb stitches on 3 needles, 9 per needle.
Pick up and knit 2 stitches from the hand of the mitten. Place stitch marker after those two stitches. 29 stitches on the needles.
Row 1: knit 27, k2tog (28 stitches)
Row 2: k2tog, k26 (27 stitches)
Row 3: k
Continue knitting until thumb reaches mid thumbnail, about 1 ¼” – 1 ½”.
Shape top of thumb:
Row 1: (k7, k2tog)3x
Row 2: k
Row 3: (k6, k2tog)3x
Row 4: k
Row 5: (k5, k2tog)3x
Row 6: k
Row 7: (k4, k2tog)3x
Row 8: (k3, k2tog)3x
Row 9: (k2, k2tog)3x
Row 10: (k1, k2tog) 3x
Copyright 2014 Kathy Lewinski JustCraftyEnough.com
Do not copy for distribution, sell, repost, claim as your own or teach this pattern without permission.
© 2005 – 2014 Kathy Lewinski & Susan Cornish

Pingback: Super Sweet Mittens to Knit · Knitting | CraftGossip.com
Pingback: Weekly Reader 02.07.14 | Hands Occupied
Pingback: Just Crafty Enough – Project: February Mi...
Pingback: 16 Easy To Make DIY Mittens For Winter