

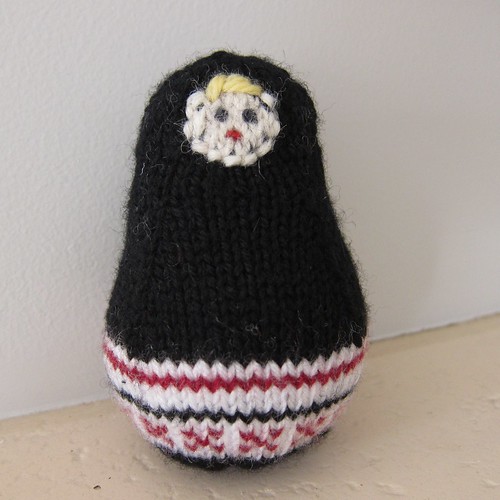
For the current Iron Craft challenge, we were directed to create something inspired by the Olympics, but not necessarily Olympic themed. I took my inspiration from the host country Russia and knit up an iconic Matryoshka doll (nesting doll). (I love how they have huge dolls on the snowboard courses.)
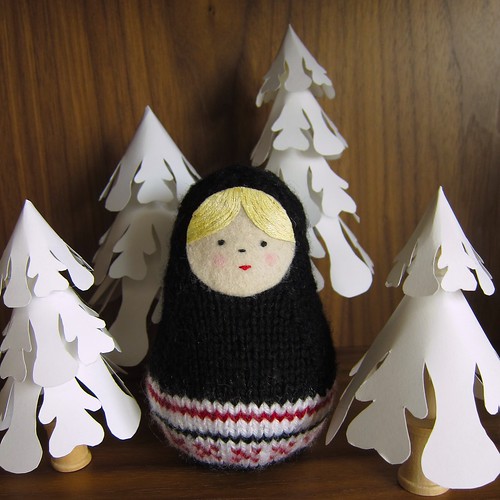
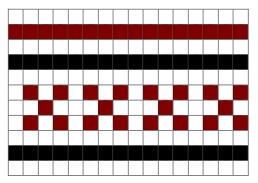
I took inspiration from the Russian team uniforms for the simple colorwork pattern on the doll. You can see the lines of stripes and crosses up the front of the sweaters.
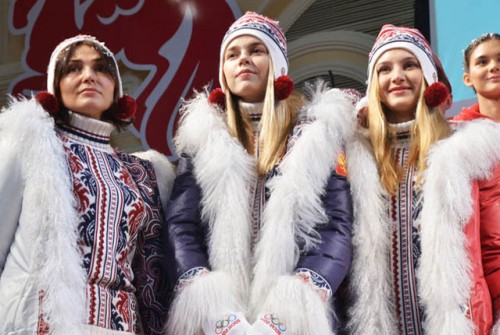
I had originally read they were black and burgundy, but obviously they are blue, so my colors are slightly off.
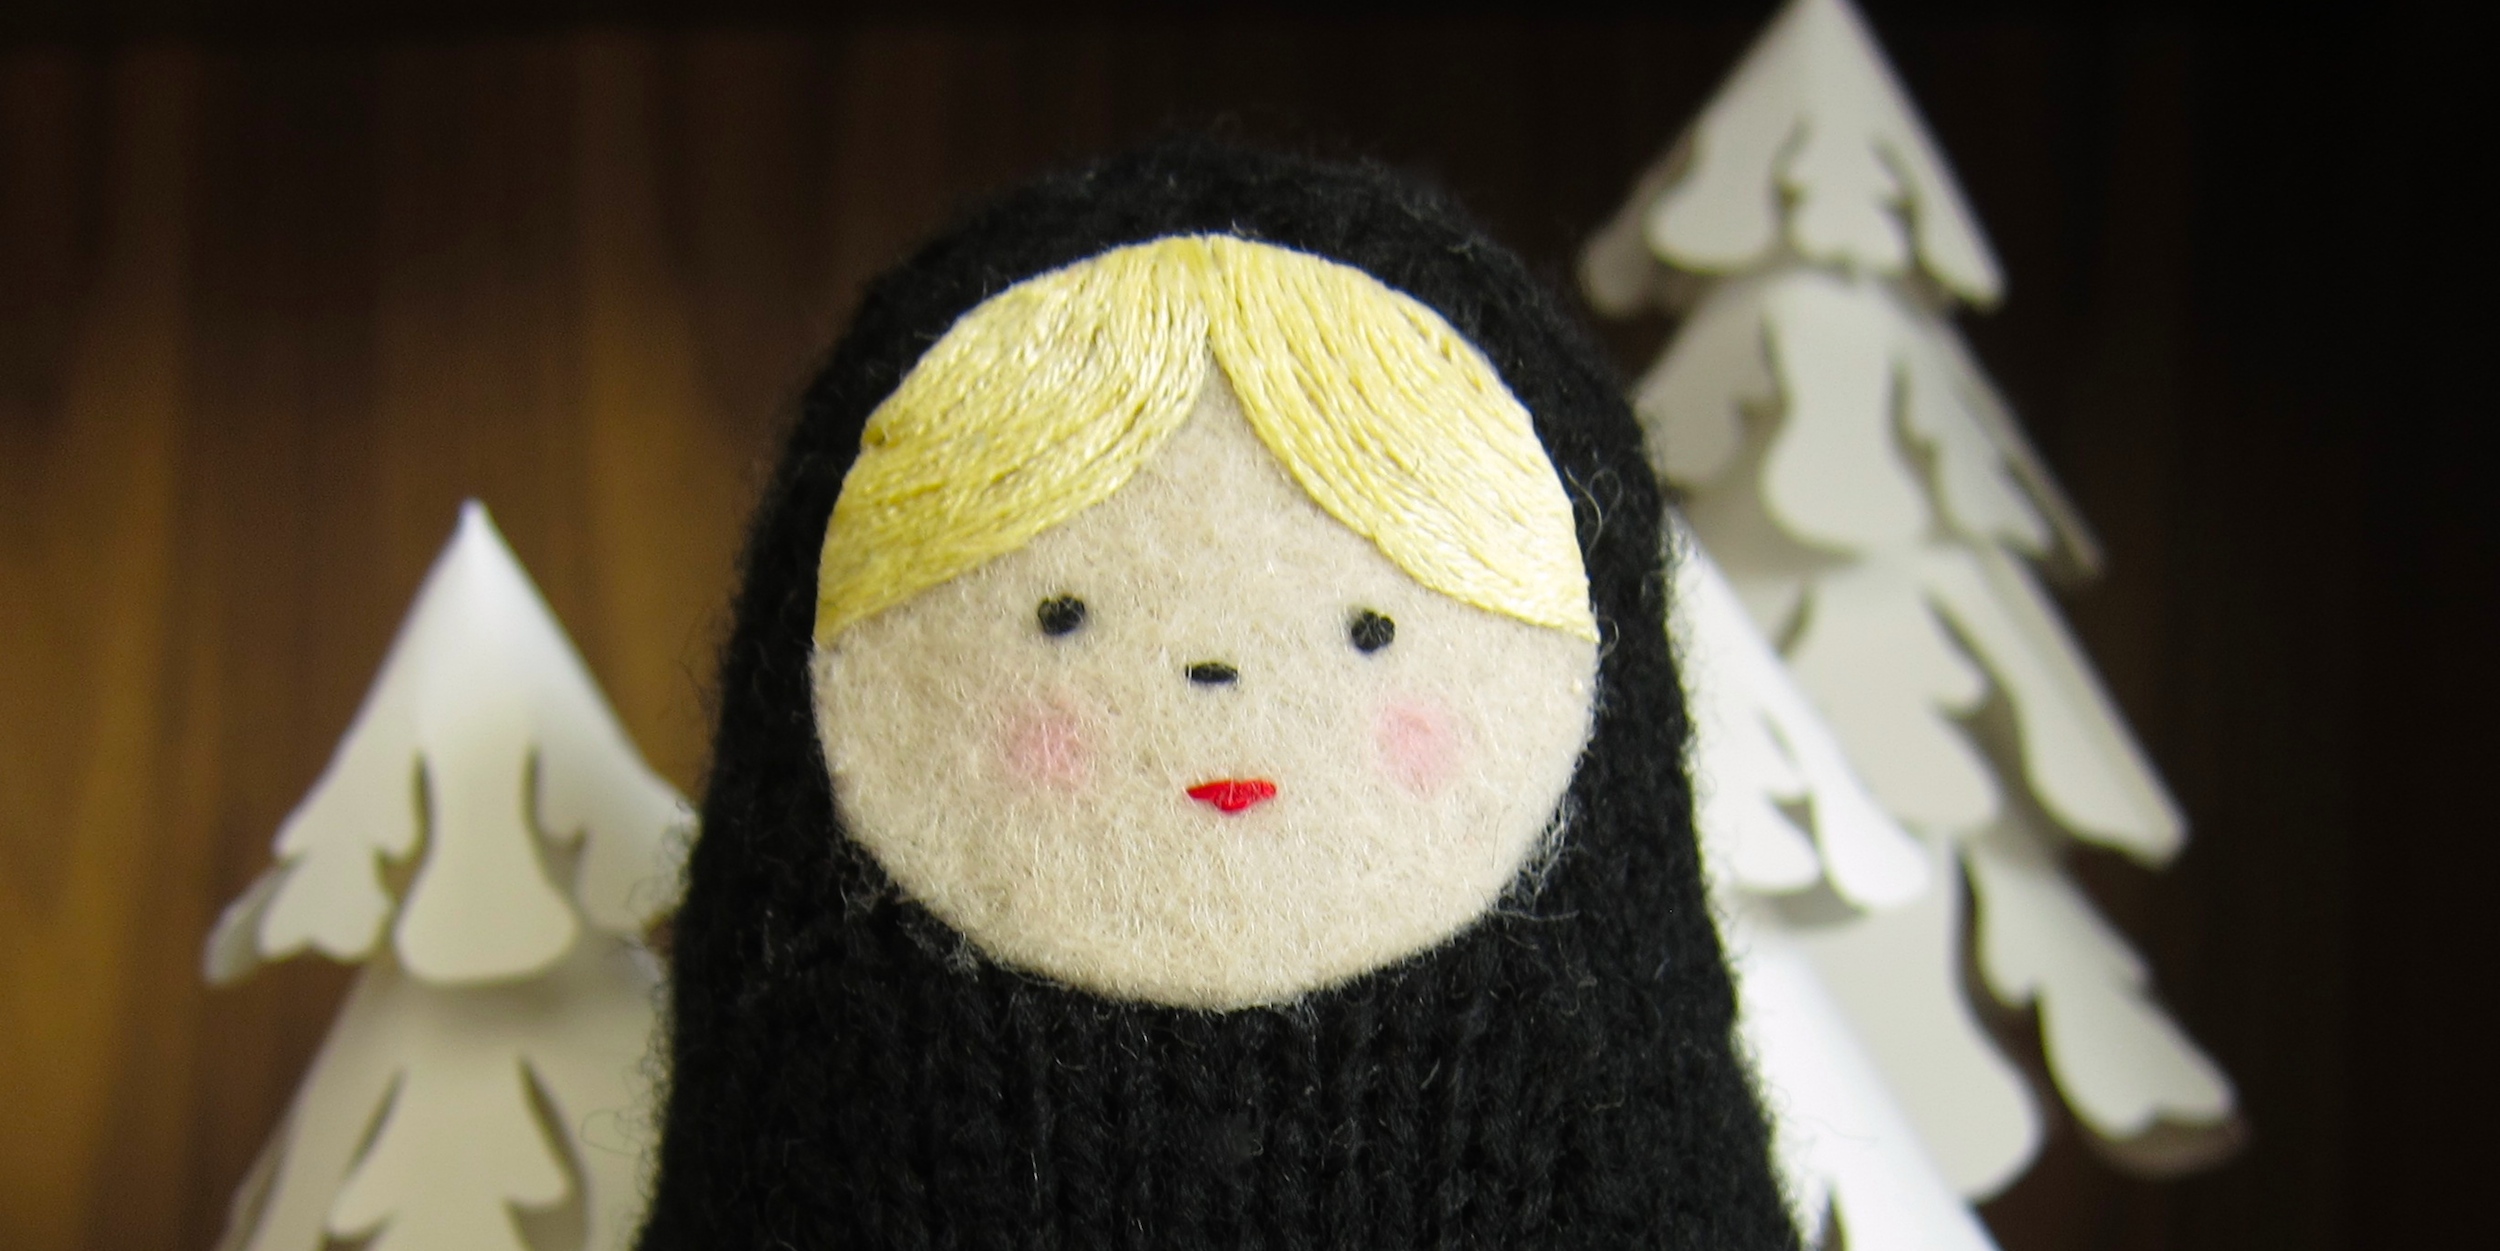
Originally, I had planned to knit the face and just embroider the features. Oh man, was it ever awful.
That took me back to the drawing board and I ended up going with a felt face that I embroidered before glueing on. A huge improvement!
Knit Matryoshka Doll
Download a printable copy of the Matryoshka Doll Pattern
Supplies:
- Worsted weight yarn in three colors. You really just use scrap amounts here.
- 4 size-2 double pointed needles
- Tapestry needle
- Stuffing
- Rock or other heavy object to weigh bottom of doll down (optional)
- Scissors
- Small circle of felt in color of your choice for the face
- Embroidery floss for face and hair
- Embroidery needle
- Pink colored pencil
- Fabric or tacky glue
Gauge:
7 stitches = 1 inch in Stockinette Stitch
Gauge is not super important here you will just get a bigger or smaller doll, this doll is 4 inches tall. Just make sure the gauge is rather tight so you won’t see the stuffing though your knitting.
Skills Needed:
- knitting in the round on double pointed needles (or magic loop)
- work small number of stitches in the round
- work basic increases and decreases, ssk, k2tog and kfb
- work stranded colorwork
- follow a color chart
Abbreviations:
- Kfb – Knit into the front & back of the same stitch, increasing one stitch.
- Ssk – Slip the first two stitches off the left needle onto the right needle as if to knit. Insert the left needle into the front of these two stitches & knit them together.
- K2tog – knit two together
Body:
Cast on 6 stitches. Divide between 3 needles. Join together being careful not to twist. Place a marker between your first & last stitch to mark rows.
Row 1: kfb into each stitch (12 stitches)
Row 2: knit
Row 3: kfb into each stitch (24 stitches)
Row 4: knit
Row 5; kfb into each stitch (48 stitches)
Row 6: knit
Row 7: kfb, k6, kfb, k6, kfb, k12, kfb, k6, kfb, k6, kfb, k6 (54 stitches)
Row 8: knit
Row 9: kfb, k7, kfb, k7, kfb, k14, kfb, k7, kfb, k7, kfb, k6 (60 stitches)
Rows 10-20: knit following this color chart (The chart is just a snippet of the pattern, repeat it across all 60 stitches)
Row 21: ssk, k7, ssk, k7, ssk, k14, k2tog, k7, k2tog, k7, k2tog, k6 (54 stitches)
Rows 22-23: knit
Row 24: ssk, k6, ssk, k6, ssk, k12, k2tog, k6, k2tog, k6, k2tog, k6 (48 stitches)
Rows 25-26: knit
Row 27: ssk, k5, ssk, k5, ssk, k10, k2tog, k5, k2tog, k5, k2tog, k6 (42 stitches)
Rows 28-29: knit
Row 30: ssk, k4, ssk, k4, ssk, k8, k2tog, k4, k2tog, k4, k2tog, k6 (36 stitches)
Rows 31-32: knit
Row 33: ssk, k3, ssk, k3, ssk, k6, k2tog, k3, k2tog, k3, k2tog, k6 (30 stitches)
Rows 34-37: knit
Pull your cast on tail inside and weave it in. Also start stuffing the body, stuff it pretty tight to get the shape you want. If you want to weigh down the bottom of the doll so it will stand easier, add a rock or some other weight to the bottom before stuffing.
Row 38: kfb, k3, kfb, k3, kfb, k6, kfb, k3, kfb, k3, kfb, k6 (36)
Rows 39-42: knit
Row 43; ssk, k3, ssk, k3, ssk, k6, k2tog, k3, k2tog, k3, k2tog, k6 (30)
Row 44: knit
Row 45: ssk, k2, ssk, k2, ssk, k4, k2tog, k2, k2tog, k2, k2tog, k6 (24 stitches)
Row 46: knit
Row 47: ssk, k1, ssk, k1, ssk, k2, k2tog, k1, k2tog, k1, k2tog, k6 (18 stitches)
Row 48: knit
Finish stuffing the body if needed and stuff the head as much as you can.
Row 49: ssk, ssk, ssk, k2tog, k2tog, k2tog, k6 (12 stitches)
Row 50: ssk, ssk, ssk, k2tog, k2tog, k2tog (6 stitches)
Add any additional stuffing you need for the head. Cut yarn leaving about an 8-inch tail. Thread tail onto a tapestry needle & thread through the 6 stitches on the needles. Pull tight & weave in the end.:
Make the Face:
Cut an appropriate sized circle from the felt for the face. I used a spool of thread to draw mine. Embroider on eyes, nose and mouth. I did single French knots for the eyes, a small straight stitch for the nose and three straight stitches for the mouth. Color small circles with the pink colored pencil for the cheeks.
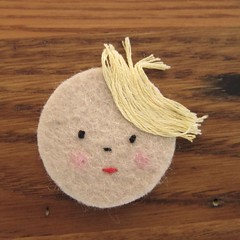
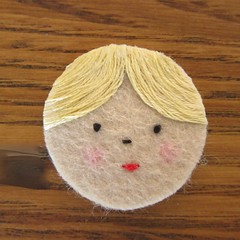
For the hair, draw guidelines with pencil where you want the hair to be. Fill that area in carefully with glue. Lay pieces of embroidery floss slightly longer than the face across the glue in the direction you want the hair to go. A straight pin is handy to help move the floss into place. Let dry and trim the hair to the edge of the face. Add a little extra glue at the edges if you need it.
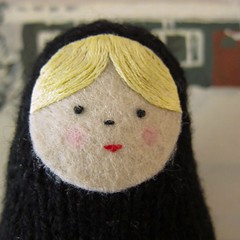
Glue the face to the front of the doll (The back is the line of 6 stitches you did at the end of every row, the front is the knit section between the last ssk and first k2tog.)
Copyright 2014 Kathy Lewinski JustCraftyEnough.com
Do not duplicate for distribution, teach, claim as your own or repost this pattern without permission.

Pingback: Matryoshka Doll Buttoned Pouch | Kniche