


(For the 24 weeks leading up to December 1st, we’ll be making a Christmas ornament. Each one will be traditional to or inspired by a different country)
This week we are headed to the Philippines for our Christmas ornament inspiration. I also want to send our thoughts and prayers to the people of the Philippines right now as they are hit by super typhoon Haiyan.
As one of only two prominently Catholic countries in Asia, Christmas is one of the biggest holidays in the Philippines. They also celebrate one of the longest holiday seasons starting in September and lasting until Epiphany in January. Dawn masses called Simbang Gabi are often held from Decemeber 16th through Christmas Eve. On Christmas Eve families attend midnight mass and then eat a traditional Noche Buena feast. Christmas Day is spent with family often visiting elders to pay them respect.
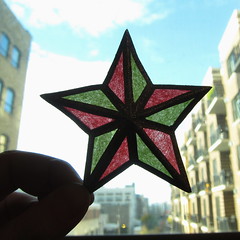
Though many decorations in the Philippines have become Americanized, families still hang beautiful star-shaped lanterns called paról, which represent the Star of Bethlehem. These lanterns are full of intricate designs in bright colors. (Take a look through Google images, they are stunning.) One city even holds a The Giant Lantern Festival the Saturday before Christmas Eve with a lantern competition.
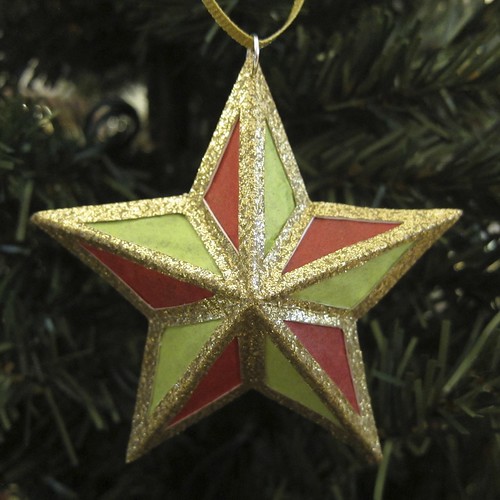
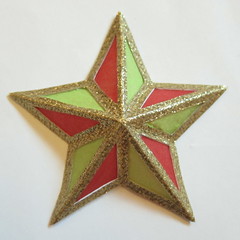
Our paról is made from cardstock with tissue paper over cutouts to let the light of the Christmas tree come through. If you want to make it even more authentic add tassels from the bottom two points.
Paper Paról Ornament

Supplies:
- gold glitter cardstock, this will be easier if you get a paper that is only glittered on one side (available in scrapbooking sections of craft stores)
- tissue paper, I used red and green
- jump ring
- thin ribbon
Tools:
- pencil
- scissors
- ruler
- scoring tool or something else to score the paper with, I used a metal nail file
- exacto knife
- glue, such as Elmer’s
- sewing needle
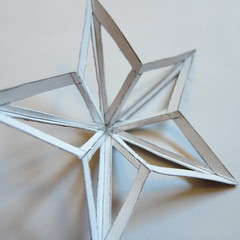
1. Cut a five-pointed star out of the card stock. I kept mine small, about 3 inches, but you can go as big as you want. I used this one as a template. On the back of the star use the ruler and pencil to draw lines from the tip of each point to the indent across the star.

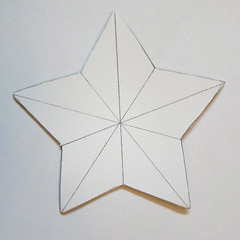
Score the lines you just drew, still on the back of the star. Now, fold the star. The lines from the points to the middle fold toward the front and the lines from the indent to the middle fold toward the back. If you have scored it well it folds pretty easily, I was happily surprised.
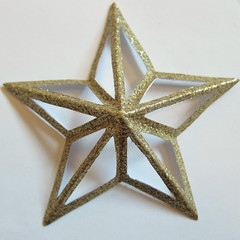
2. Re-flatten the star. Use the pencil and ruler to draw where you want the windows on the back of the star. I kept the space between the windows and around the edge of the star to 1/8th of an inch. I made sure there was an equal amount of space on either side of the fold lines. For a bigger star, you could leave them wider. Use the exacto knife to cut those sections out. Save one of the cut out pieces.
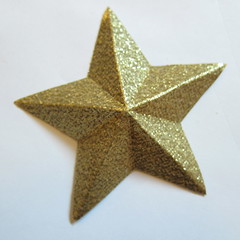
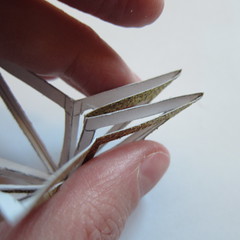
Refold the star. I find it was easy to fold two points together at once like in the picture below.
3. Use the saved cut out piece as a template to cut the tissue paper. You want the pieces of tissue paper to be just a little bigger than the windows they are covering.

Put a small amount of glue around each window on the back of the star and glue the tissue paper in place.
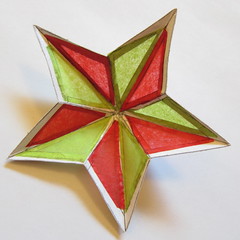
Admire how the light shines through.
4. Use a needle to poke a hole near the top of one of the points. Put a jump loop through the hole. Thread a length of ribbon through the jump ring and tie it into a loop for hanging.

Hang in front of a light on the tree for best effect. Maligayang Pasko!
© 2005 – 2013 Kathy Lewinski & Susan Cornish


Pingback: DIY Christmas Tree Decoration Star | Home and Garden | CraftGossip.com