


(For the 24 weeks leading up to December 1st, we’ll be making a Christmas ornament. Each one will be traditional to or inspired by a different country)
Let’s head to Finland for this week’s Christmas ornament, a simple star made of straw.
Stars, angels, animals, hearts and other shapes made of straw have been traditional Christmas ornaments in Scandinavian countries for hundreds of years. The tradition may have started from the old custom of sleeping on fresh straw beds at Christmas time as a way to share the same conditions the holy family slept in when Jesus was born.
The straw in the Christmas bed was said to contain magic and any dreams had while sleeping on it would come true. Grains that fell from the straw gave insight into the quality of the next harvest. After Christmas the straw was spread on the fields to improve the harvest, fed to sick cows and twisted into decorative crosses. These traditions are no longer practiced but the ornaments are still found everywhere.
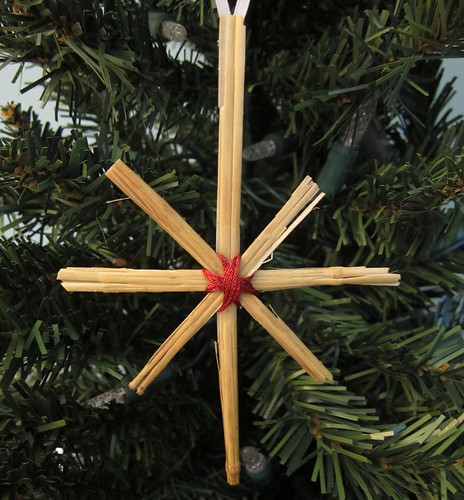
Straw Star Ornament
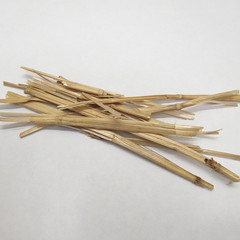
I’ve kept my straw ornament very simple, but you can add more arms and shape it as you wish. I was able to find straw out in my yard being used as a ground cover.
Supplies:
- 3 lengths of straw, I used one long one and two shorter.
- red metallic embroidery floss (or color of choice)
- 1/8″ wide ribbon
Tools:
- glue such as tacky glue
- scissors
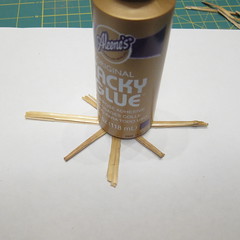
1. Glue one of the shorter straws to the longer straw in the middle creating a cross shape.
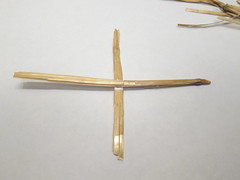
Glue the second short straw across the other two at the middle, like in the picture below. Let dry. I found it helped to weight it down a bit.
I didn’t glue my straws exactly even.
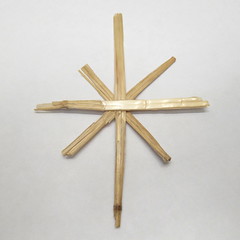
So, I just trimmed them up with scissors.
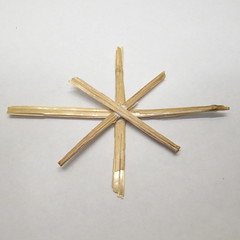
2. Wrap the embroider floss around the center of the star through each opposing “v” 2 or 3 times. Leave a tail of a few inches at the beginning and end at the back of the star. Tie those tails into a knot at the back of the star and trim. I add a dot of glue to keep it secure.

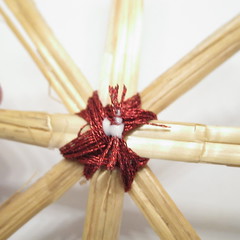
Metallic embroidery floss can be a real pain to work with because it will not stay wound together. I found it helped to put a little glue on the ends to keep them together especially when I was tying the knot at the back.
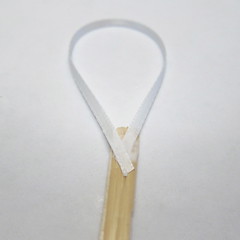
3. Create a loop at the top of the star by gluing the ends of a small length of ribbon to the back of one end of the long straw.
Hyvää Joulua!
© 2005 – 2013 Kathy Lewinski & Susan Cornish


