


(For the 24 weeks leading up to December 1st, we’ll be making a Christmas ornament. Each one will be traditional to or inspired by a different country.)
This week we are heading to the Baltics and the country of Latvia for our ornament inspiration. Riga, the capitol city of Latvia, is credited with the first documented use of an evergreen tree as part of the Christmas celebrations in the town square in 1510. In these times pagan ceremonies were often involving into what we consider Christian celebrations today and trees were often a religious symbol. This first city Christmas tree was said to be erected by a local merchants guild and decorated with paper flowers and fruit. Paper roses were used as a representation of the Virgin Mary. At the end of the celebrations the tree was used to create a bonfire.
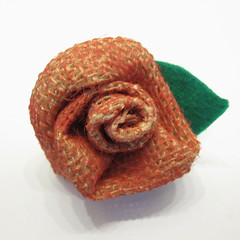
For our ornament we are going to create a rose, but from burlap instead of paper. The reason I chose to use burlap instead of paper is because the fabric reminds me a bit of straw which is also a common material for traditional Latvian ornaments. Also burlap holds a nice shape to create the shape of the rose.
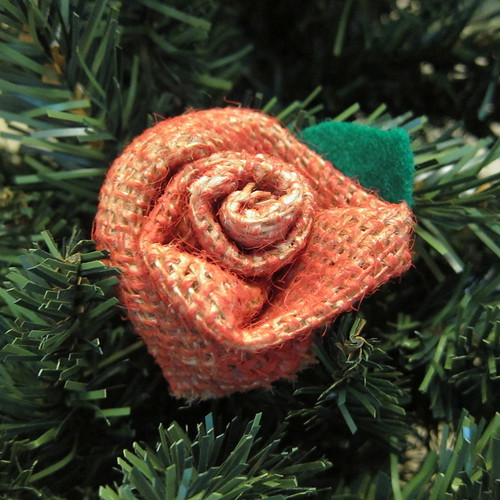
This ornament is made to nestle in the tree branches instead of hang. A handful of these scattered around the tree would be really pretty. I can also see using them in a striking wreath.
Burlap Rose Ornament
Supplies:
- burlap, natural or red
- red acrylic paint, if you are using natural burlap
- tacky glue
- thread to matck the burlap
- green felt
Tools:
- scissors
- paintbrush or stamper, if you are using paint
- hand sewing needle
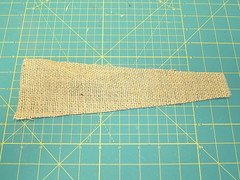
1. Cut a strip of burlap that starts skinny at one end and gets wider at the other. Mine was about 1 1/2″ at the short end and 3 1/2″ at the wide end and just over 11″ long. My finished rose is 2″ and 2″ deep. You can make your strip bigger or smaller to get bigger and smaller roses.
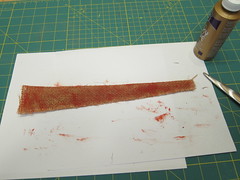
2. If you are using natural burlap, paint it red on one side. I used a dry paintbrush and painted very lightly being careful not to fill the holes in the burlap. Let dry.
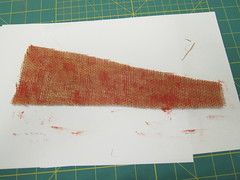
If you are using red burlap you can skip this step.
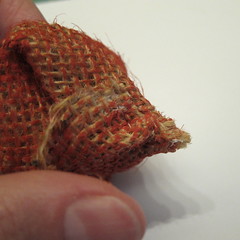
3. Turn the burlap over so the unpainted side is facing up. Put a bead of glue along the two ends and one long side. Fold in half. You may have to hold it together a little bit to get it to stick.
4. Starting at the smaller end, begin rolling the burlap length-wise. The fold part of the burlap is the top of your flower and the glued end is the bottom.

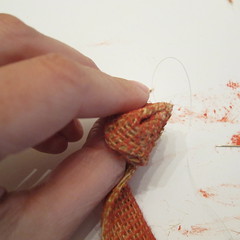
Use the needle and thread to stitch the bottom together. Continue rolling the length of the burlap. From time to time you’ll want to gather the burlap at the bottom to make the bottom of the rose tight and the top open. Put in a few stitched at the bottom every now and then as you work.
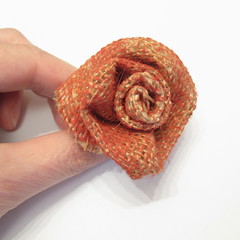
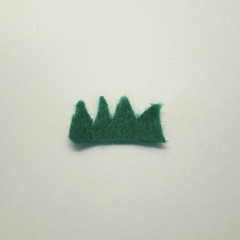
5. Cut a small piece of felt about 1/2″ tall and 3/4″ long and snip the top into little “v”s.
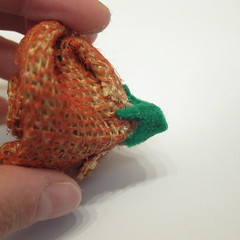
Glue around the bottom of the rose, cutting off any excess.
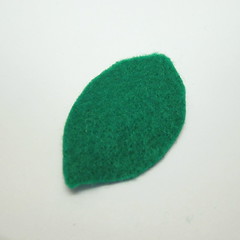
6. Optional: Cut a leaf from the green felt and glue on.
Priecīgus Ziemassvētkus!
© 2005 – 2013 Kathy Lewinski & Susan Cornish


