


(For the 24 weeks leading up to December 1st, we’ll be making a Christmas ornament. Each one will be traditional to or inspired by a different country.)
For this week’s ornament we are going to visit a country I love, Iceland. Our ornament is based on a traditional Iceland Christmas food, Laufabrauð or “Leaf Bread.”
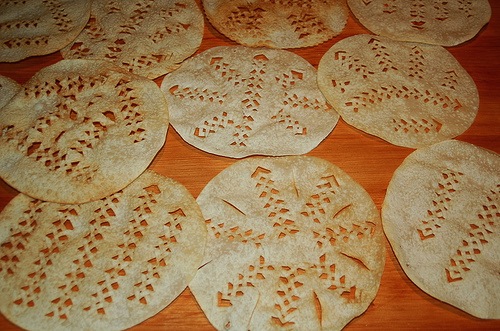
this is what the bread looks like
The custom of making thin rounds of bread and decorating them with geometric shapes goes back to the time when things like flour, salt and sugar were hard to come by, especially in winter. So, this special bread was a big treat for Christmas. Many Icelandic families still get together for a day of making this traditional bread before the holidays. You can read more in depth about making it here.
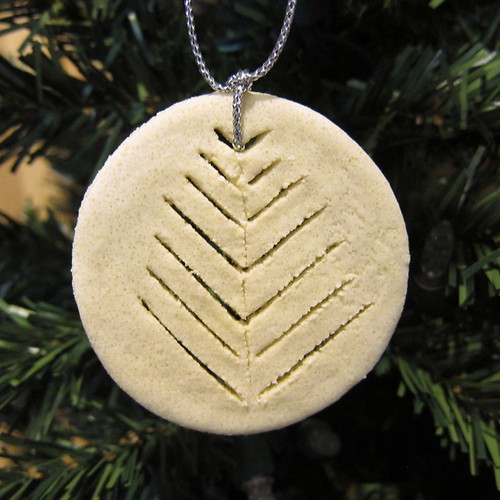
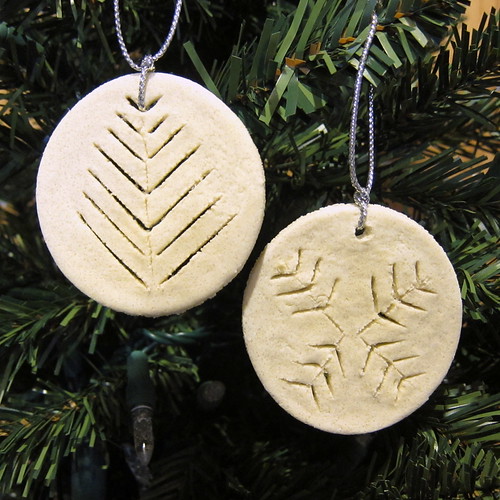
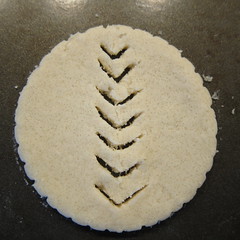
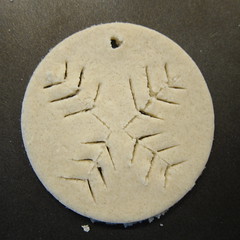
When I was in Iceland last year, we saw beautiful small versions of this bread available as Christmas ornaments. I used salt dough to make mine, so it will last many years. You could also use fimo or any other type of sculpting clay, but I like that salt dough didn’t shrink or curl up while cooking. Typically, a special knife with a “v” shaped end it used to cut the shapes into the bread, I don’t have one of those, but a paring knife works just fine. Mine were no where are elaborate as the inspiration pieces, but I like the simplicity of them.
Icelandic Laufabrauð Ornaments
Supplies:
- salt dough or sculpting clay (my recipe for salt dough)
- ribbon
- clear polyurethane (optional)
Tools:
- baking sheet
- rolling pin
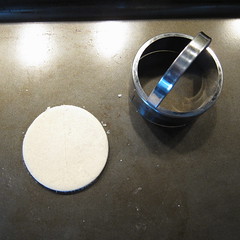
- round cookie cutter
- sharp paring knife
- toothpick or skewer
1. Roll the dough out on the baking sheet. Try to get it very thin, 1/8″ or less, I wish I had done mine thinner. Cut it into circles and remove excess dough. Clean the edges as necessary.
2. Use the paring knife to cut shapes into the dough circle. It is traditional to create patterns with leaf like shapes.

I used a skewer to slightly scallop the edge of one ornament.

3. Make sure there is a place to put a ribbon through the top either by making one of the “leaves” wider or making a hole with the toothpick.
4. Bake at 200F for 2 hours. You can turn the ornaments from time to time while baking, they stick a little so be careful turning.. They need to be cooked through. Let cool completely.
5. You can’t paint these if you wish, but I left mine natural with a coat of polyurethane to look more like bread. The polyurethane will help them last longer.
6. String a ribbon through the top to hang.
These would be a fun pre-Christmas activity to do with your kids or a group of friends.
© 2005 – 2013 Kathy Lewinski & Susan Cornish


One Comment to Advent Calendar Project ’13 – Week 4