So, we typically like to show you pretty, successful projects here on Just Crafty Enough, but let’s be realistic not every project is a success. Let me tell you a tell of such a project…Easter egg soap.
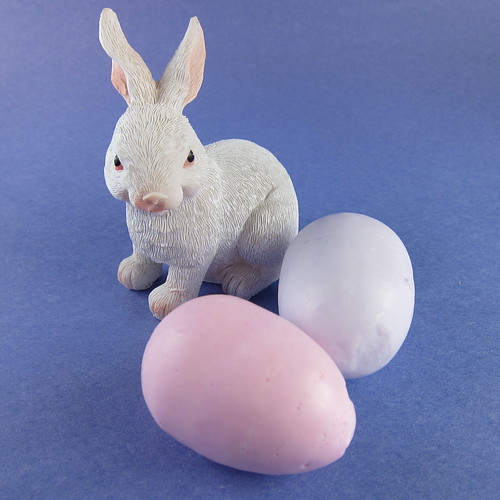
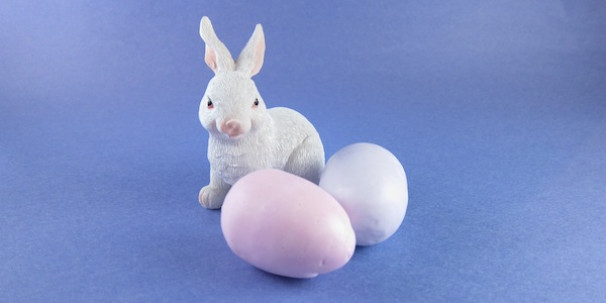
I had these images of smooth, shiny, egg shaped soaps in pretty pastel colors in my head. What I ended up with look more like lumpy pastel rocks than anything else. (Even the bunny looks disappointed.) Plus it took a lot of work to get them to even look this good.
I had decided I was going to try using plastic eggs as my mold and went online to see if anyone else had done something similar. I found beautiful projects like this one on My Repurposed Life.
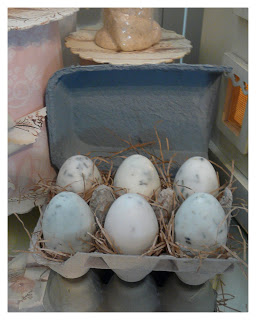
I took a glance at how they did it and saw it was similar to what I had planned and got a few tips. Then I spent the afternoon making soap. Here’s what I did…
Easter Egg Soaps
Supplies:
- plastic eggs, the kind that are spilt in half
- electrical, duct or other strong tape
- white soap base
- soap dyes
Tools:
- sharp knife, scissors or drill
- egg cup or egg carton (something you can stand an egg up in)
- microwavable cup with a spout
- microwave
- spoon
- small funnel
1. I made a hole at the top of the plastic eggs the size of your funnel. (I tried doing a small hole with the first egg and making a funnel to fit from tin foil and it was a mess. The “funnel” kept closing and so did the hole in the egg.)
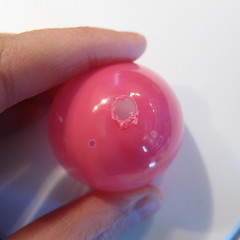
I did this by first inserting a pin on the egg as a starter hole and then increasing the size by turning scissors and a knife in the hole. Then I cleaned up any plastic hanging on the inside of the eggs.
2. I put the eggs together and taped them securely shut. My eggs also had small holes in them which I covered in tape.
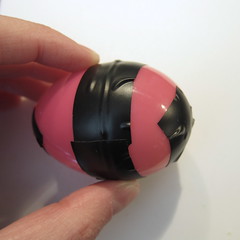
3. I used an egg cup to hold them upright and placed them on a cutting board because I had a feeling that filling would get messy.
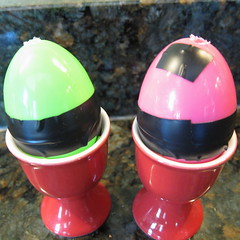
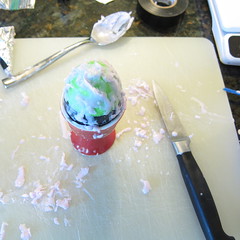
4. I followed the instructions to melt my soap base in the microwavable cup. I used about 2 – 2 1/2 ounces of soap base per egg. Then I stirred in some coloring.
5. Holding the funnel over the hole, I poured in the melted soap. I filled the egg to the top and then tapped it sharply on the counter a few time to help the soap settle. I needed to add soap a few more times to get it full, tapping in between fillings. I had to work rather quickly here as the soap starts to harden.
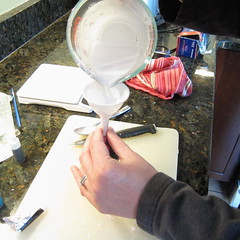
6. I let them cool in the refrigerator for an hour, removed the tape holding the egg together and carefully pull apart. Ok, the top came off easily, the bottom took some work.
Here’s what was wrong and what I would change…
The first egg, the one with the smaller hole that I struggled to fill (see the messy picture above), looked full to me, I tapped and tapped it on the counter, but this is what I got when I removed it from the mold.
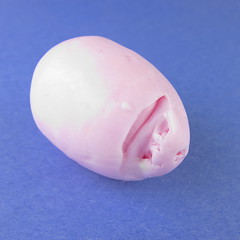
The egg with the bigger hole filled much easier and once again looked full, but when I removed it from the mold, I found the top still wasn’t completely full and a little misshaped. I think the way to fit this would be to fill them from the bottom. I would rather the top looked perfect
The other big problem was the lip where the egg pieces met. It was suggested you could remove this with a sharp knife, which I did, but this made the eggs look all scraped up and it was impossible to get it smooth. A damp paper towel helped smooth things out, but the eggs didn’t have the shine of soap right from the mold. I can’t think of any better way to fix this part.
I did think of making the soap in two halves of the egg mold and then joining them together. The reason I didn’t was because in the past when I’ve tried joining pieces of soap I found they didn’t stick together well and fell right apart with use.
Will I try this idea again? I don’t think so. I get the feeling this is one of those projects that look a lot better online than any result I’ll end up getting. Oh well, an afternoon spend crafting, even when the results aren’t great, is better than an afternoon doing housework.
© 2005 – 2013 Kathy Lewinski & Susan Cornish



it was a good try, anyway. I’m glad you share some of these not so successful projects. I’ll think of this when I encounter my next fail – which is probably right around the corner!
It’s interesting to hear your process, and why this went in the “fail” category, Because I don’t think they look that bad! But, they didn’t turn out like the store ones. I laughed out loud about Crafting fail is still better than house work. HA! -susi
I photographed them at their nicest angle. Believe me in person they look like a fail 😉
Oh, I think these look rustic, and I would still put those in a basket in the bathroom, problem sides down. I really like them! I have a tip though from a candle project I did. For that project it was recommended to warm up a cookie sheet in the oven, not scorching hot. Bring the sheet out of the oven and roll the egg along the sheet. Between the warmth of your hand and the sheet, it may help lessen the joins. Just a thought if you decide to try it again! And besides, if it were me, I wouldn’t hesitate to tell people the kids were playing with the eggs and dropped them, but hey, that’s just me! Thanks for sharing!
I am with Susi on this one. I love to learn about the processes that other people do and how they think while creating which was why I resolved to share my failures online as well. While the project might not be “show worthy” everyone learns in the process.
As for housework, I create so I can afford to have someone come into clean because nothing in the world is worse than housework and if I did it myself, I would be featured on Hoarders.
I would rather eat mayonnaise sandwiches for weeks so I can save up for the housekeeper that comes once every other week–LOL.