


This Iron Craft challenge was to use one of my favorite supplies, felt. I wasn’t sure what I was going to make and then I kept seeing these little elves in all the stores around Iceland.

I was tempted to buy one, but they looked so much like something I could make and the perfect project for this challenge. Not only does this project use felt, but I created my own by needle felting.
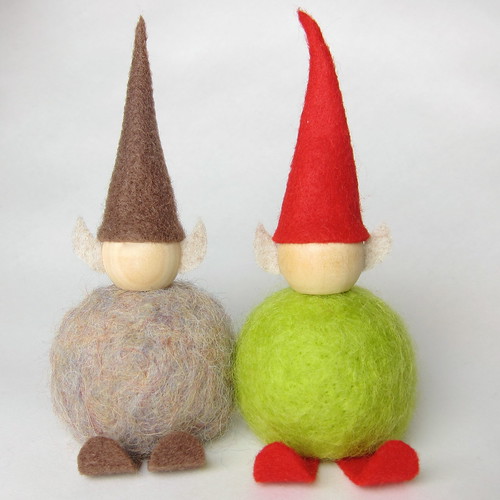
I think I’ve got it down pretty good. I didn’t do the embroidery though. The ones I saw in the store were thick felt and hallow inside. I used a styrofoam ball covered in wool for the body of mine so embroidery would have been tricky.
Felt Elf
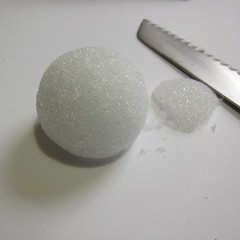
- 2″ Styrofoam ball
- Serrated knife
- Roving or lightly spun yarn
- Needlefelting needle
- 1″ Wooden bead or ball with a flat side
- Fabric glue
- Tacky glue
- Tan felt
- Red felt
1. Using the serrated knife, cut a small part of the bottom off the styrofoam ball to create a flat base for it to sit on.
2. Needle felt the wool around the ball – You can use either roving or lightly spun 100% wool yarn for this step. The yarn must be wool to felt.
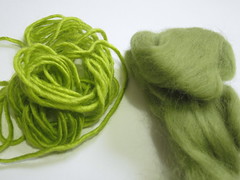

I used Sheep(ish) is Chartreuse(ish) which almost isn’t spun at all. I like it’s bright color compared to the green roving I had on hand. Whichever you use, pull it apart to create a cloud of wool.
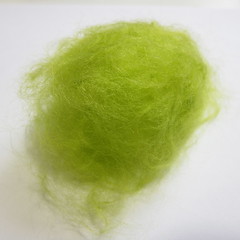
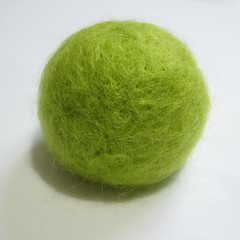
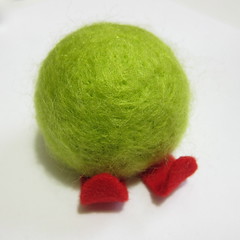
Cover the styrofoam ball with the wool and use the needle felting needle to felt it to the ball. I didn’t bother covering the bottom. You are trying to get a relatively smooth felt surface, though it’ll never be completely smooth. Add more layers of wool if you have spaces that you can see through.
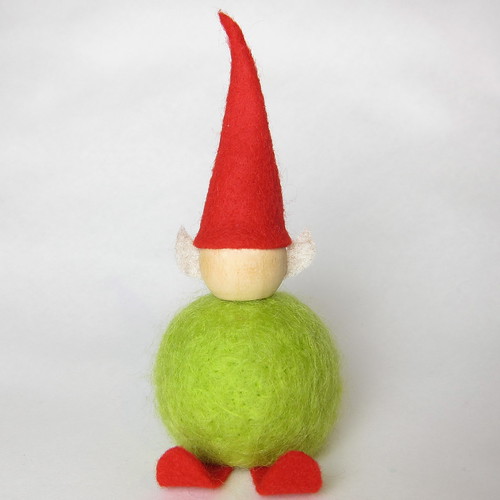
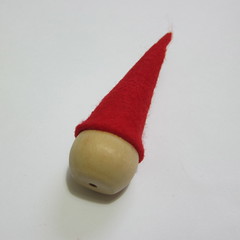
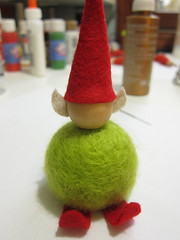
3. Make the hat – Cut a quarter circle from the red felt. The curved part needs to be wide enough to go around the wooden bead with a little overlap. Fold into a cone and glue together with fabric glue.
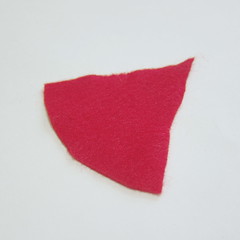

I twisted the top of the hat a little to give it even more of a point.
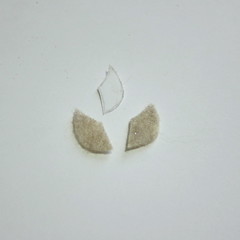
4. Make the ears – Cut two pointed ears from the tan felt. I made myself a little paper pattern which made it easier to cut two pretty identical ears.
5. Glue the hat and ears on the wooden bead.
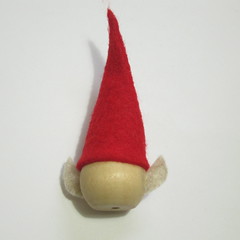
I just used a little tacky glue for this.
6. Make the feet – Cut two rectangles of the red felt that cover the bottom of the ball and stick out about 3/4″.
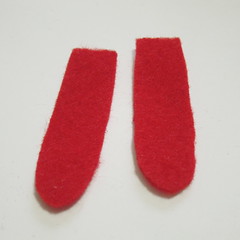
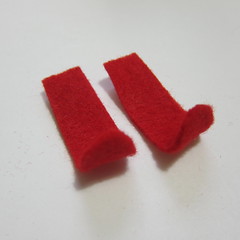
Round off one end. Roll the rounded end up.
7. Assemble the elf – Glue the feet to the bottom of the ball. Then the wooden ball to the top. Let dry.
© 2005 – 2012 Kathy Lewinski & Susan Cornish


Pingback: Felt Elf tutorial, Christmas décor · Felting | CraftGossip.com
Pingback: Elfi din fetru, decoratiuni de Craciun | tutoriale handmade
Pingback: Christmas Decoration Tutorial Round up | Span's Studio